How to Save Images for the Web
In this week’s installment of my blog design series, I will be explaining how to save images for the web. This is a small diversion from the normal “how to make your blog pretty” theme, and is geared more toward practicality, website optimization, and page load speed.
When a page is image-heavy it takes longer to load. Google doesn’t like pages with long load times. That causes you to rank lower. The solution is to look for the smallest possible file size without losing actual quality.
Disclosure: this post contains affiliate links.
Color format and size:
To start with, you also want to make sure your images are in the right color format so that they look right. You’ll want to make sure they are the correct pixel size so that they look great (aren’t too small) and yet aren’t larger than they need to be (longer load time). You can read this article to understand better what I’m talking about.
Reducing pixel size is the easiest, quickest way for you to reduce the file size of your image. You can do it in any photo editor under your image size options.
What is the correct pixel size? There is no single correct answer for this, but here are some things you can take into consideration:
- Social media share sizes – what size will you want them for pinning and other social media shares?
- 600 pixels – I like my images to be at least this width to be clear and beautiful.
- The width of your text body – it definitely doesn’t need to be wider than this.
- Height – don’t forget that if it’s too long, readers will need to scroll to see the whole image. Since it’s best if an image is seen in a single eyeful it’s best to avoid this. (I have this sometimes with my main pin image).
While WordPress does have the option to resize built in, this only compresses the appearance of your image, not the file size. So set the file size in your image editor whenever possible.
Saving for the web in Photoshop:
This is my mega trick for you, the one that saves you loads of time.
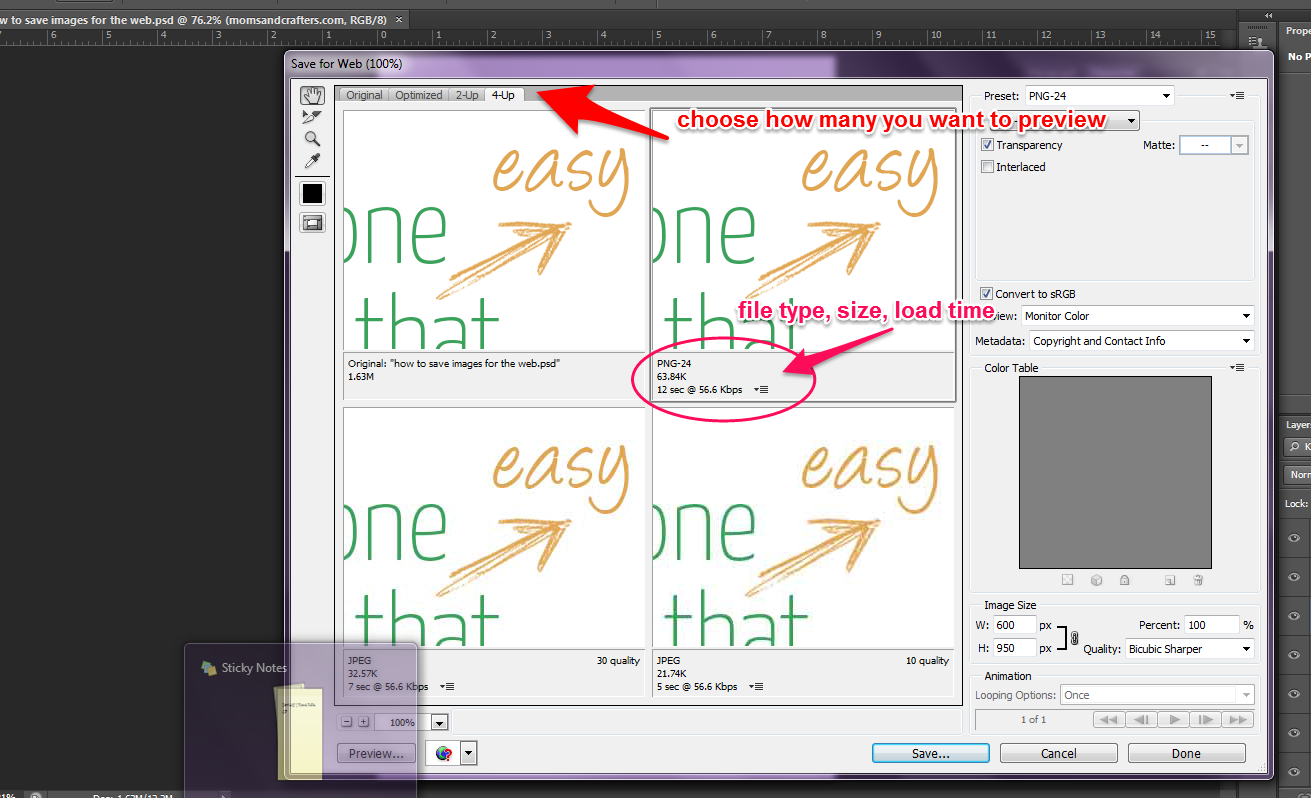
Photoshop has an amazing feature built in called “save for web”. This is under file>save for web and opens a new dialog box with various options. You can choose how many you preview at once, and play with different options for file formats. You have a preview that shows a true-to-size version so you can see how low you can get. It also shows the file size underneath so you can go with a mix of “no loss of quality” and “smallest file size.”
I definitely recommend photo editing in Photoshop as it gives you the most control over your images. I do use Photoshop as a rule…
For other editors, usually saving as a PNG helps. Just make sure you’re starting out with the correct pixel dimensions, as explained above, and you’re already way ahead of the game.
Did this help you? click the sharing buttons to the left so that it can help a friend! Ad make sure to check out the rest of my blog design series to learn how you can have a beautiful blog.