
What are Pixels?
What are pixels? And a few more things every blogger should know before creating images for the web! This will help your blog design look professional, and totally SMASHING!
I’m going to introduce you to a few “image” terms here and explain how they apply to you and your blog. In later posts in this series, I will go more into the actualities of creating these images, but meanwhile I want you to have the background and foundation that will help these images look great.
What are Pixels?
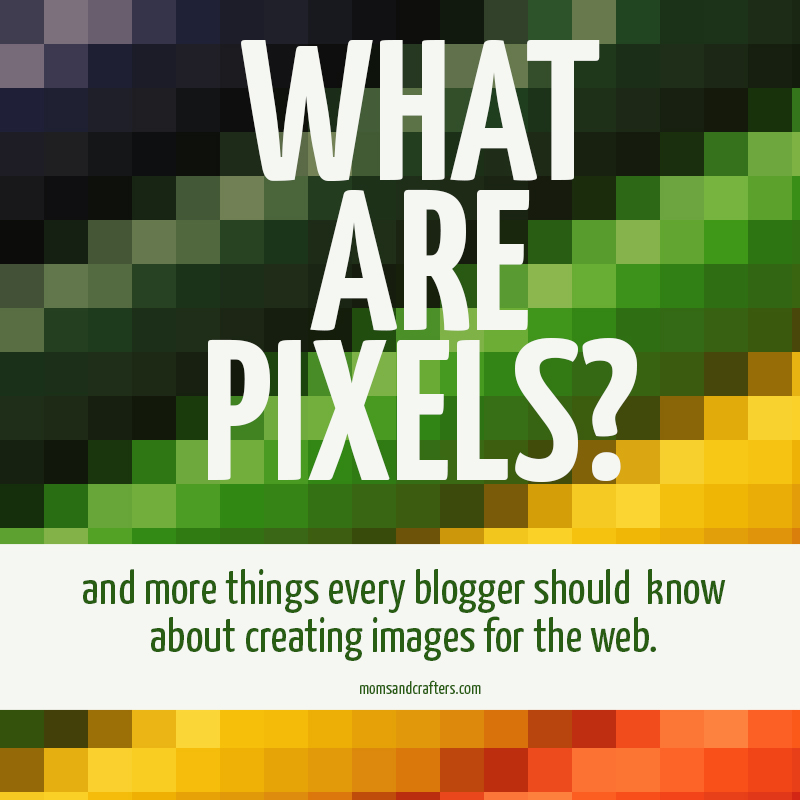
Pixels – the little ‘dots’ that make up an image. Look at the cover image of this post, for example. It’s made up of enlarged pixels. When you have many of those in a tiny space, it makes up a high quality image.
Pixelated – I’m not sure if that’s an actual word, but it’s a term you might hear. It means that you can actually see the pixels on an image, meaning that the quality is too low. On a high quality image, you will not be able to see pixels.
Dpi (or ppi) – Stands for “dots per inch” or “pixels per inch. This is also known as your image resolution, or image quality. It’s what determines how many pixels you have in an inch of your photo.
Other image terms you should know:
Raster – A raster image is the kind of image that is made up of pixels. Most highly detailed images are raster, including photos.
Vector – an image that is not made up of pixels, rather of paths and fill. Unless you’re “drawing” images from scratch in a program such as Illustrator, you do not need to worry about understanding that concept.
Lossy vs Lossless – a Raster image is lossy. That means that if you just add pixels to make it larger, it will lose quality. A lossless image, or a vector, will not lose quality (but doesn’t have as much detail to begin with).
Jpeg – an image with the .jpg file extension. This is a raster image, that can not have a transparent background. This means that if your image (such as a logo, for example) has an odd shape, it will be framed by a visible rectangle in the background color.
Portable Network Graphics – better known by the file extension .png is another raster image type, but is the most lossless of its kind (it loses the least quality when you save a vector image into this format). It also can have a transparent background, meaning that if your image is an odd shape, it the rectangle surrounding it will be invisible.
RGB vs CMYK – The many colors you have on your picture is made up of only a few colors in different combinations. The screen uses RGB (red, green, and blue) colors and printers use CMYK (cyan, magenta, yellow, and black).
How this applies to your blog:
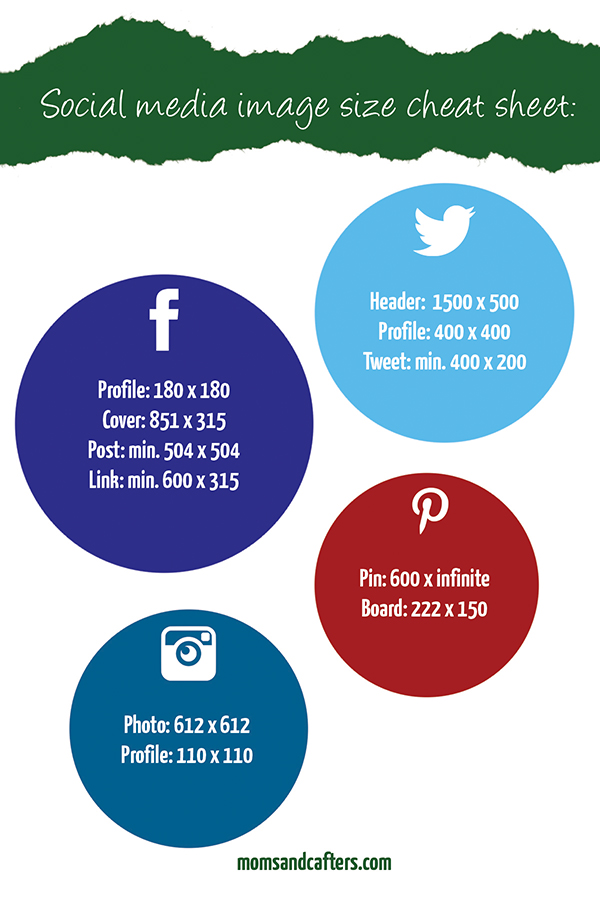
- When you create an image and when you upload it on your blog, it is important to be aware of the correct pixel sizes. In next week’s post, I will create a resource that will guide you toward the ideal size for each type of share, and each type of post and element.
- When resizing an image to a larger size you will lose quality. If your image pixel size is to small, you should either find a different image to use, or be creative. Adding an effect (that fits the photo) might help, or including that photo in a larger frame. It also means that once you’ve made a photo smaller, you will not be able to change your mind and enlarge it.
- Images for printables should be made at 300 dpi which is print quality. Images for web elements, such as the header, or blog post graphics should be made at 72 dpi, which is web quality.
- Make sure your logo or anything else that you want to stand out on a separate background is saved as a .png with a transparent background.
- Printables must be made in CMYK color mode and web images in RGB. This is crucial as otherwise the colors will look funny. This means that if you are offering a printable, you should make it in CMYK color. Then, in your photo editing program, change it to RGB color so you can offer your readers a realistic preview with unaltered colors.
I hope this has helped you! If you haven’t yet, you can catch up on my blog design series here.
![]()


Thanks for the information, it’s always good to learn the behind the scenes workings. I can use this information.
Thanks for the useful info. I’m building my blog and learning as many things as possible. Great work!