
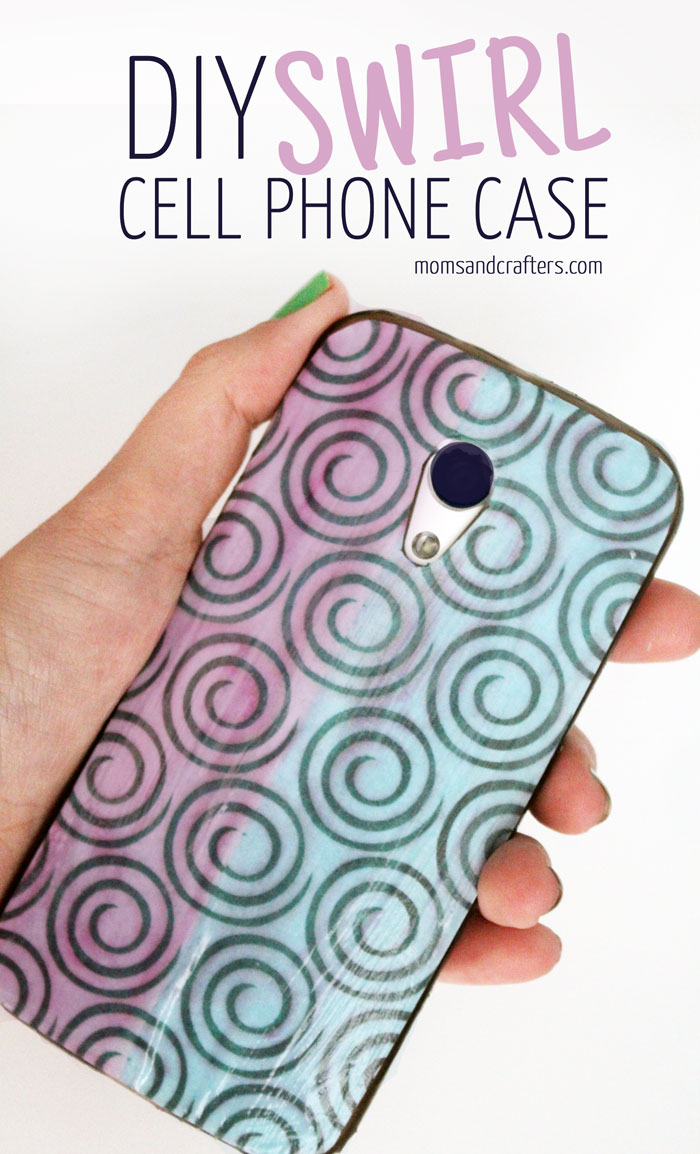
Customize a Cell Phone Case!
I wanted a way to customize a cell phone case since I was growing tired of my drab gray case. It needed to be quick and easy since I don’t have very much time. I also wanted it to be inexpensive and to use the case I already had.
I decided to put my graphic design skills and my HP Envy 5660 to work for this one. I designed these fun and simple swirl prints for you to use on your cases too. You can try this with your photos as well! They key is to print it out on regular copy paper, so that you have the softness that will mold right to your phone case. Anything thicker won’t work.
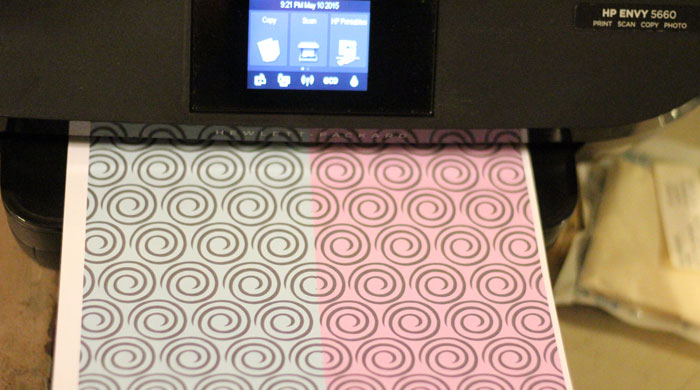
If these prints aren’t for you, you can print out scrapbook paper you find online. That way you have the thin texture that you won’t get with bought papers. That is the beauty of having the ability to print at home and choose your own paper type!
Supplies needed to customize a cell phone case:

- A print out of the digital files found here
- Decoupage glue such as Mod Podge
- A foam brush
- An inexpensive cell phone case with a flat back
- Pen
- Scissors
How to customize a cell phone case:
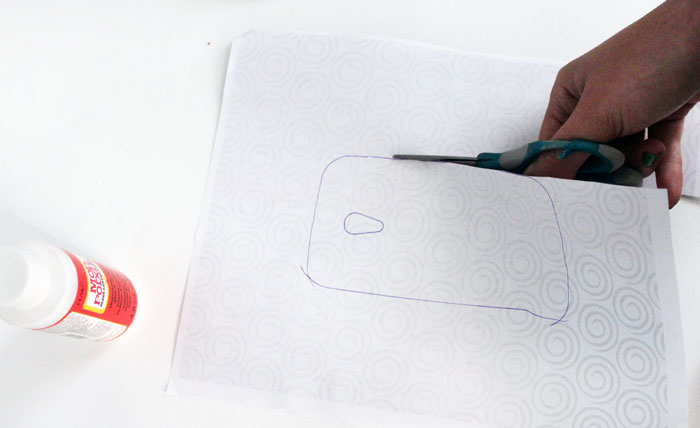
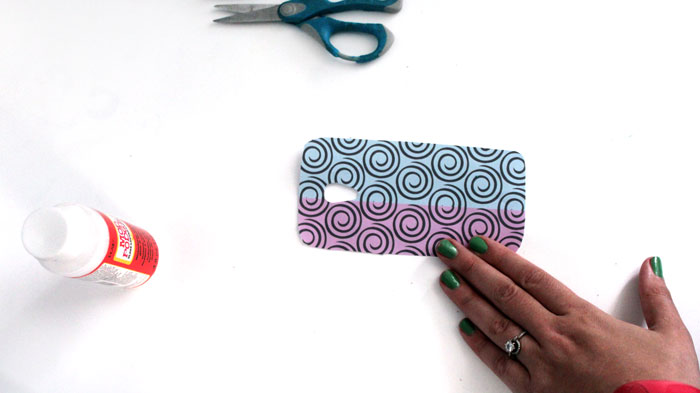
1. Trace your cell phone case onto the back of the printout. I originally intended for the colors to be used separately, but accidentally traced mine in the center. I decided that I liked how the two tone effect came out. You can choose to have it overlap on both colors, or to do it on one. If you decide to use one color, fold the paper and unfold before tracing to mark where the colors change.
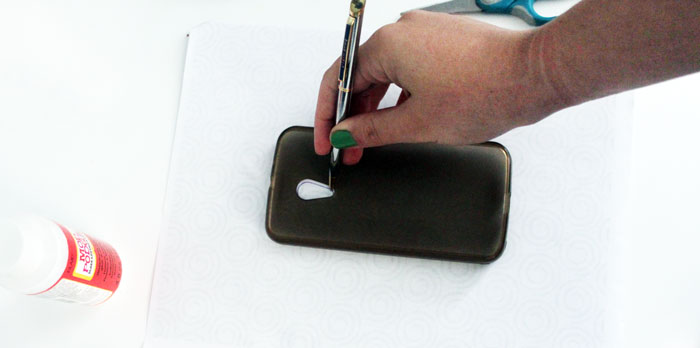
2. Cut it out. Trim a little inward so that the cut out fits exactly onto your case. Don’t forget a hole for your camera..
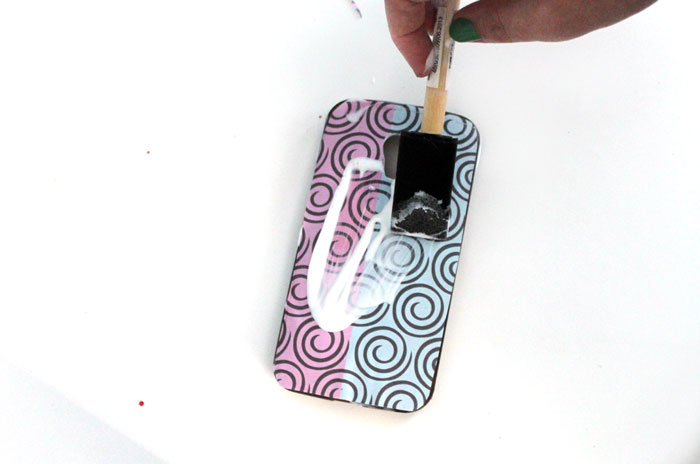
3. Coat your case in decoupage glue. Note: don’t attempt to do this while the case is on your phone.
4. Place the paper cutout face up on the outside of your phone case. Smooth any creases. If you have accidental overlap on the edges, DON’T TRIM! You can smooth it a little bit over.
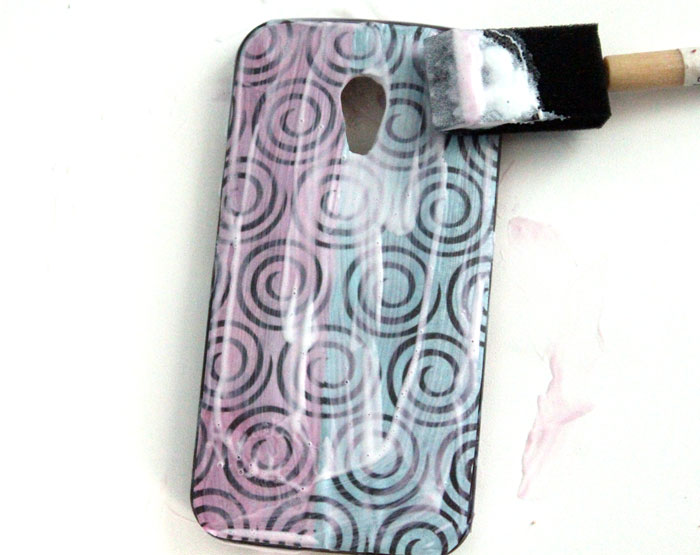
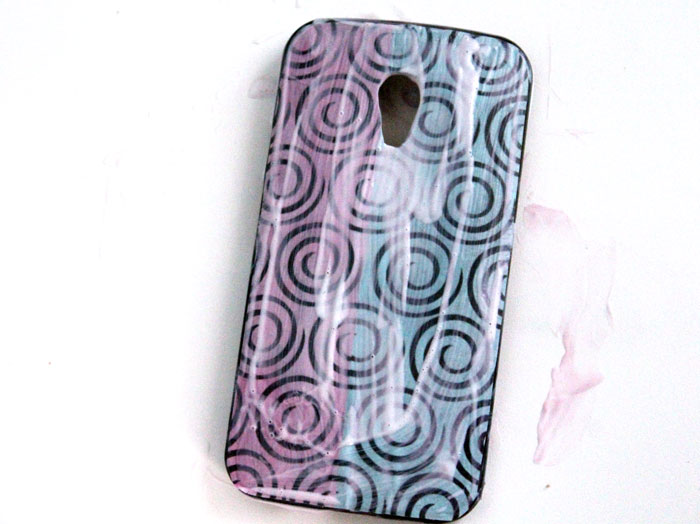
5. Cover with a thin layer of decoupage. The colors will run into the glue a little, which makes it nicer. It gives it a softer, more natural effect, that looks nice once the decoupage dries clear.
6. Allow it to dry completely and coat it with another layer. Allow it to dry again completely and insert your phone You now have a super chic, super cool, and awesomely frugal cell phone case!
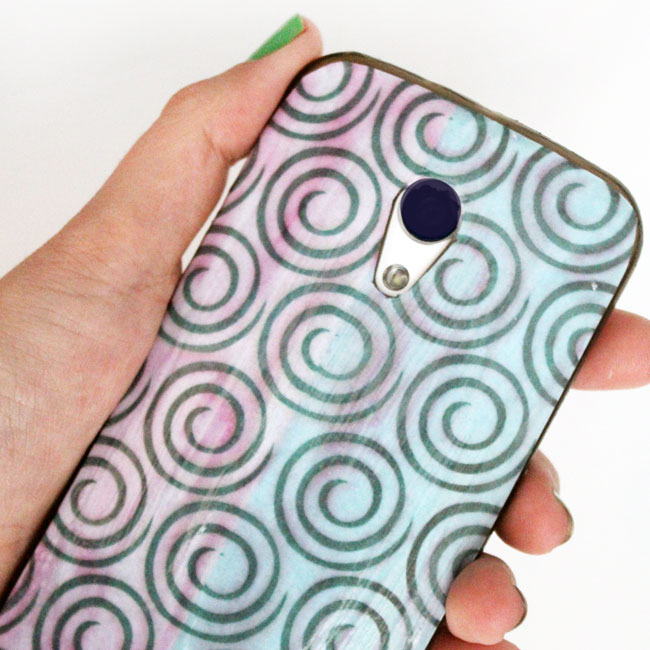
Place your phone on a lazy susan or similar flat surface. Give it a (gentle) spin and see what happens! The swirls create an optical illusion that make it appear to be spinning! If that isn’t cool – what is? What an awesome way to customize a cell phone case!
The streaks that occur when you decoupage make it look almost like you hand-painted the design!
Do you want more, awesome crafts ideas like this? You should definitely check out MyPrintly’s website for some more great ideas!
Enter to win a printer!
There’s a giveaway too! Until May 15th, you can enter to win an HP Envy printer of your own! To enter, follow @MyPrintly on Twitter, Facebook, Pinterest, or Instagram and then fill out this form. It’s that easy! The giveaway is open to residents of the US only.
Disclaimer: The giveaway is run by MyPrintly and HP entirely – I am only sharing it with you. Moms & Crafters received compensation for creating this sponsored post. Moms & Crafters received a printer free of charge as an HP SmartMom. All thoughts and opinions are my own.
How cool! This is such a neat idea!
this is a really neat idea! thanks for sharing on how to do this, my daughter and I both love to switch out our phone cases from time to time and this will give us a fun way to customize ours.
Thanks for another great tutorial Menucha!
I’ve included your tutorial in a round up of 29 ways to repurpose adult coloring pages on my website – I know you didn’t use a coloring page in this example, but I think it would work great.
Here’s the article: https://sarahrenaeclark.com/29-creative-ways-repurpose-coloring-pages/
Thanks for sharing!
Thank you for sharing it! Yes, I agree it’s a great use for coloring pages – especially pattern-based ones!