
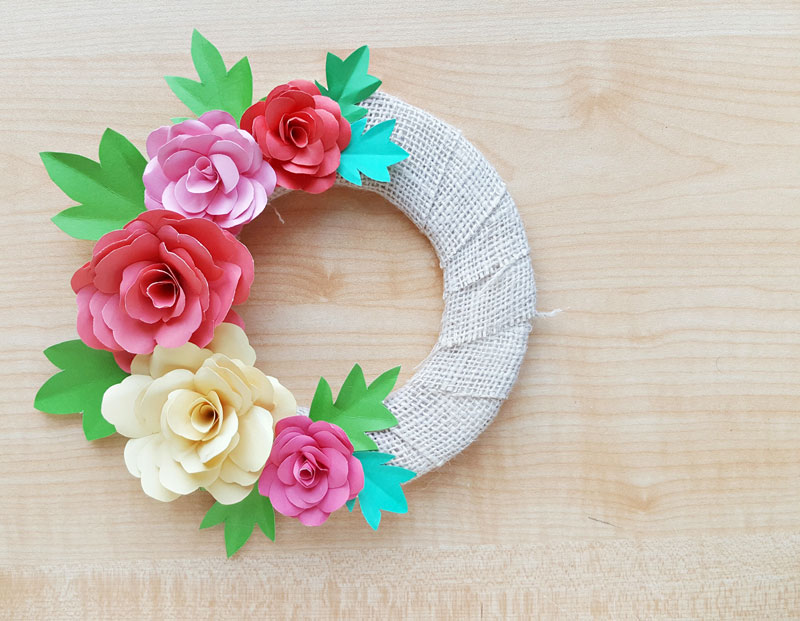
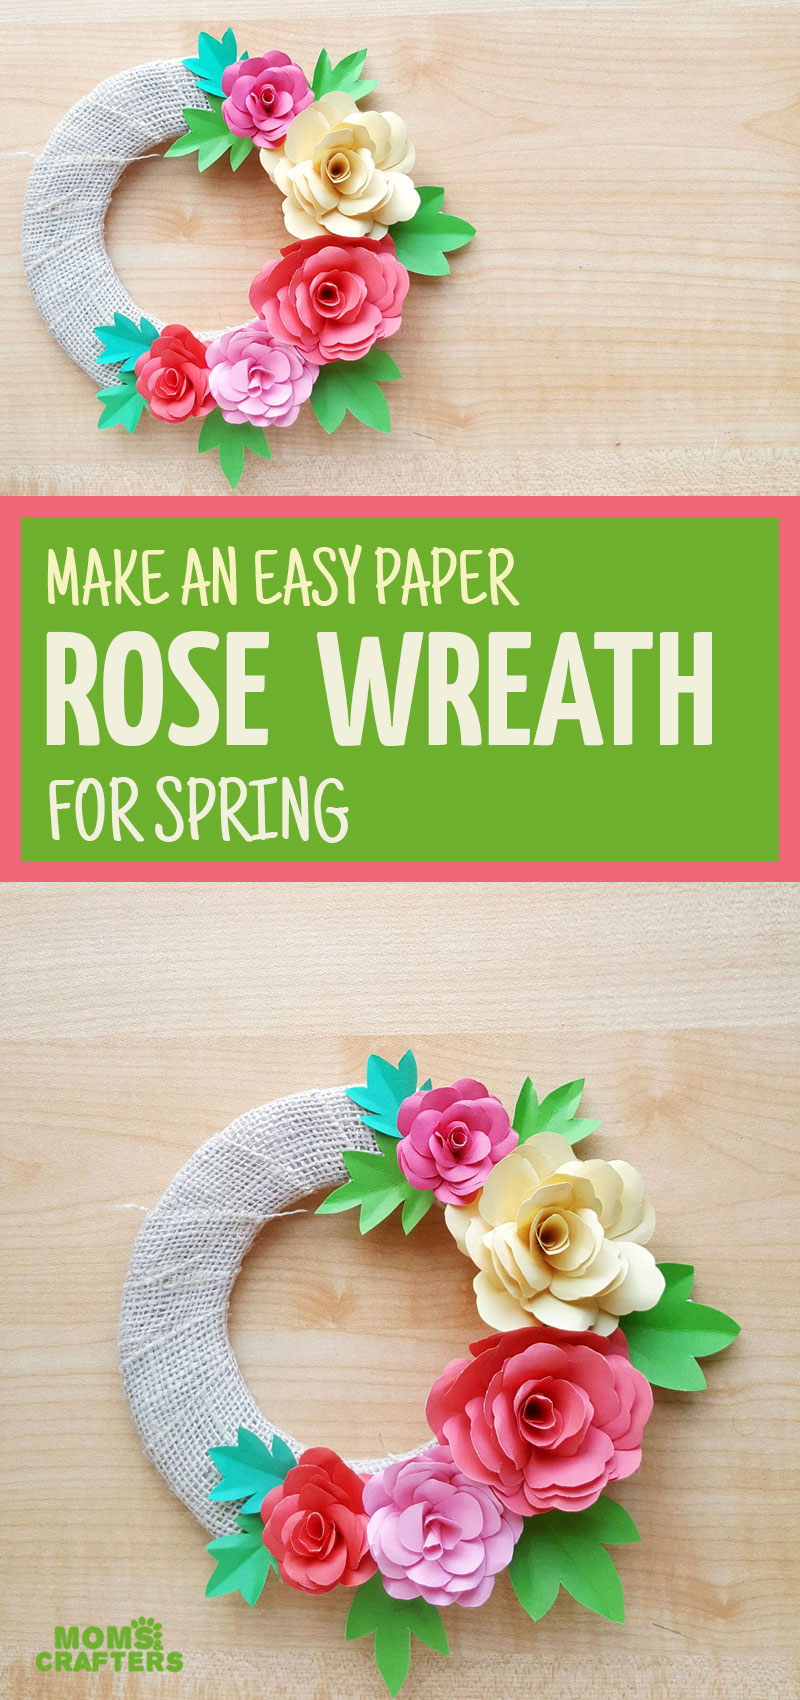
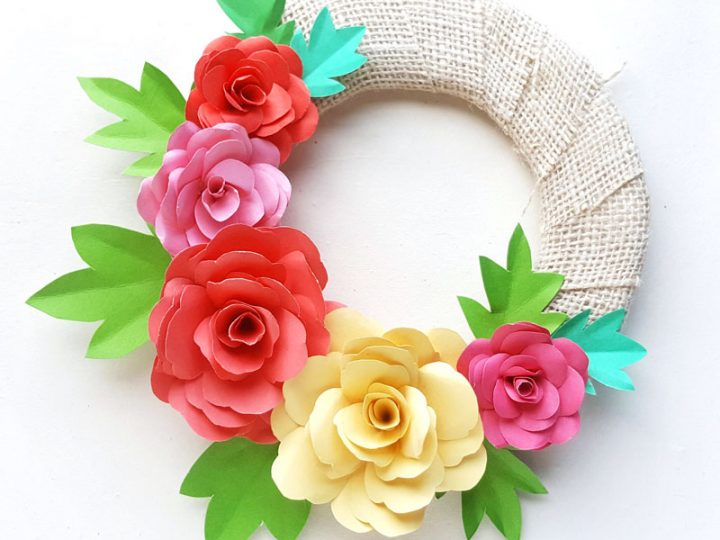
Turn DIY Paper Roses into a cool paper flower spring wreath!
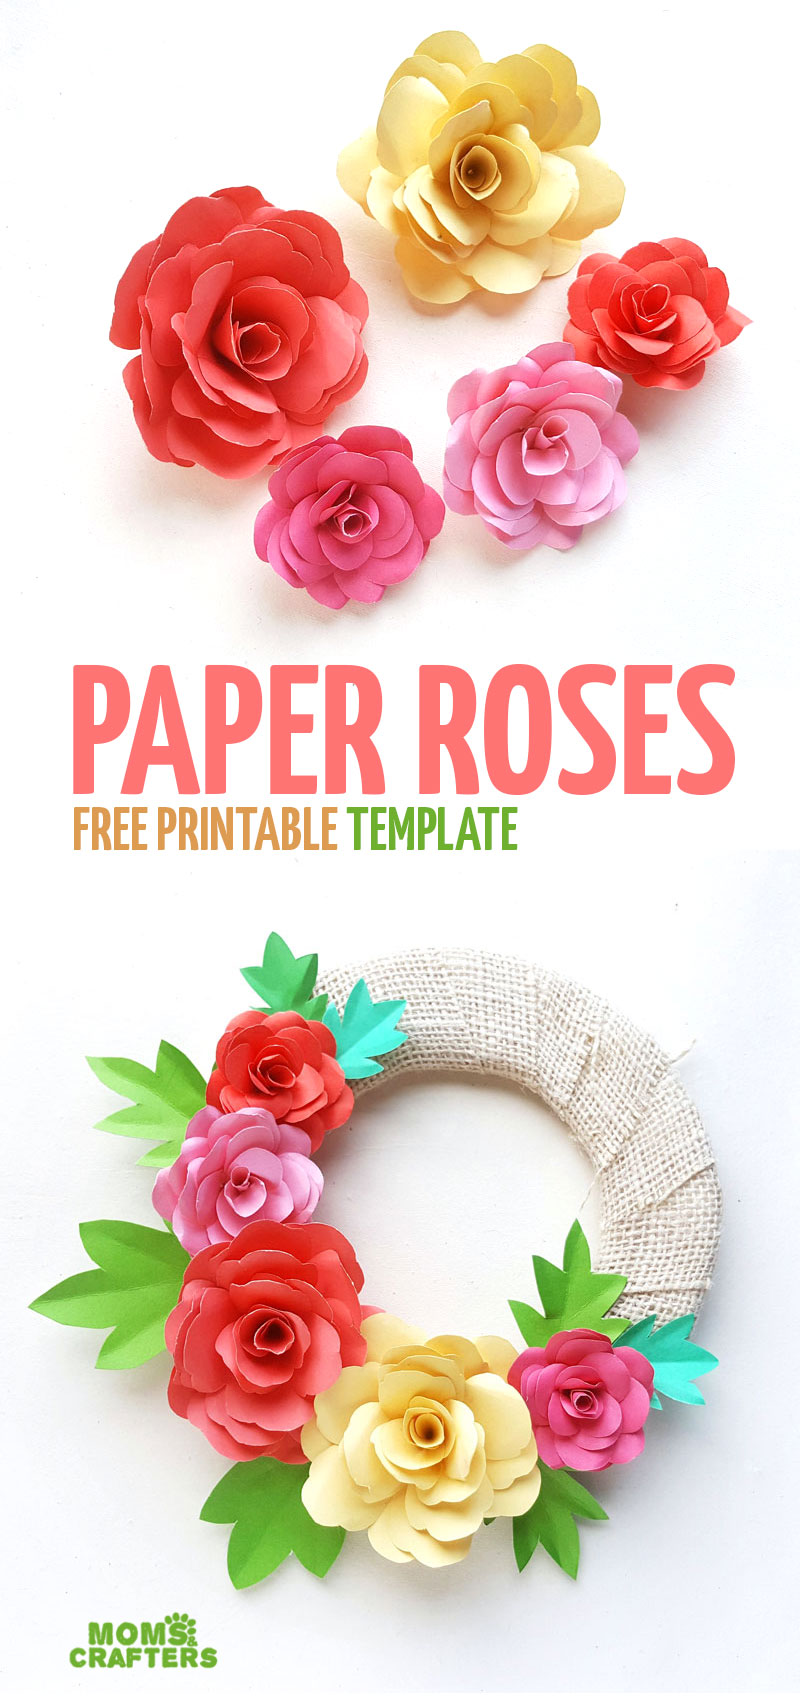
Use a free paper flower template to turn DIY paper roses into a beautiful paper flower spring wreath! Find more paper flower templates on the blog as well. Disclosure: this post contains affiliate links.
Paper is obviously the most versatile of craft materials (you can check out my list of fun crafts for tweens with paper here) but one of the most on-trend uses of paper: flowers.
We may be trekking along in the dead of winter, but hey, we all know that the commercialization is marketing Easter already anyway, so why not start dabbling in flower crafts to brighten up the dark, dreary winter days ahead?
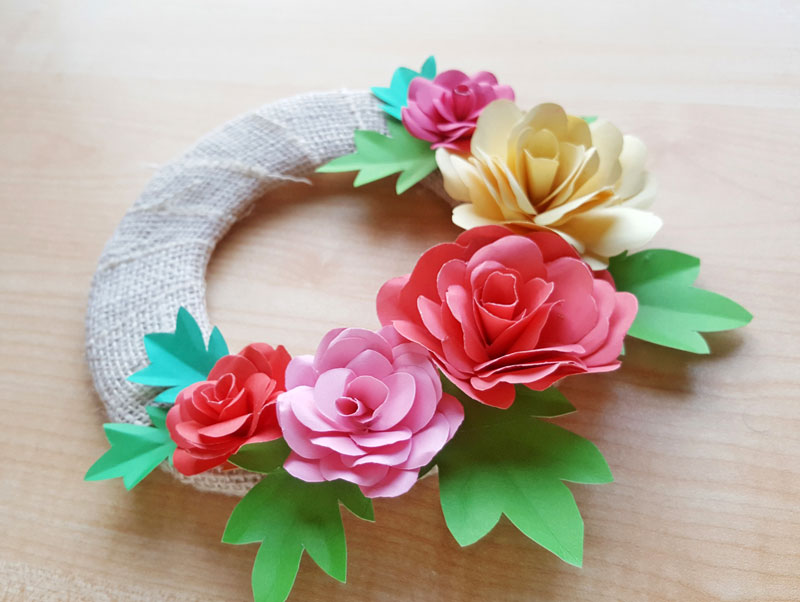
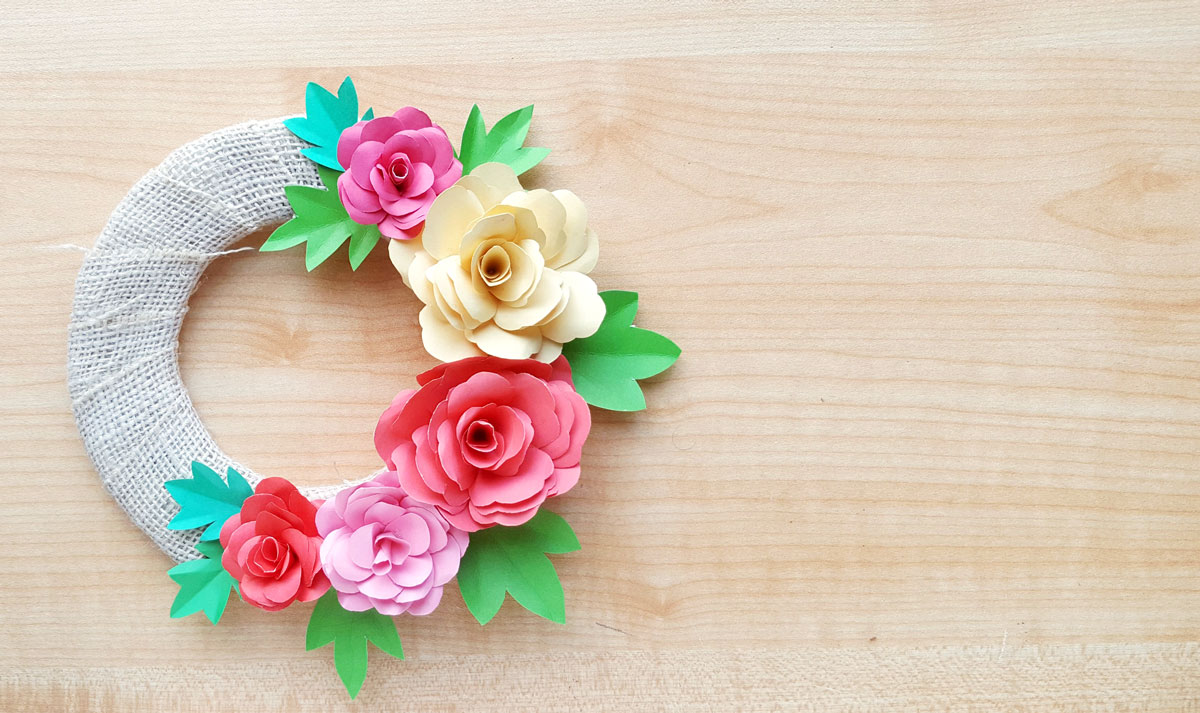
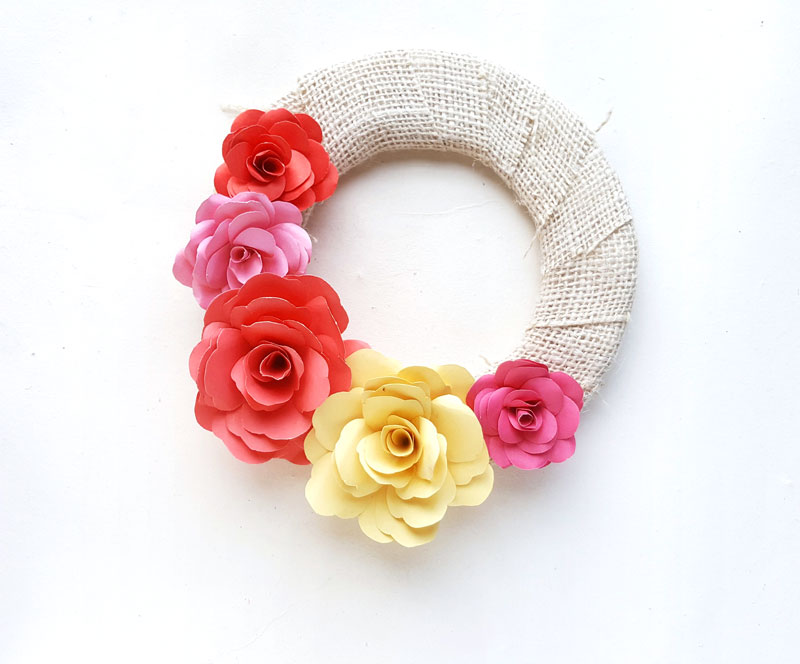
These DIY paper roses can really be made into anything, but for the purposes of this tutorial, they’ve been turned into a beautiful, colorful, and inexpensive wreath.
Paper flower making is really not so hard – especially when you have free templates like this one to work with! Yep – you heard right, you get a free template to make your DIY paper roses.
So grab those materials, relax, and enjoy!
Download your free printable DIY paper roses template below:
What you need to make DIY paper roses:
- The template above, printed on paper
- Colored cardstock in rose and leaf colors (you can print the template directly on this paper, however you will have the outline to deal with)
- Pencil
- Burlap ribbon
- Round base for the wreath (this one has been made out of cardstock)
- Tacky glue
- Hot glue gun
- Scissors
How to make DIY paper roses:
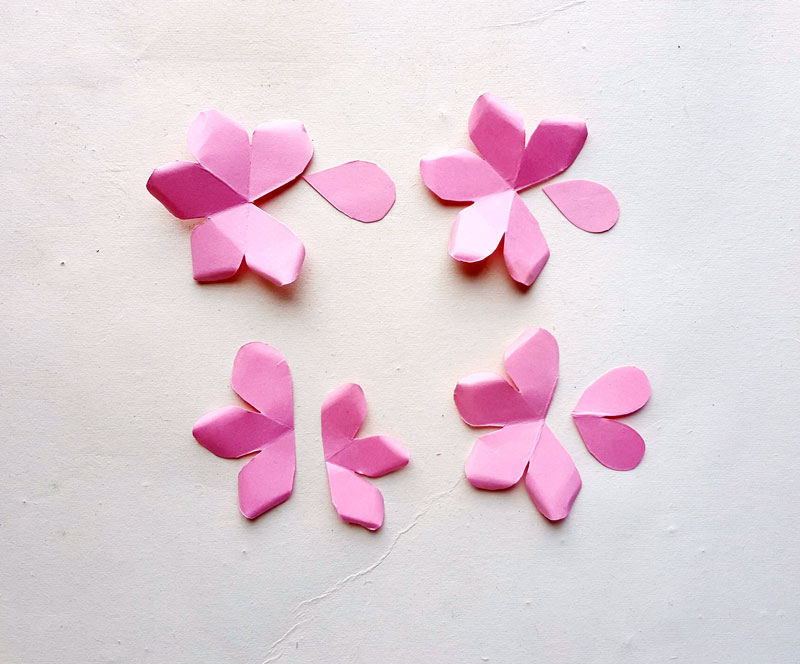
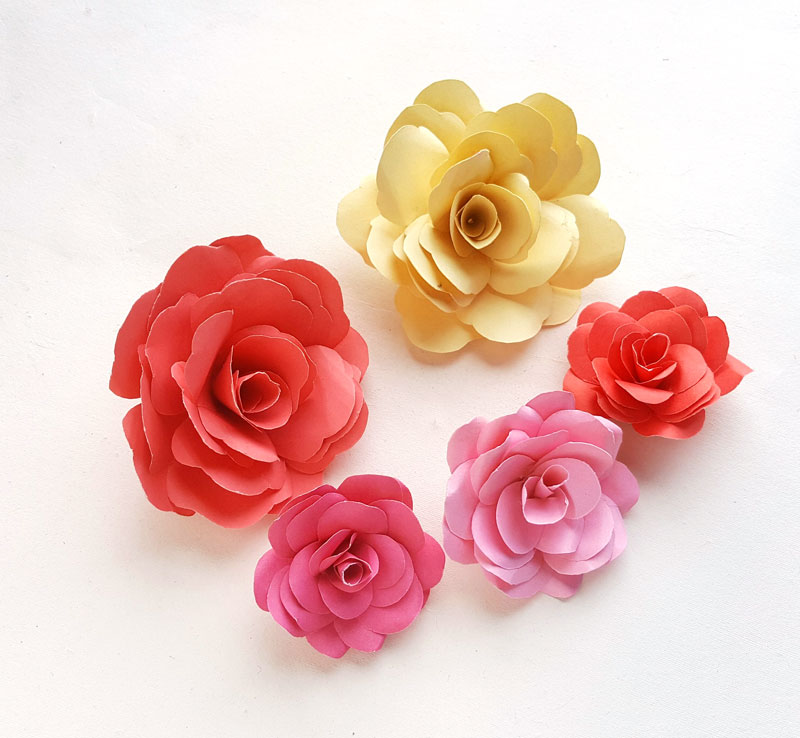
1. Use the template to cut out your DIY paper roses parts.
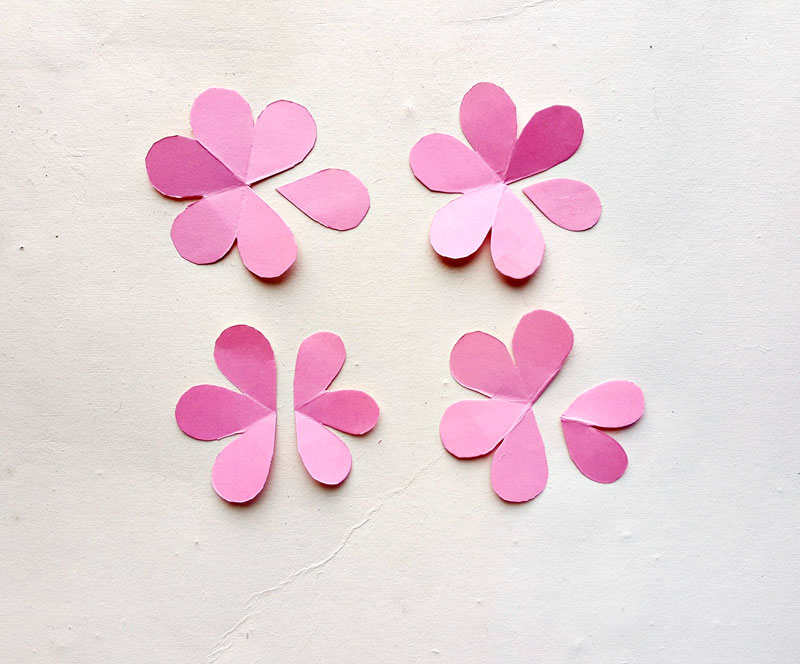
2. Use a small paint brush or any round object to curve the outer edges of the petals.

3. Leave the single and double petal shapes flat – don’t curve those!
4. Take each of the pieces one by one and apply tacky glue on one side of it, glue to the opposite side.
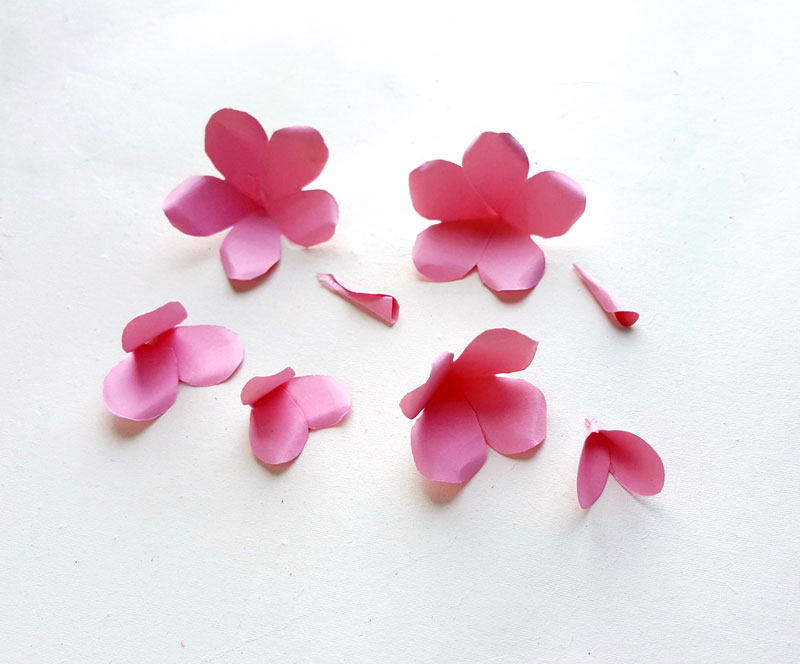
5. Now take the two 5-petal pieces and glue them together, one on the top of the other.
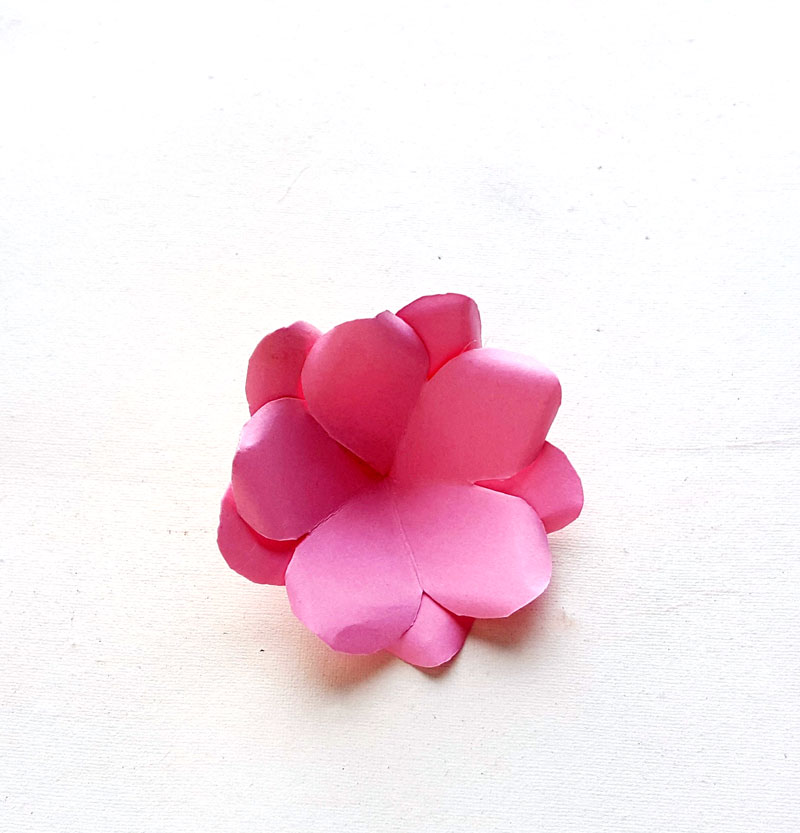
6. Continue doing this with the other petals, arranging it so that it looks nice as you go along.
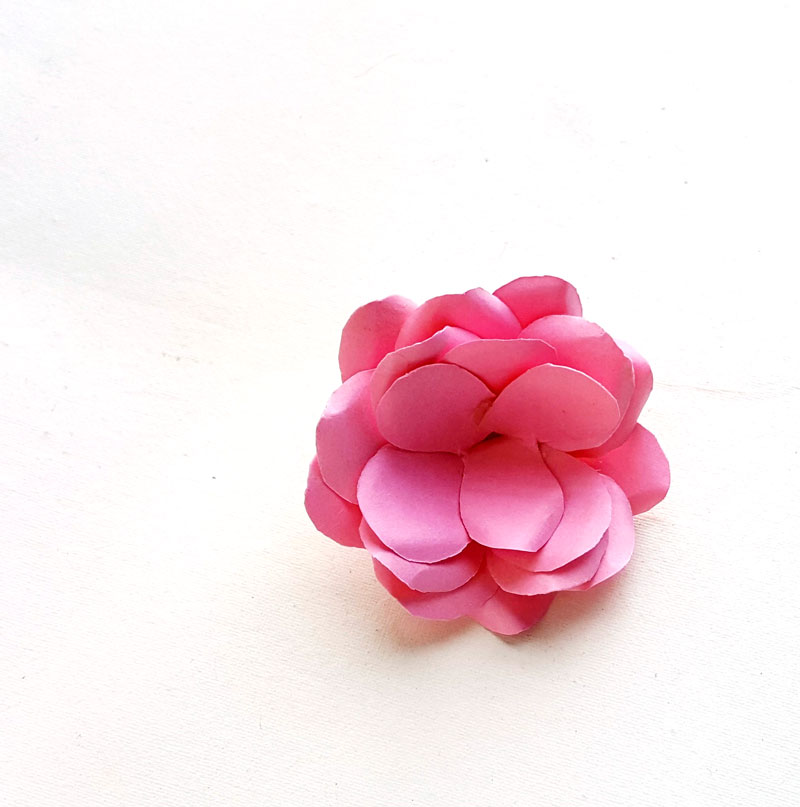
Do this in order of the amounts of petals – starting with the largest on the bottom, and finishing with a single closed petal at the top.
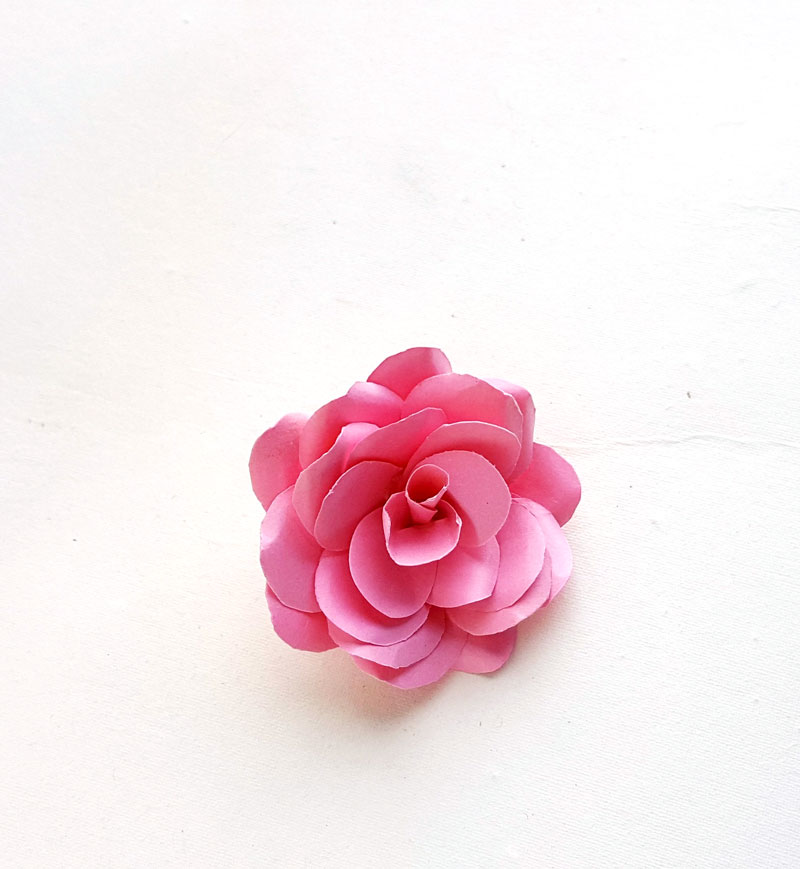
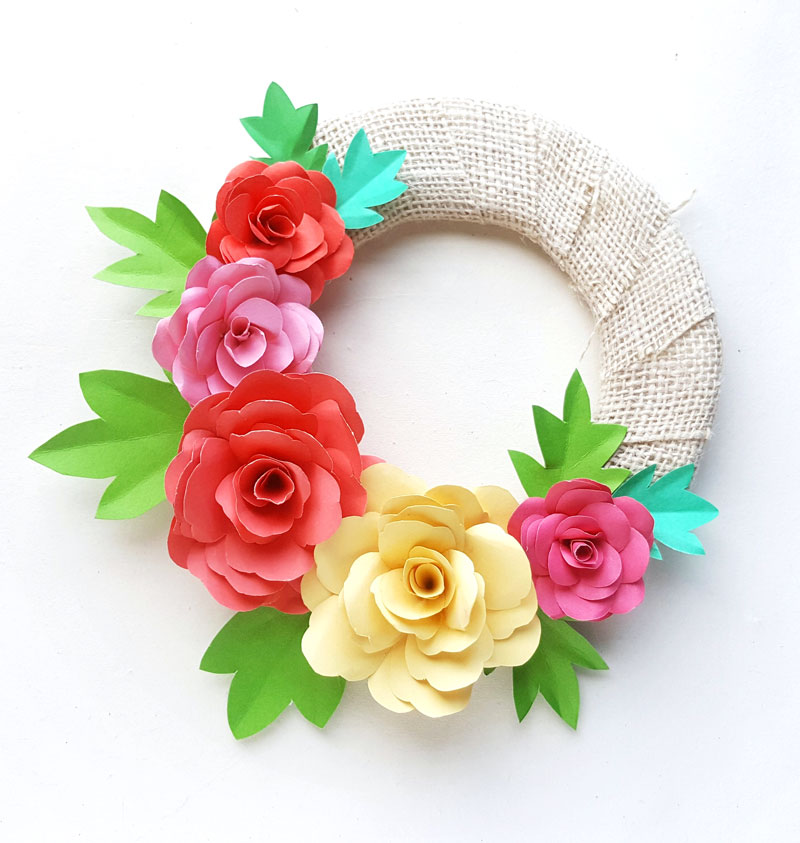
7. Create 4 or 5 more of these DIY paper roses in different sizes for the wreath. You can shrink the size of the template when you print, in your printer options. Cut jagged edges on the roses if you’d like.
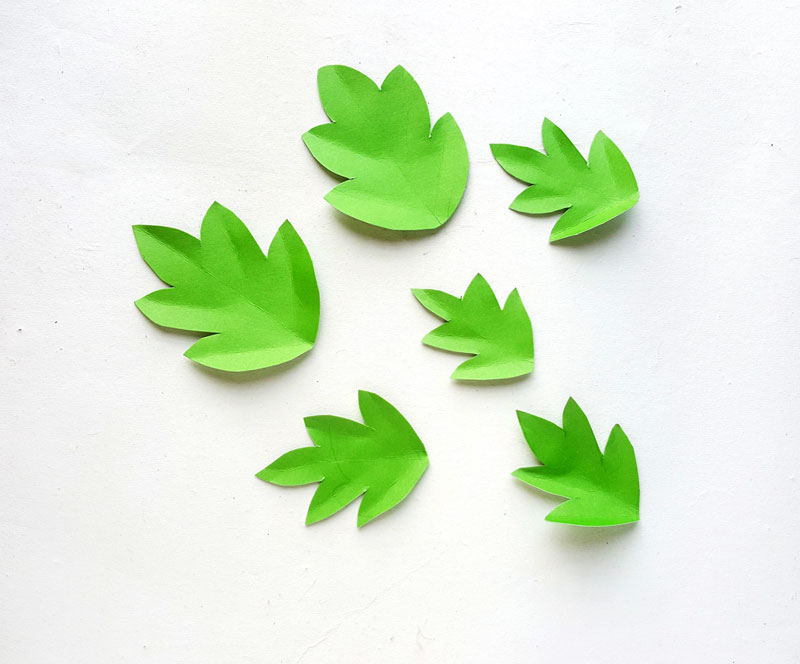
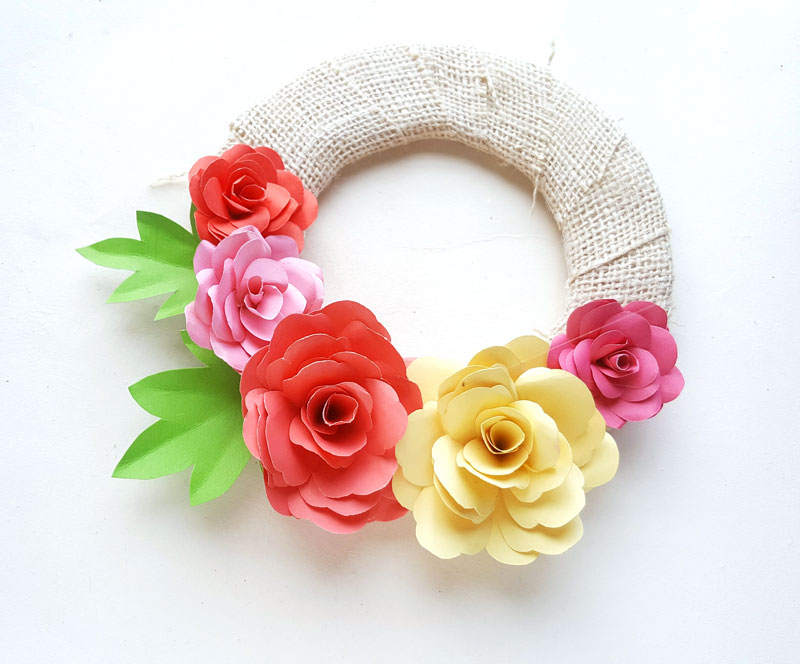
8. Trace and cut out the leaf patterns on green cardstock paper. Create vertical and diagonal creases on the leaves to give them a 3d look.
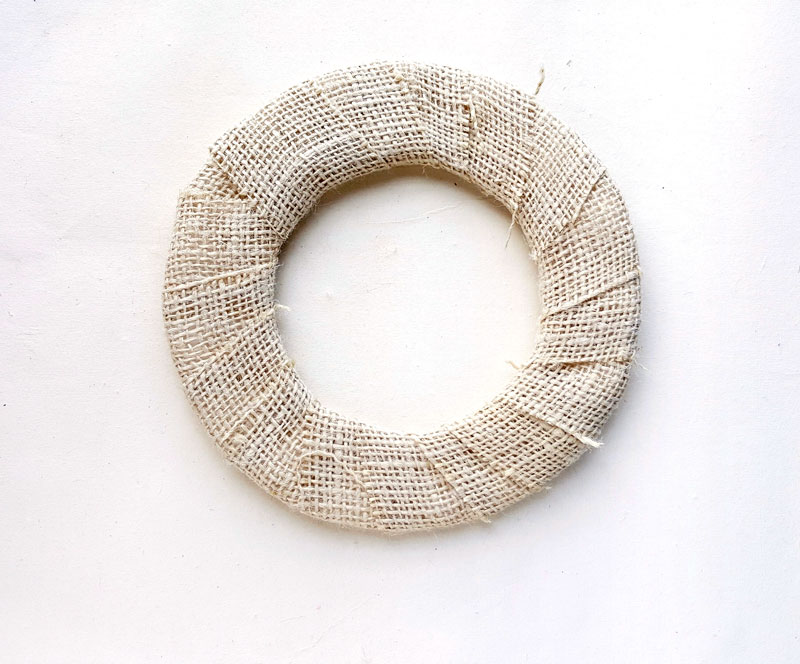
9. Apply hot glue on the open end of your burlap ribbon and attach it to the wreath form. Start to wrap the burlap strip around the form, gluing as you go.
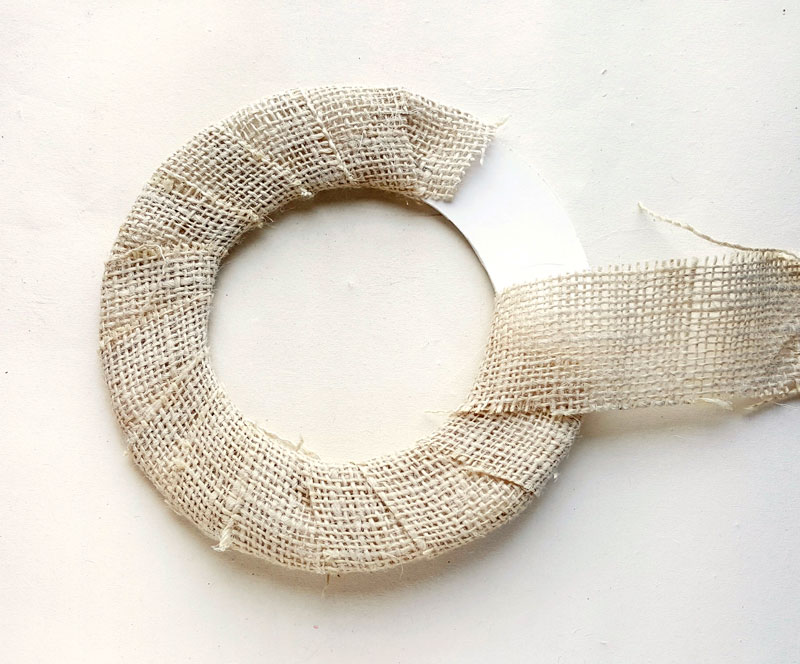
Keep wrapping the burlap until the whole base is covered.
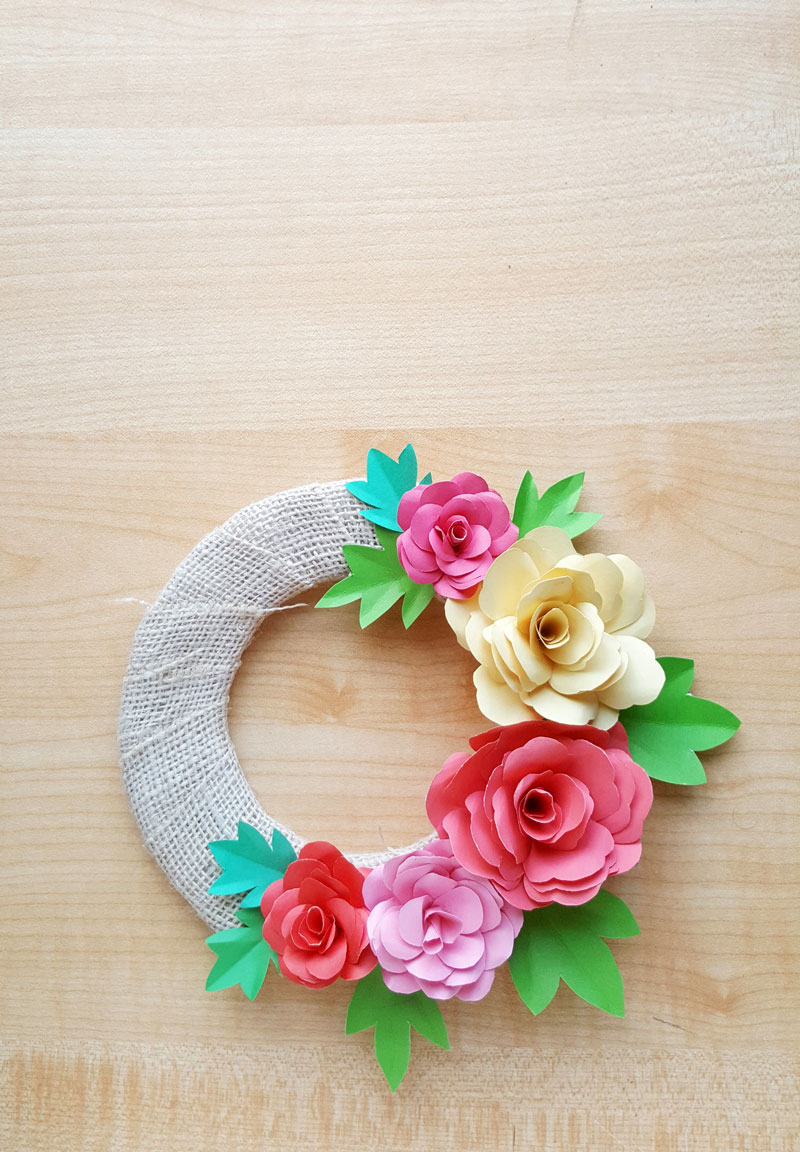
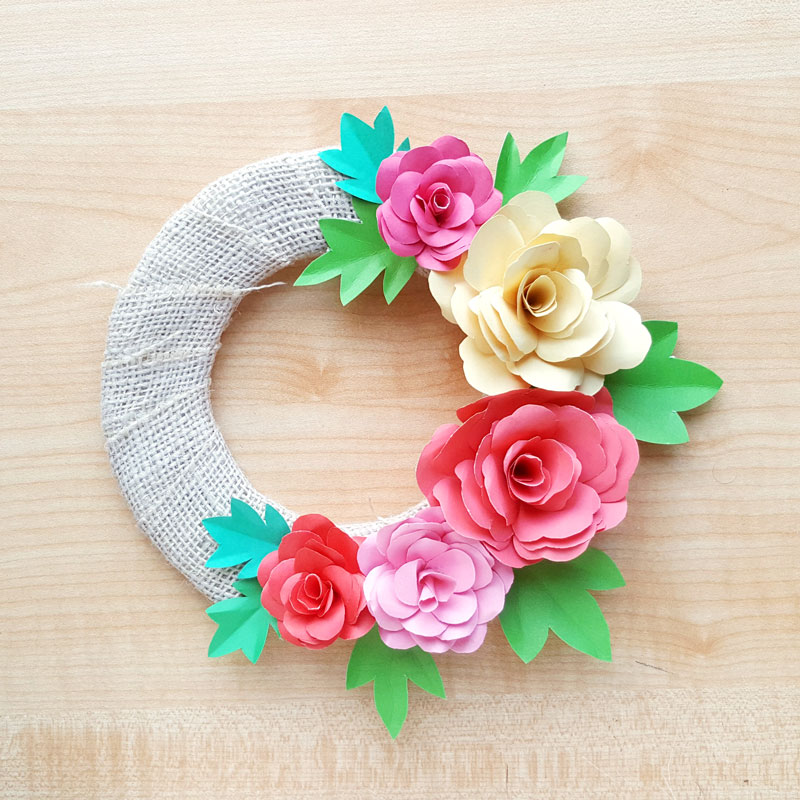
10. Glue the paper roses onto your wreath base, arranging them how you like it. An asymmetrical arrangement using an odd amount of roses (such as 3 or 5) looks great!
11. Glue the leaves between the flowers, behind them, onto the edges of the wreath form.
12. Once you are satisfied with the way your wreath looks, attach a hanging mechanism on the back and you’re ready to hang it! You can use anything, but my favorite is a ribbon looped through the wreath.
Have you ever made DIY paper roses before? Comment below!
Want more like this? If you love making DIY paper roses, you’ll also love:
- Crepe Paper Flower Wreath (this one is for autumn – but try it in Spring colors too!)
- Paper Flower bookmarks
- Paper Quilling Flower Pendant
Loved these DIY paper roses? Print out the instructions to remember for later:
DIY Paper Roses Spring Wreath
Make your own DIY paper roses using the free template, then turn them into a beautiful wreath, perfect for Easter or Spring!
Materials
- The template
- Colored cardstock in rose and leaf colors (you can print the template directly on this paper, however you will have the outline to deal with)
- Pencil
- Burlap ribbon
- Round base for the wreath (this one has been made out of cardstock)
- Tacky glue
- Hot glue gun
- Scissors
Instructions
1. Use the template to cut out your DIY paper roses parts.
2. Use a small paint brush or any round object to curve the outer edges of the petals.
3. Leave the single and double petal shapes flat - don't curve those!
4. Take each of the pieces one by one and apply glue on one side of it, glue to the opposite side.
5. Now take the two 5-petal pieces and glue them together, one on the top of the other.
6. Continue doing this with the other petals, arranging it so that it looks nice as you go along.
Do this in order of the amounts of petals - starting with the largest on the bottom, and finishing with a single closed petal at the top.
7. Create 4 or 5 more of these DIY paper roses in different sizes for the wreath. You can shrink the size of the template when you print, in your printer options. Cut jagged edges on the roses if you'd like.
8. Trace and cut out the leaf patterns on green cardstock paper. Create vertical and diagonal creases on the leaves to give them a 3d look.
9. Apply hot glue on the open end of your burlap ribbon and attach it to the wreath form. Start to wrap the burlap strip around the form, gluing as you go.
Keep wrapping the burlap until the whole base is covered.
10. Glue the paper roses onto your wreath base, arranging them how you like it. An asymmetrical arrangement using an odd amount of roses (such as 3 or 5) looks great
11. Glue the leaves between the flowers, behind them, onto the edges of the wreath form.
12. Once you are satisfied with the way your wreath looks, attach a hanging mechanism on the back and you're ready to hang it! You can use anything, but my favorite is a ribbon looped through the wreath.
↵
Recommended Products
As an Amazon Associate and member of other affiliate programs, I earn from qualifying purchases.


The link to the template is not working 😕
Hi Deana, Some of my externally linked forms are unfortunately not working 🙁 I added a new form in the post that I tested and works. You can use that one meanwhile or if you’re still having trouble, you can always email me at menucha@momsandcrafters.com and I’ll send it directly.