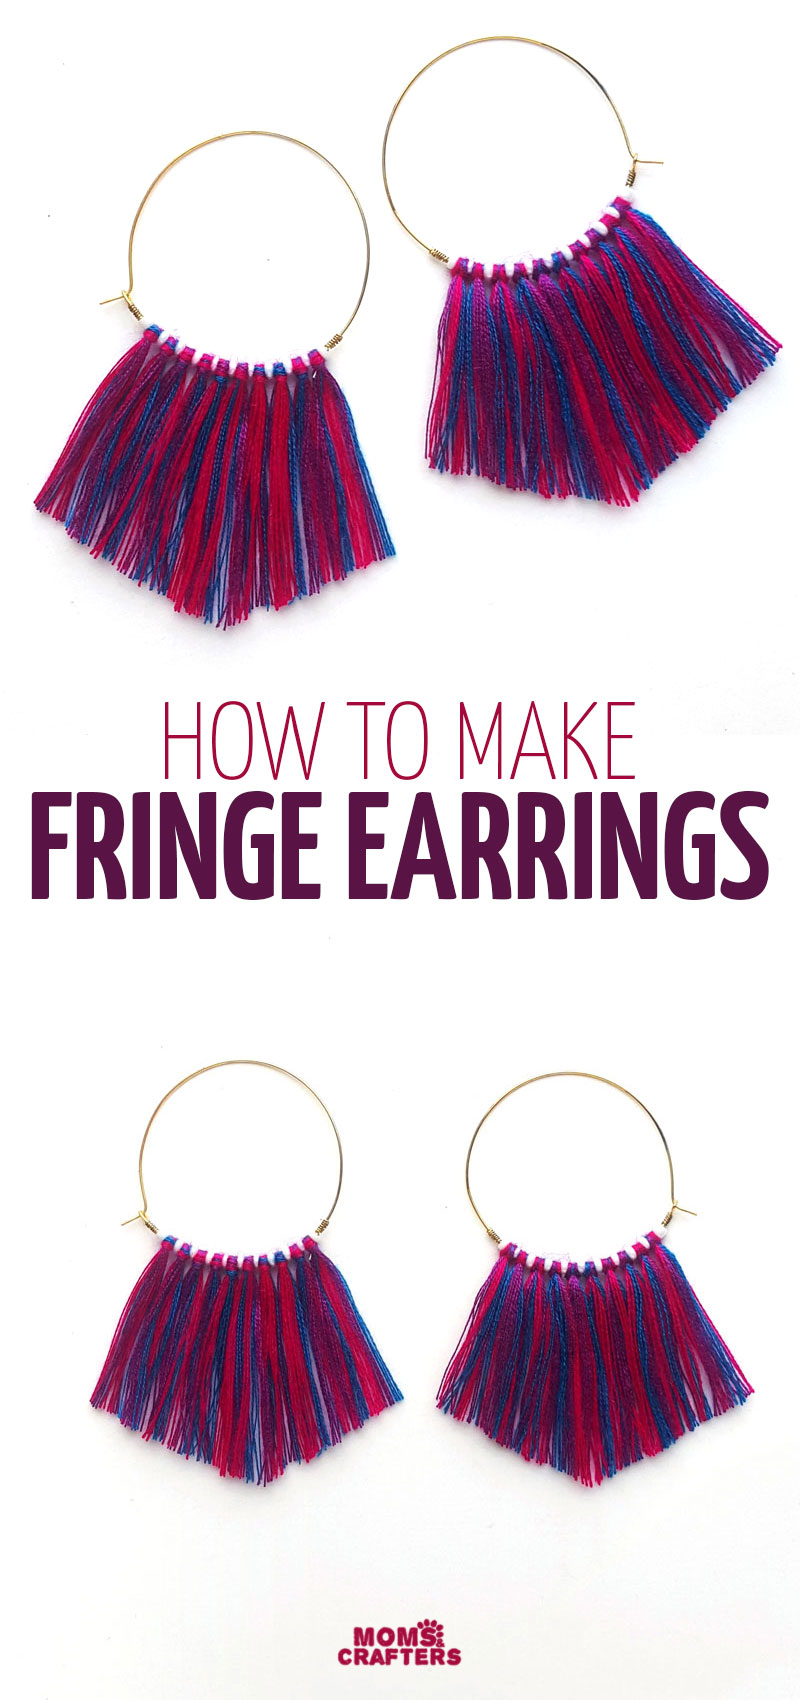
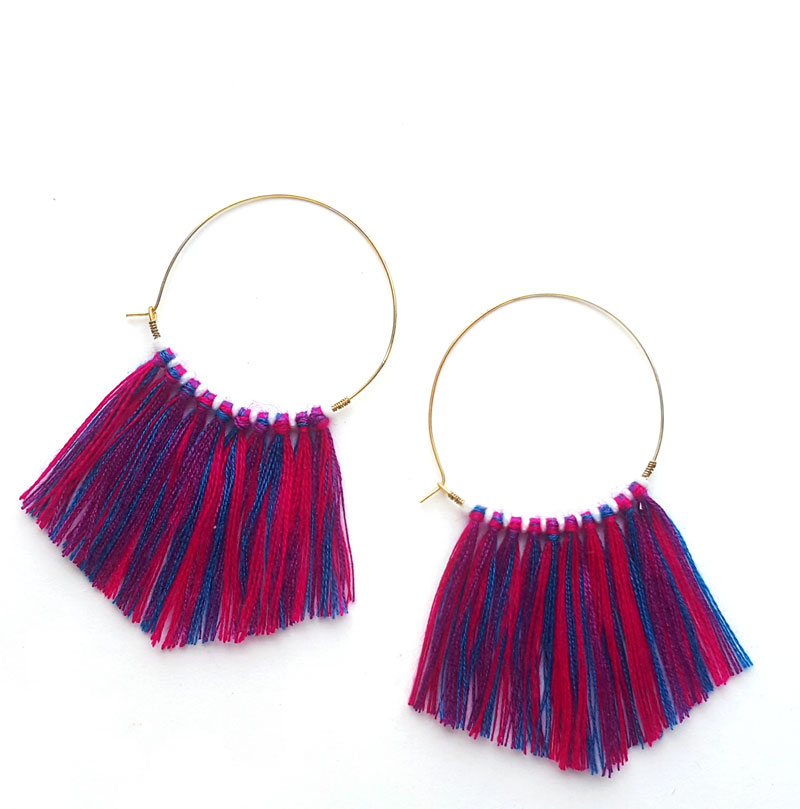
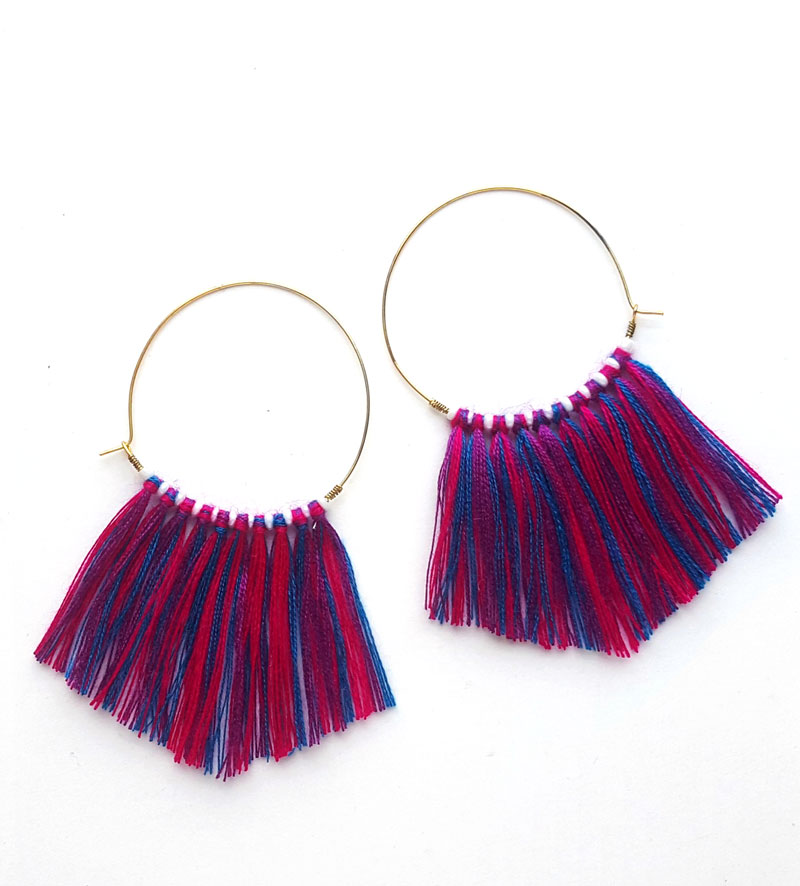
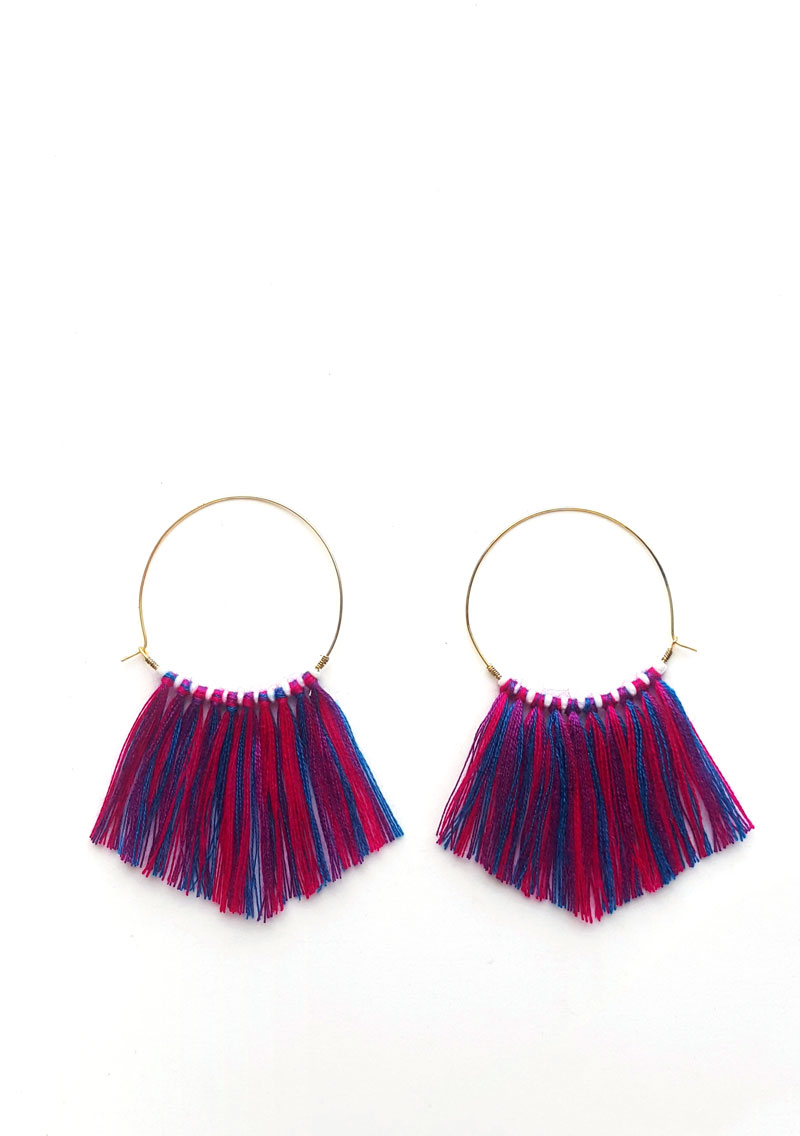
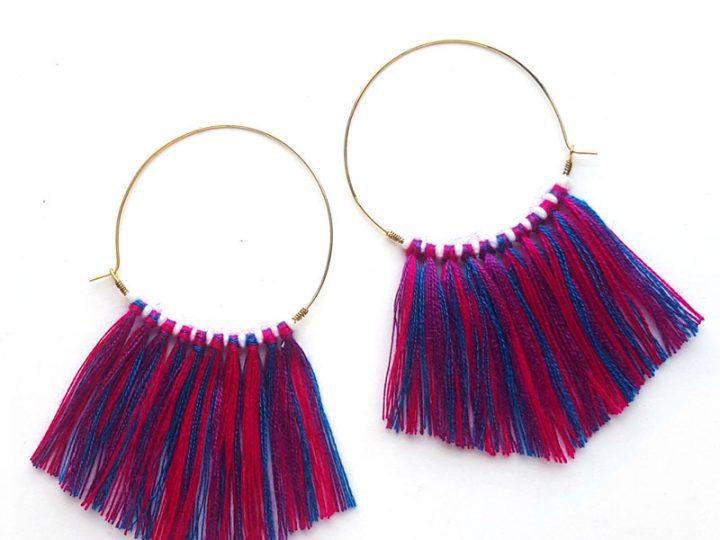
Fringe Earrings DIY – Hoop Fringe Earrings
If you’re looking for a fun jewelry making project that won’t break the bank, this fringe earrings DIY tutorial is so much fun! Learn how to make DIY dangle earrings and then scroll down for these hoop fringe earrings! Disclosure: this post contains affiliate links.
Jewelry making has a reputation for being an expensive hobby. And while your first set of jewelry making tools might cost more than a pack of construction paper, its bad reputation isn’t entirely true.
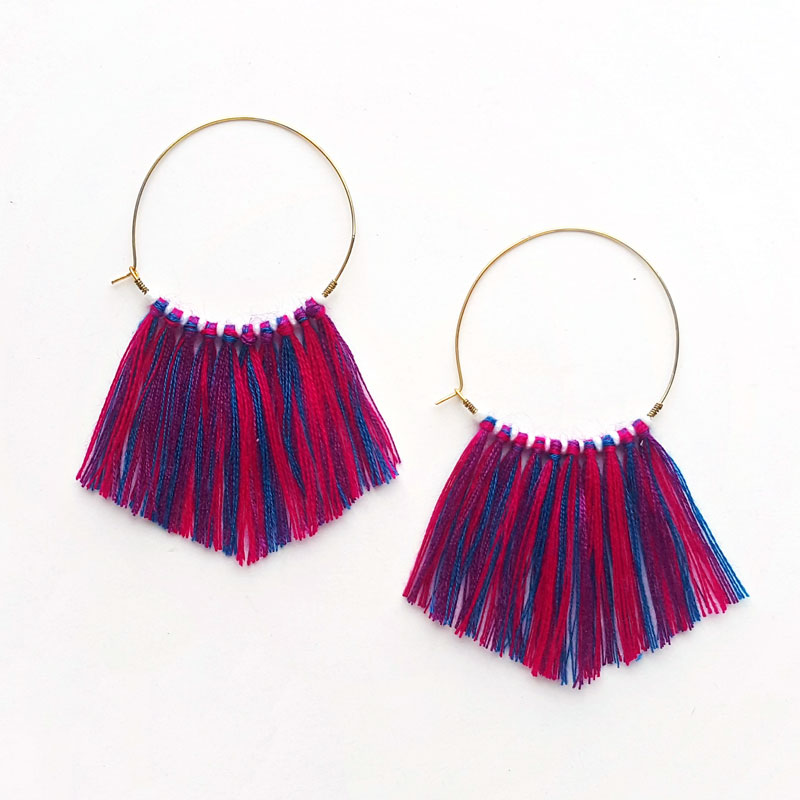
Case in point: these hoop fringe earrings DIY.
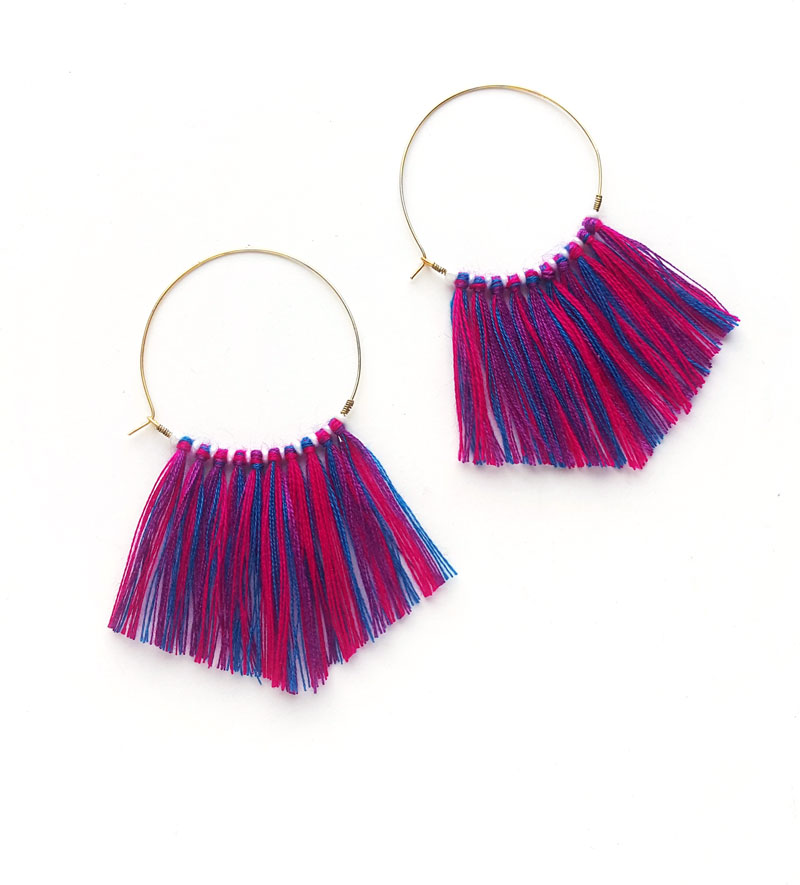
With just a few inches of wire, some inexpensive wire hoops, and a few strands of embroidery thread, you can make beautiful, trendy fringe earrings in any color you’d like.
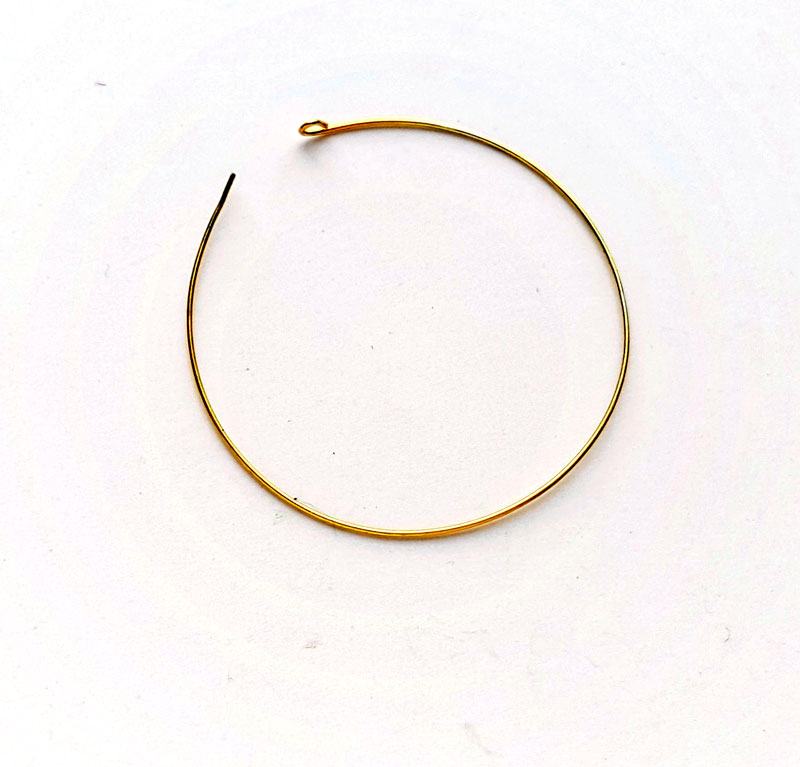
To make these beaded fringe earrings DIY, you’ll want to make the hoops using wire, or get very thin wire hoops, with an end that can be straightened out.
If you’d like, you can skip the beads and use classic hoop earrings. If you want a spacer between the fringes, but want to use an existing hoop, you can use the same wire-wrapping technique that you’ll be using to secure the fringe in place between the beads too.
Now for the tutorial! It’s written out right below, but if you scroll down to the end of this tutorial, you’ll find a printable “recipe card” version as well. Happy crafting!
Want to learn how to make jewelry out of anything? Get the book!
What you need to make this DIY earrings tutorial:
- Embroidery thread – 2 to 3 different colors or shades
- Wire hoop earrings or make your own using wire
- 24-26 gauge wire
- Jewelry pliers – Flush cutters and flat nose pliers
- Detail Scissors
- Seed beads or small, plain spacers.
How to make this hoop fringe earrings DIY:
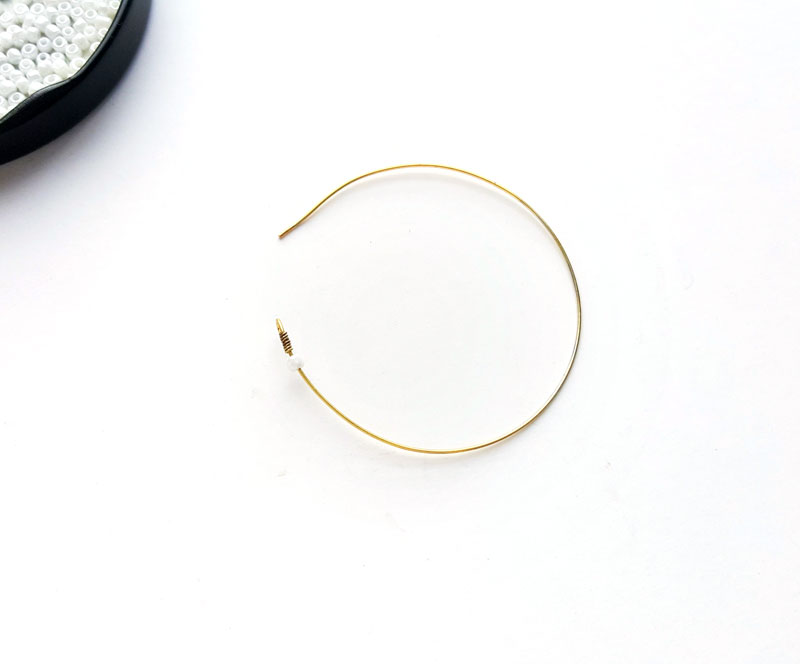
1. Take a hoop earring and use the flat nose pliers to straighten the bent part of the closure.
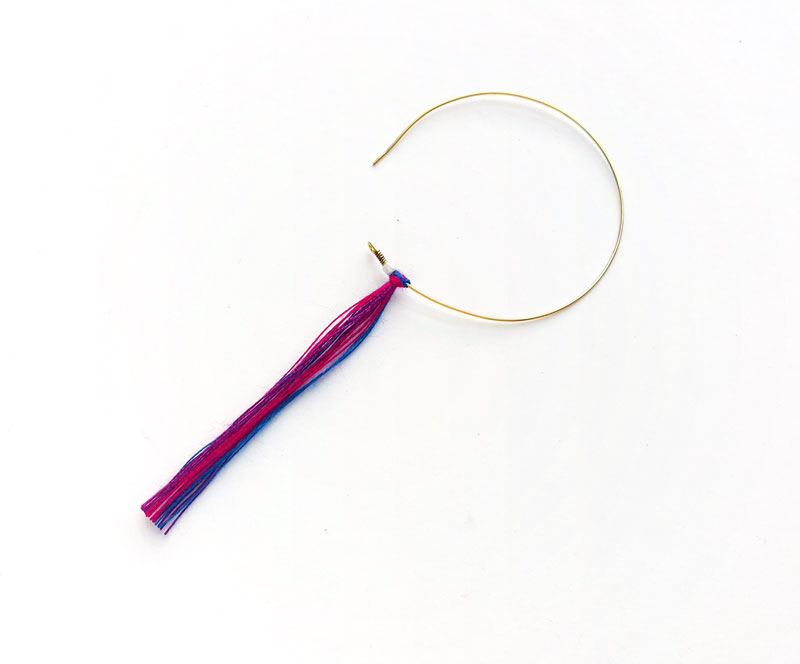
2. Coil about 0.5 cm of wire where you want your fringe to end using thin wire . Once the coiling is done, thread a bead onto the earring wire and push it all the way to the coil.
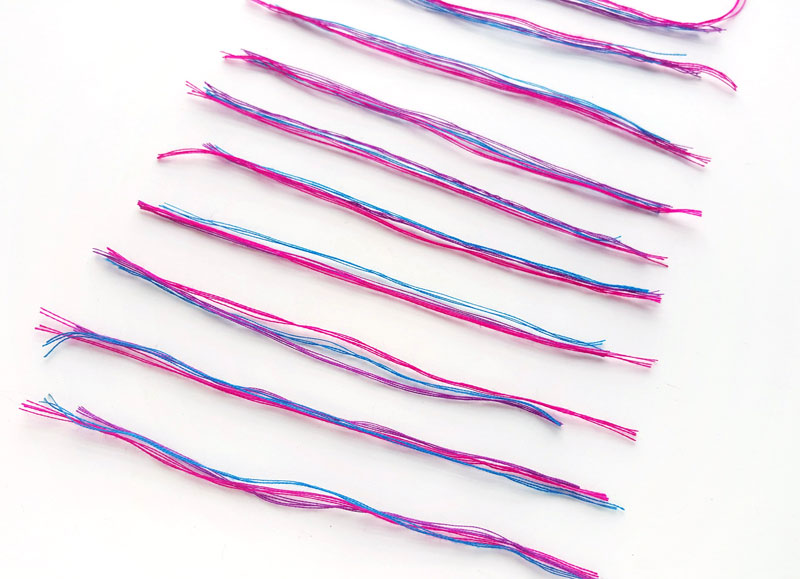
3. Take your 3 colors of embroidery thread and make groups of thread with 4 strands of each color. This tutorial uses ten such groupings of thread. How many threads and groups you’ll want will depend on the weight of your thread and the size of your hoops.
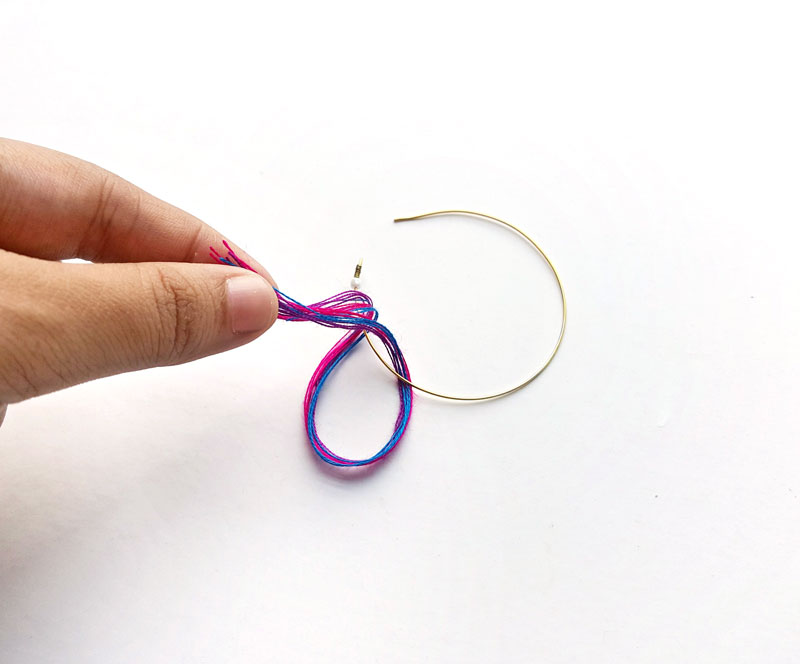
4. Take your first thread group and fold it in half. Place the folded end under the hoop earring wire.

5. Hold the loose ends of the thread group from one side of the earring wire, keeping the closed end of the thread group on the other side of the earring wire. Draw the loose ends of the thread group over the earring wire, bringing it through the looped/folded end of the thread group.
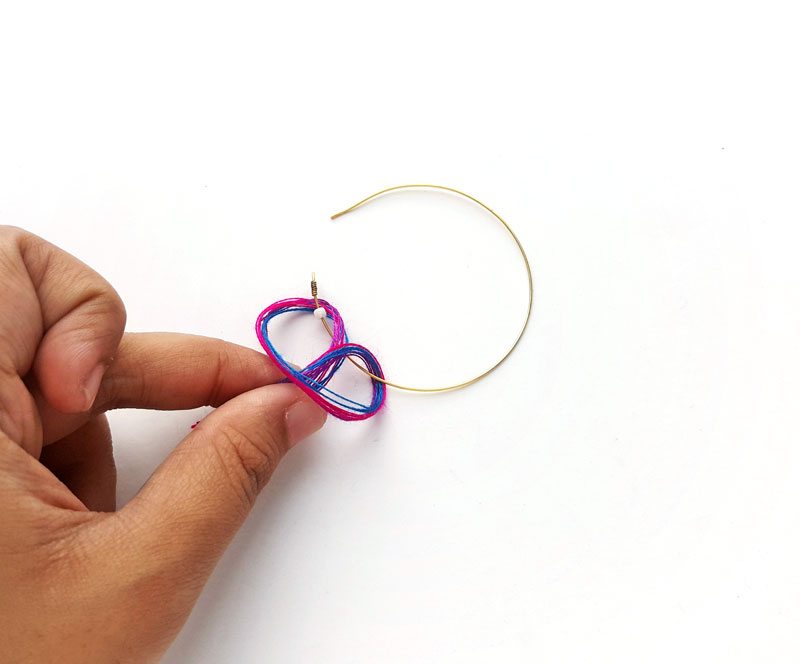
6. Pull the loose ends of the thread group all the way through until it’s tight securely in place on the wire hoop.
7. Thread another bead onto the earring hoop and then attach another thread group to the wire like you did with the previous one.
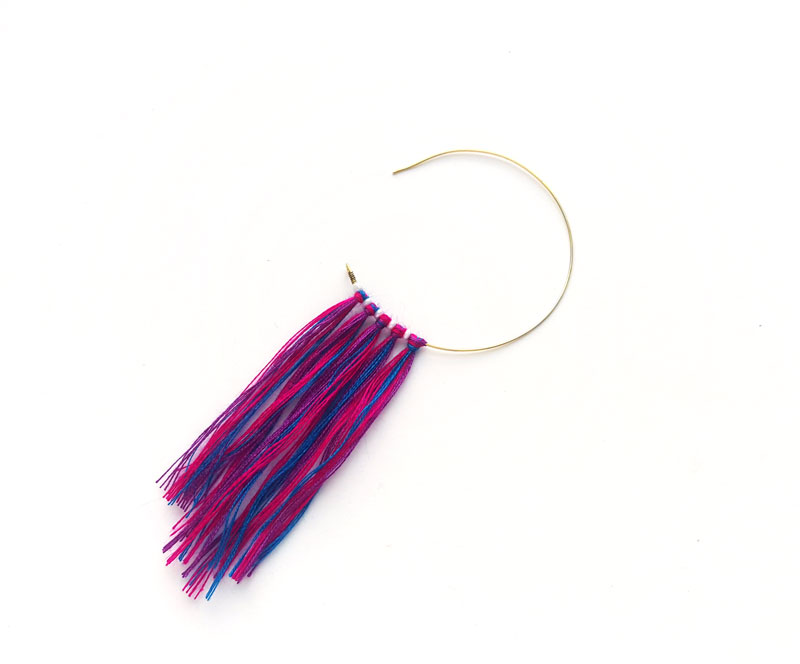
8. Continue to repeat steps 4 through 7 until you are satisfied with the width of your fringe.
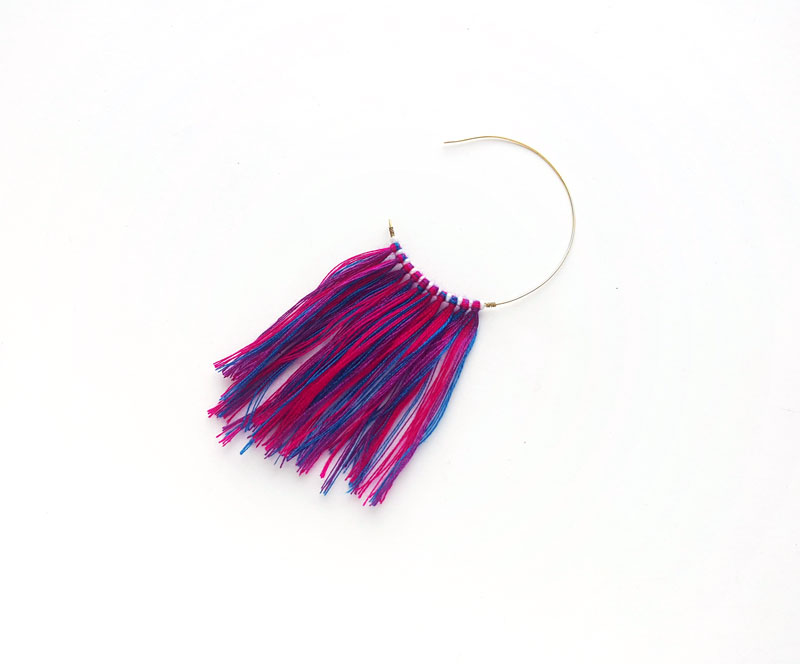
9. Done adding all the threads? Use scissors to carefully trim the bottom open ends of the thread groups. Trim the bottom end into any pattern you like, such as the V shape in this tutorial.
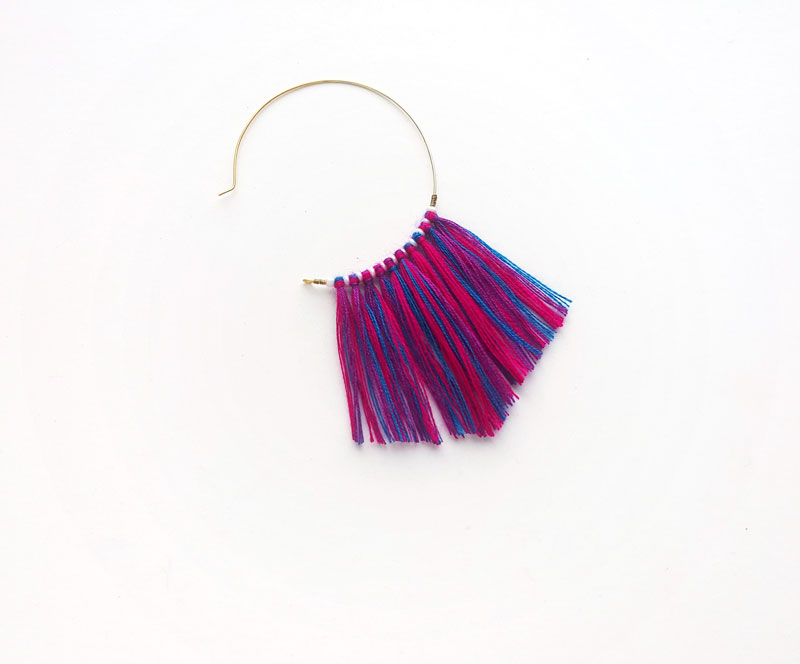
10. Add another end coil, and bend back the end of your hoop.
11. Repeat to make a pair!
Have you tried making your own fringe earrings? Got any tips, ideas, or feedback? Comment below!
Fringe Earrings
Materials
Instructions
1. Take a hoop earring and use the flat nose pliers to straighten the bent part of the closure.
2. Coil about 0.5 cm of wire where you want your fringe to end using thin wire . Once the coiling is done, thread a bead onto the earring wire and push it all the way to the coil.
3. Take your 3 colors of embroidery thread and make groups of thread with 4 strands of each color. This tutorial uses ten such groupings of thread. How many threads and groups you'll want will depend on the weight of your thread and the size of your hoops.
4. Take your first thread group and fold it in half. Place the folded end under the hoop earring wire.
5. Hold the loose ends of the thread group from one side of the earring wire, keeping the closed end of the thread group on the other side of the earring wire. Draw the loose ends of the thread group over the earring wire, bringing it through the looped/folded end of the thread group.
6. Pull the loose ends of the thread group all the way through until it's tight securely in place on the wire hoop.
7. Thread another bead onto the earring hoop and then attach another thread group to the wire like you did with the previous one.
8. Continue to repeat steps 4 through 7 until you are satisfied with the thickness of your fringe.
9. Done adding all the threads? Use scissors to carefully trim the bottom open ends of the thread groups. Trim the bottom end into any pattern you like, such as the V shape in this tutorial.
10. Add another end coil, and bend back the end of your hoop.
11. Repeat to make a pair!
Recommended Products
As an Amazon Associate and member of other affiliate programs, I earn from qualifying purchases.
-
 How to Make Jewelry Out of Anything: A Complete Out-of-the-Box Jewelry Making Guide for Teens and Teens-at-Heart!
 -
 Sewing Shirt - Vintage Sewing Machine Sketch - Women's short sleeve t-shirt in red, green, blue,...
 -
 Jewelry Designer Templates - Color In Fashion Drawing Models to Make DIY Handmade Jewelry
 -
 Mug for Crafters - I Make Stuff - What's Your Superpower
 -
Youth Short Sleeve T-Shirt - I Make Stuff Whats Your Superpower - Funny Humorous Gift for Crafters