Paper Dream Catcher + Free Template
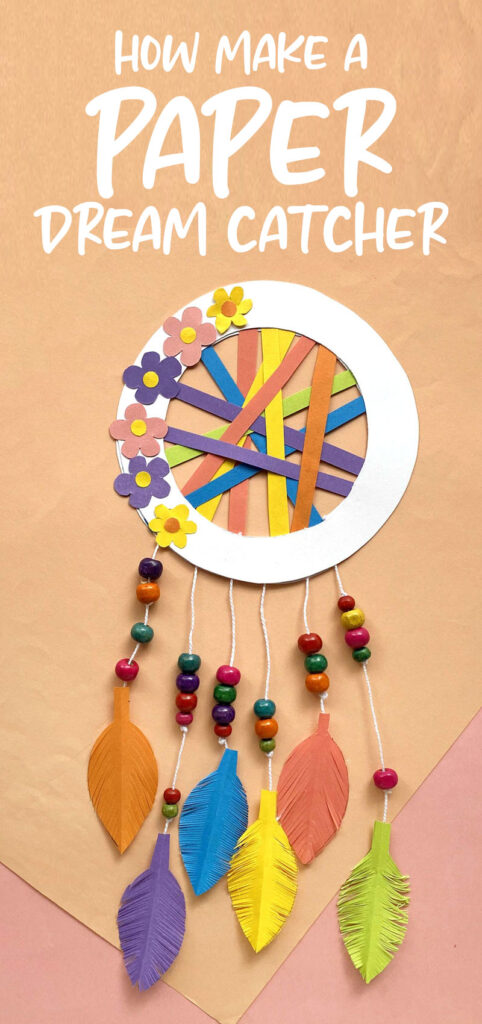
Craft a paper dreamcatcher using this free template! This is such a fun craft for tweens to make with paper and hang in their bedrooms too. This post contains affiliate links.
Dream catchers originated in Native American culture. The idea behind them is that if you hang one by your bed, it’ll catch the bad dreams and let only the good ones come through. That makes it a perfect craft for kids that sometimes suffer from bad dreams. Even if they don’t work, they definitely look pretty and are super fun to make.
Your tween will especially love to make a paper dream catcher to hang in the bedroom.
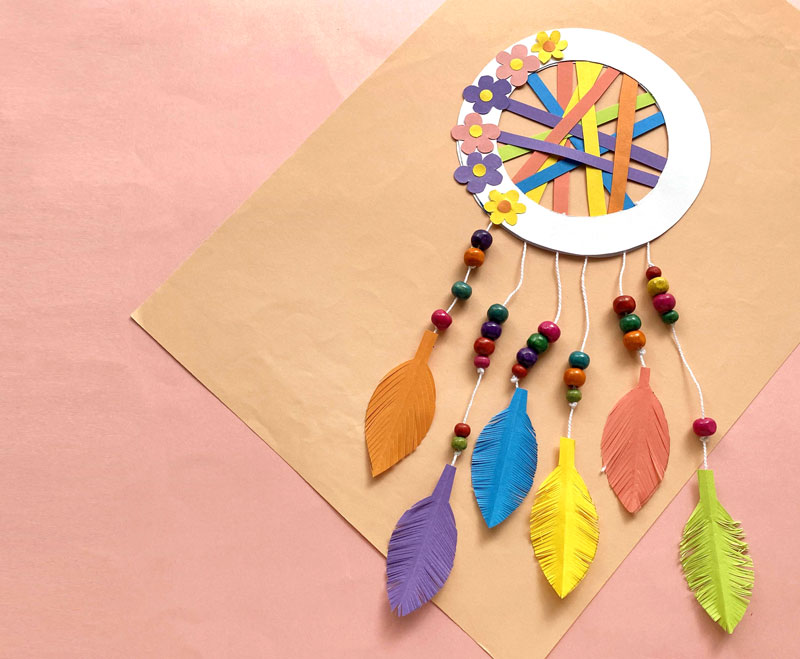
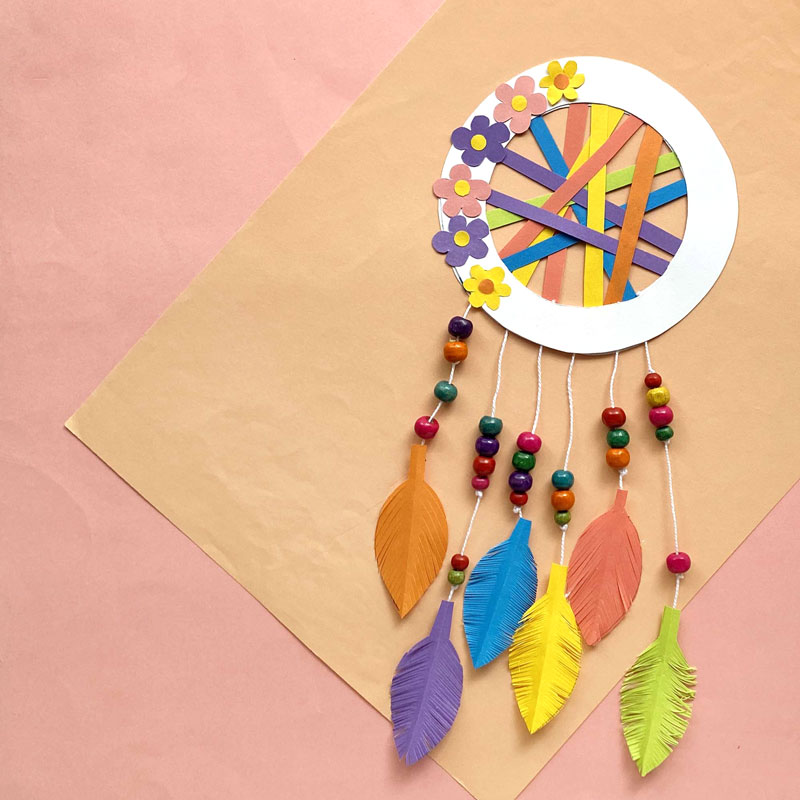
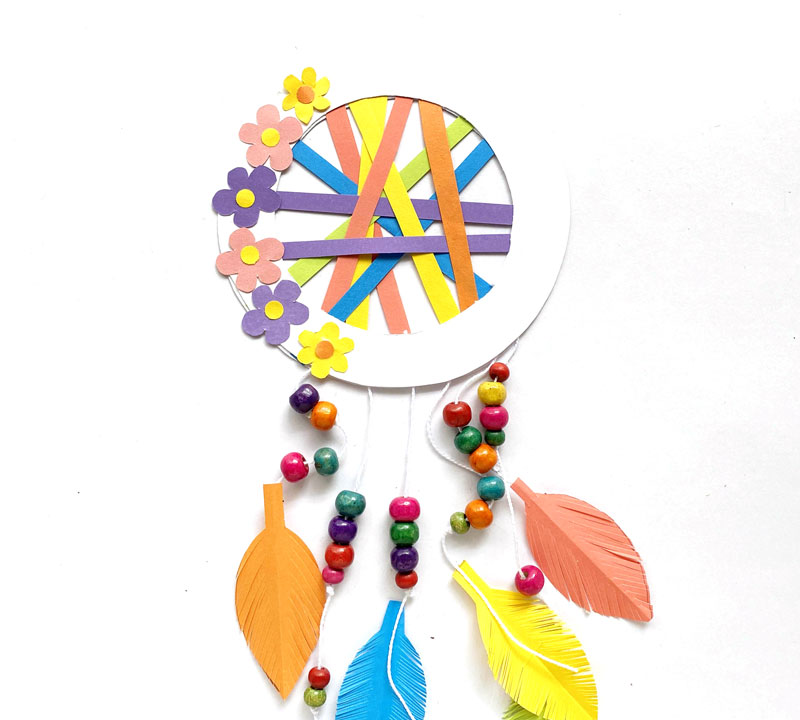
In this craft example, paper flowers have been added for decoration, but that’s just a suggestion. Your kids could choose to decorate it however they want. You can make it as only paper as you’d like, incorporating more of other materials if you wish.
Download the Dream Catcher Template below
To download, fill out the form below. You’ll be signed up for our free newsletter – unsubscribe at any time in the footer of the emails. I respect your privacy and the law and won’t share your information with anyone.
What you need to make a paper dream catcher
- The template (above)
- White Cardstock
- Construction paper
- Pencil
- Ruler
- Scissors
- Tacky Glue
- Cotton twine
- Wood Beads
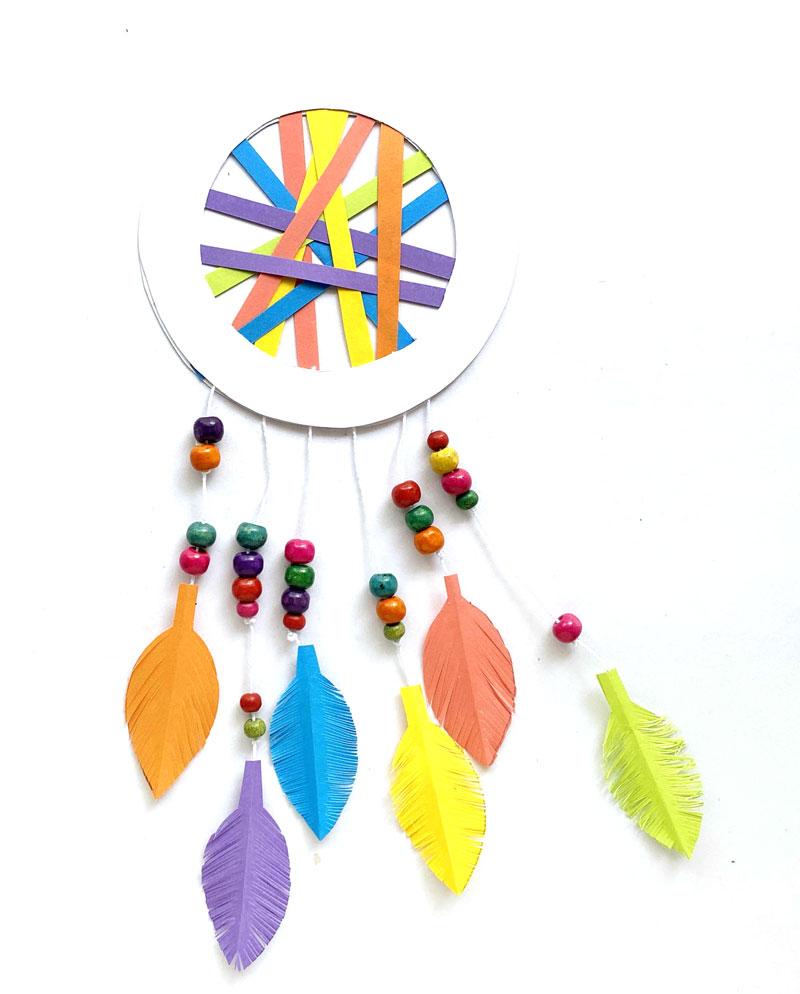
How to Make a Dream Catcher Out of Paper
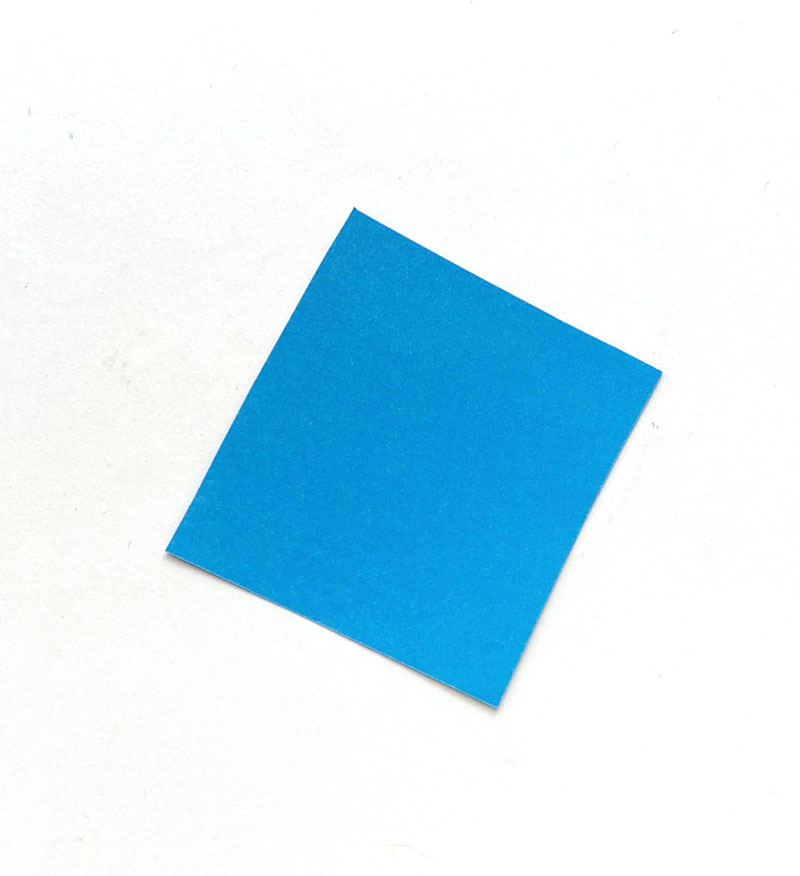
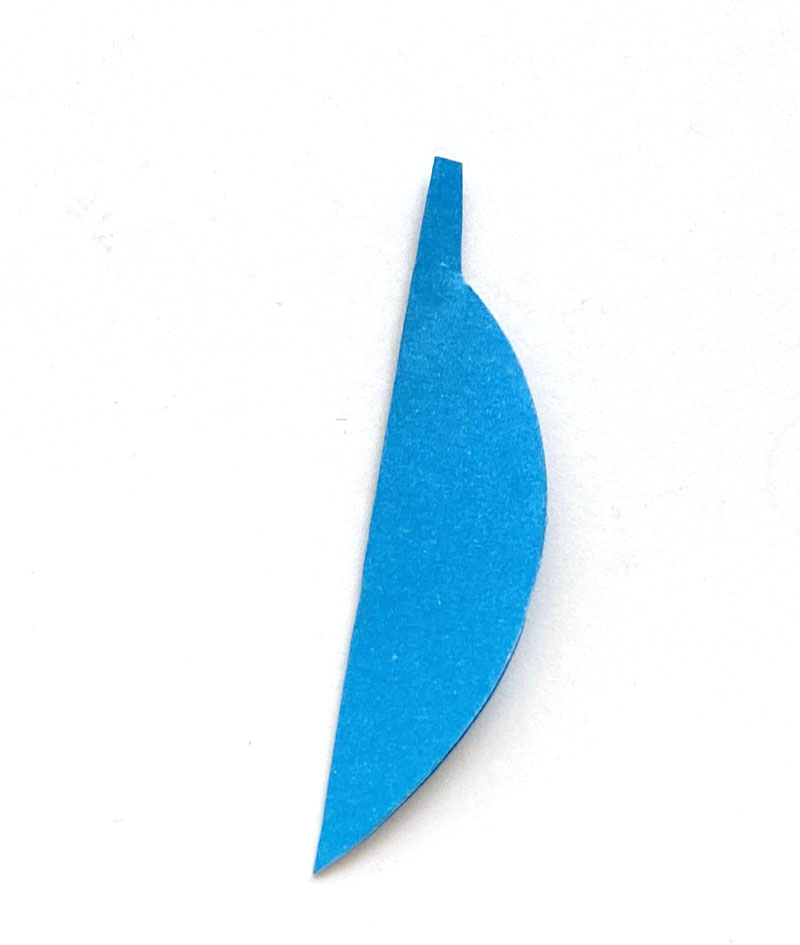
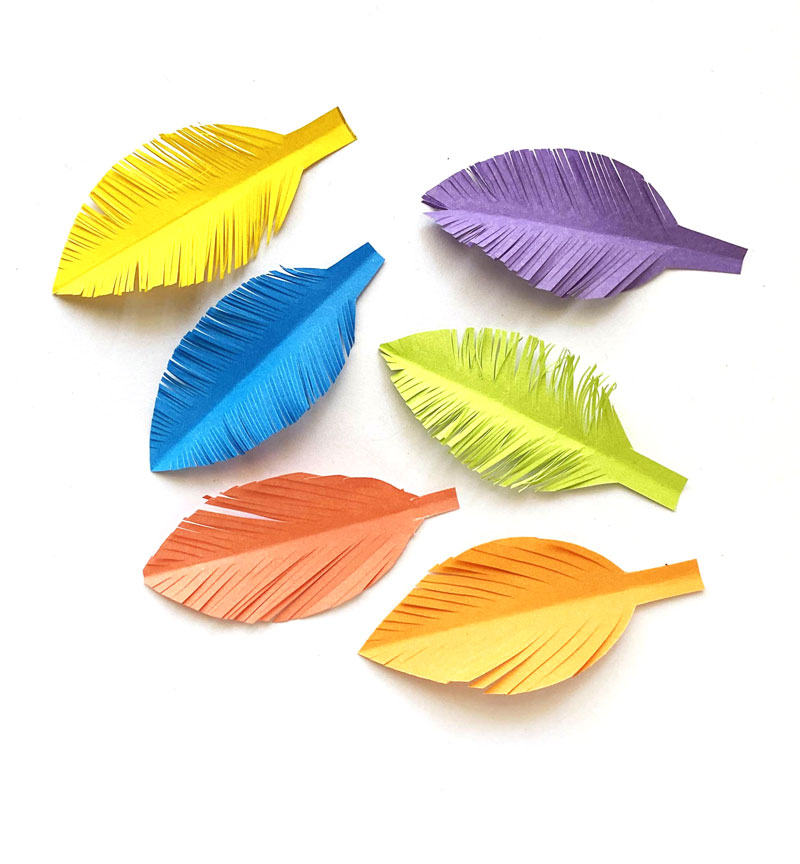
1: Gather the supplies and print out the PDF template. Cut out a square piece of colored paper.
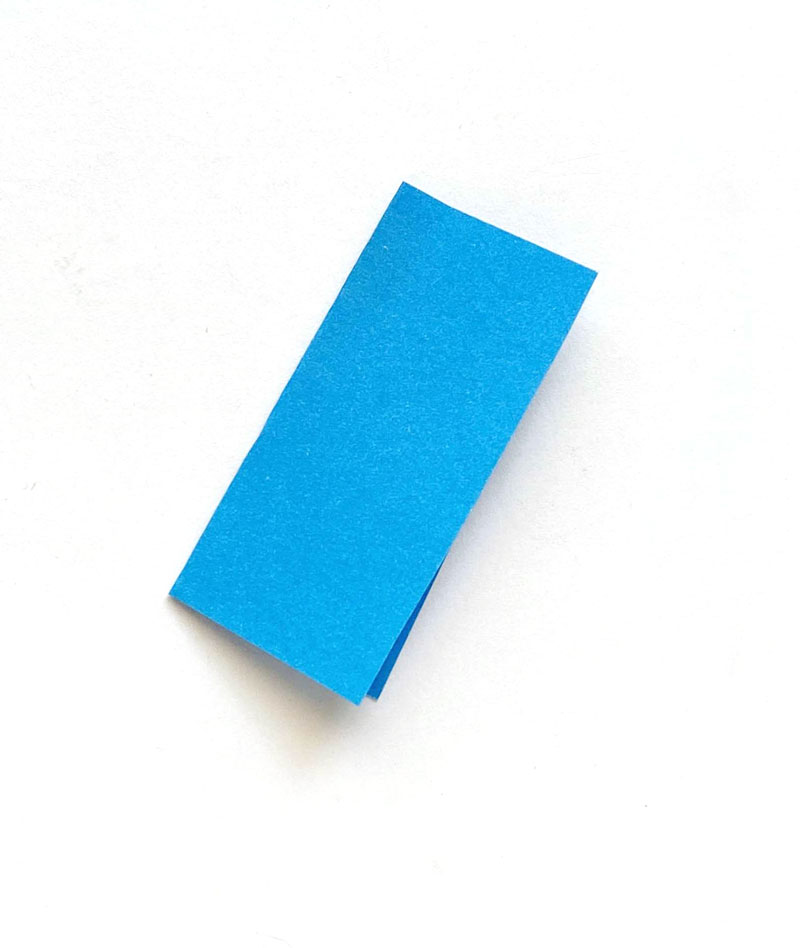
2: Fold the paper in half.
3: Cut the paper using the feather template.
4: Make thin diagonal cuts on the curved side of the paper to simulate feathers. Start cutting from the opened end of the fold, but don’t cut all the way to the centerfold.
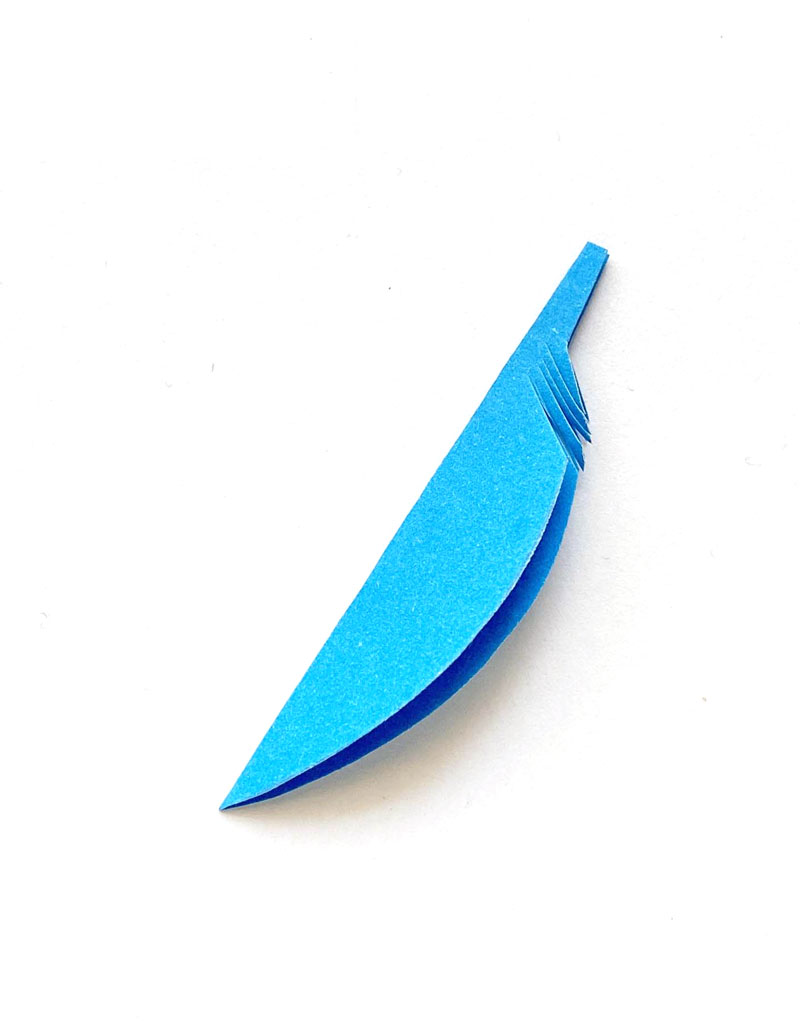
5: Keep making thin diagonal cuts all the way to the top of the feather.
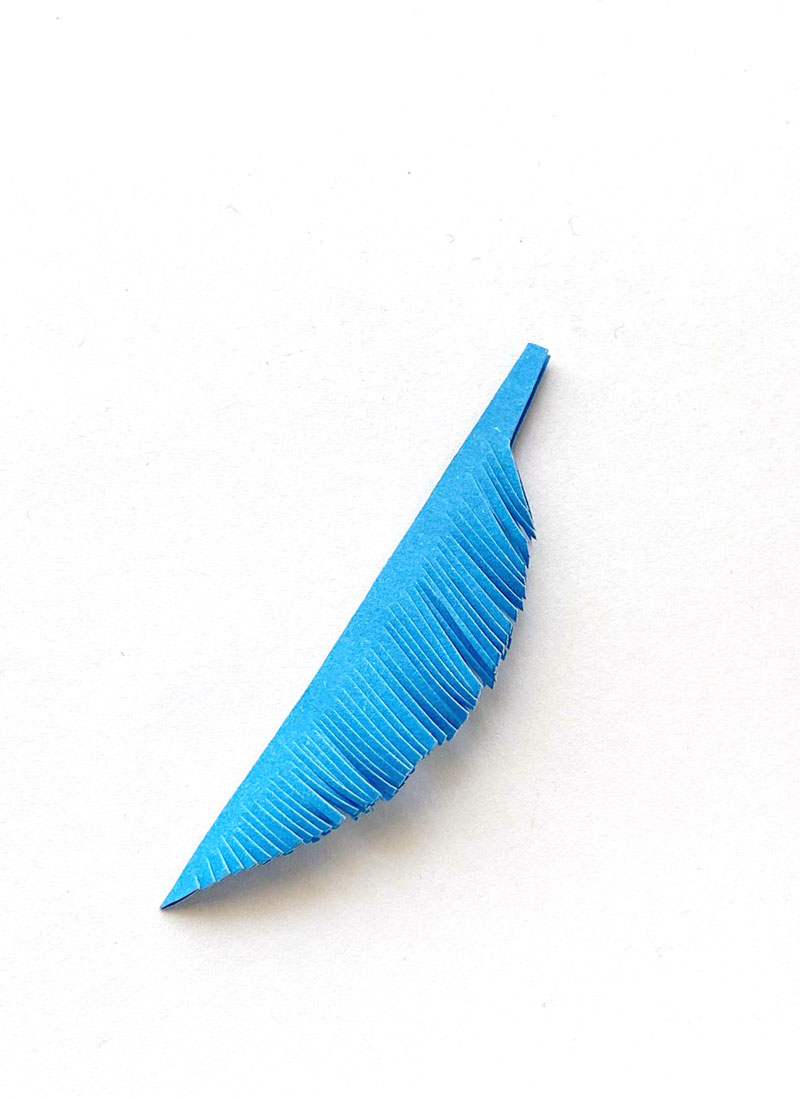
6: Open the fold.
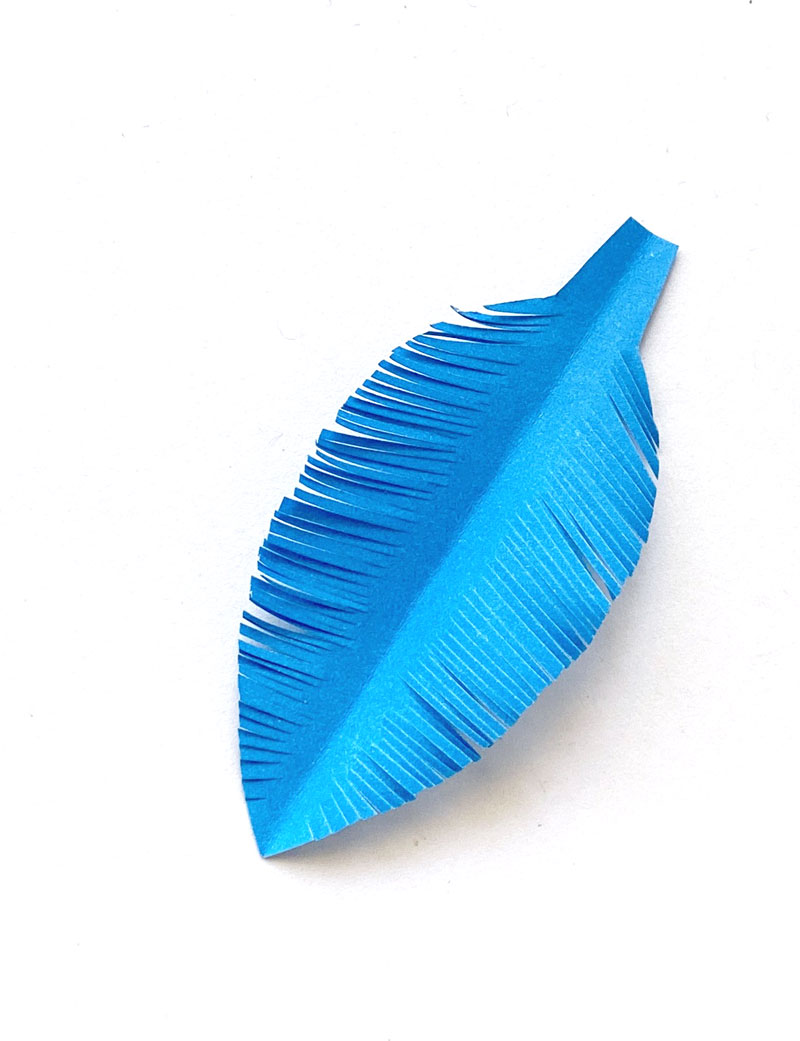
7: Repeat the process until you have several feathers.
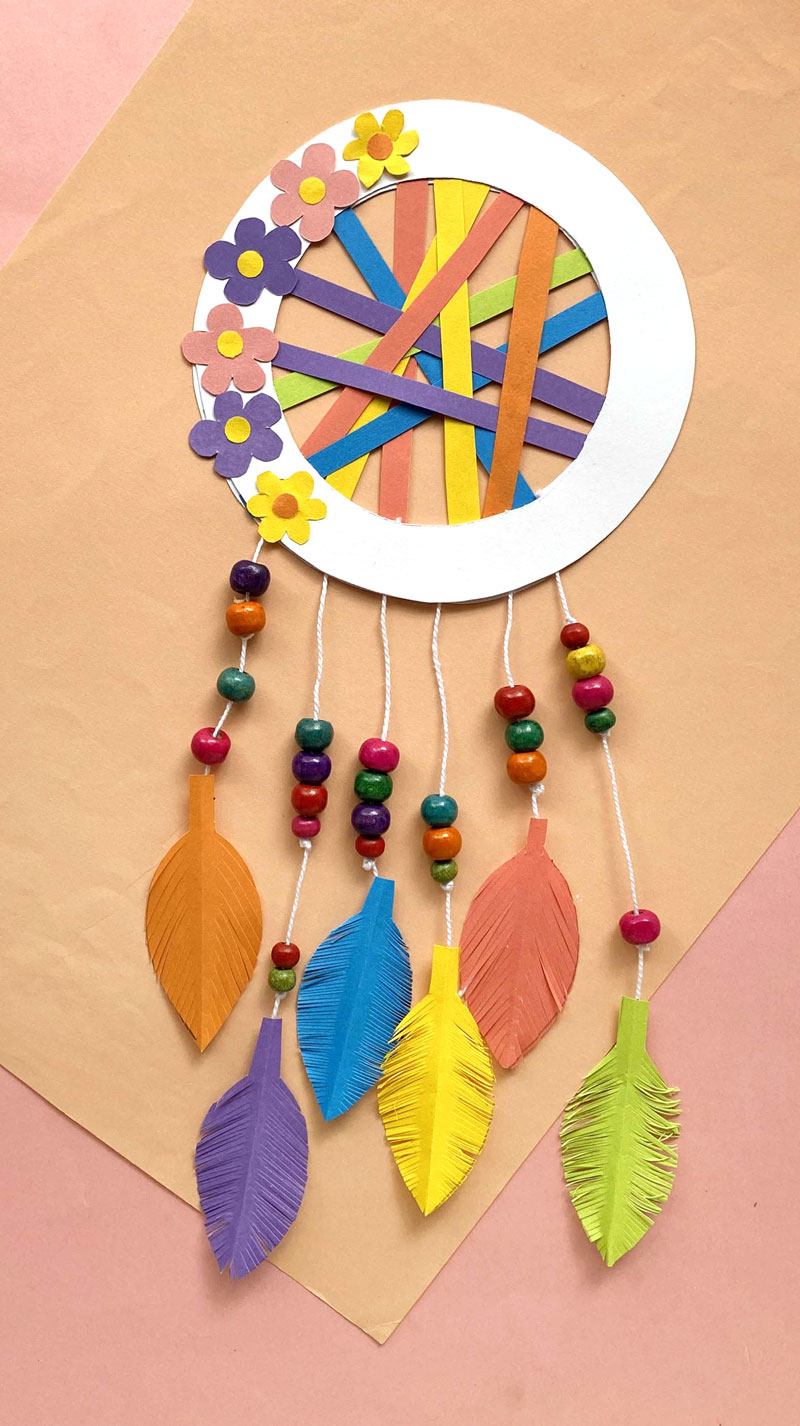
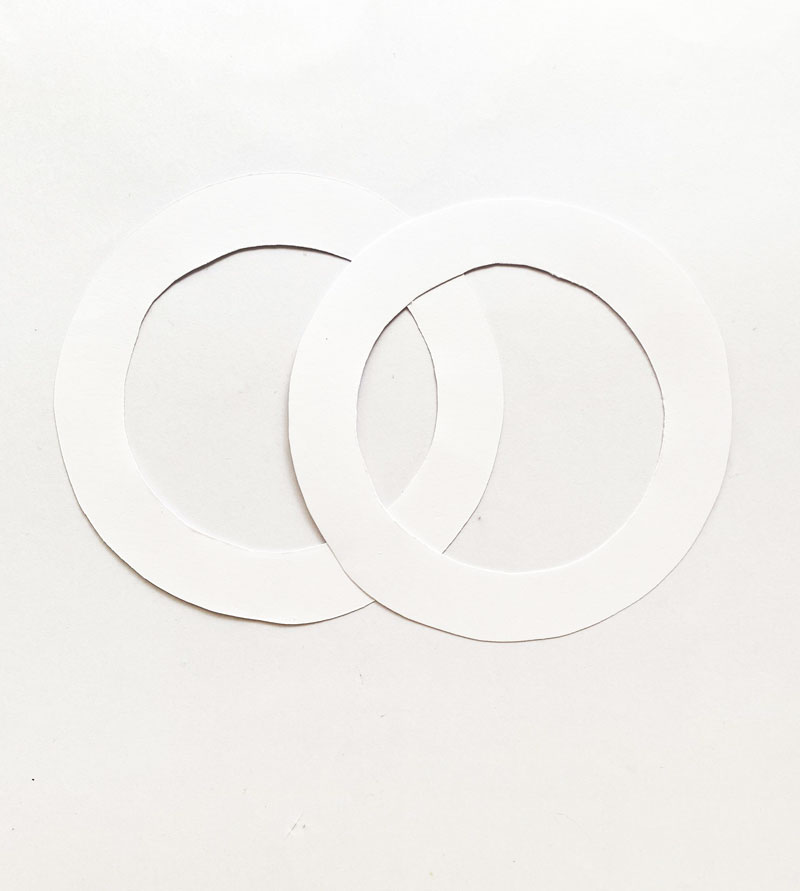
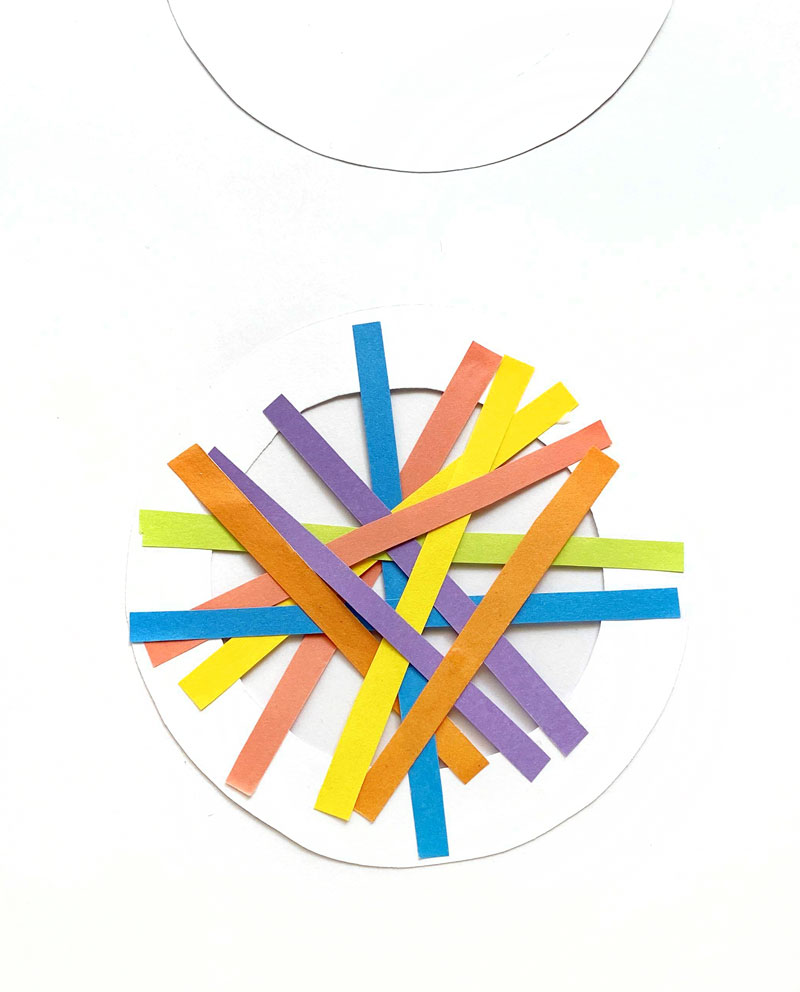
8: Trace the circle onto white cardstock. You can also use a paper plate for this.
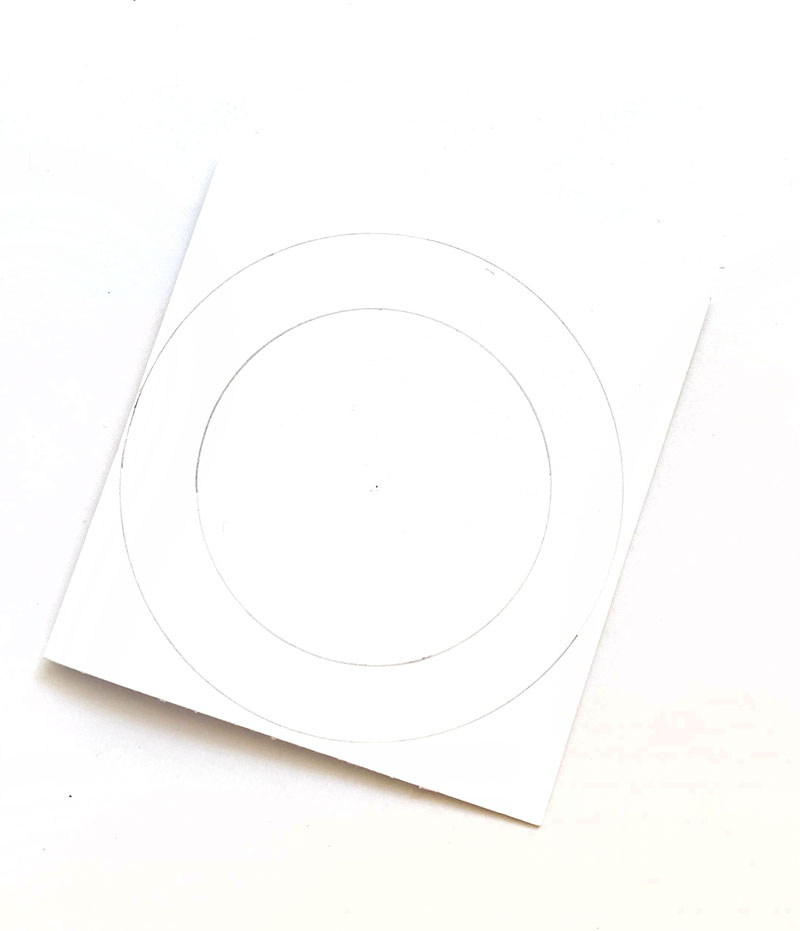
9: Cut out two circle bases from cardstock.
10: Use the craft paper to cut out paper strips in a variety of colors.

11: Glue the paper strips to each side of the circular base, so that it crosses over the empty middle like a bridge.
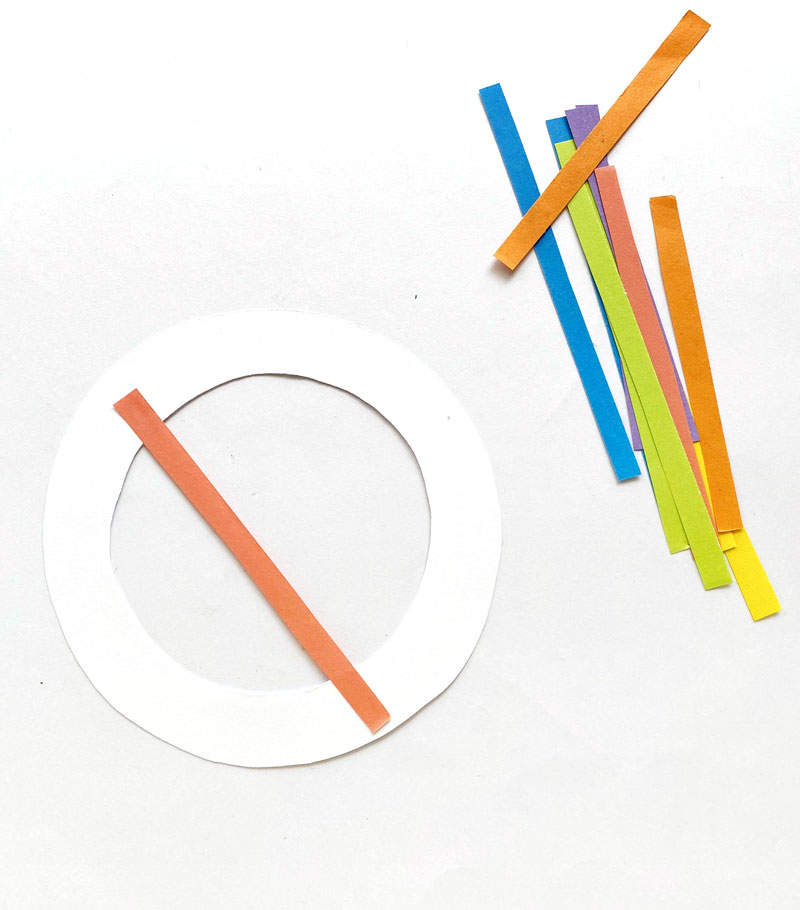
12: Glue each paper strip across the middle of the base at various angles, letting them overlap each other.
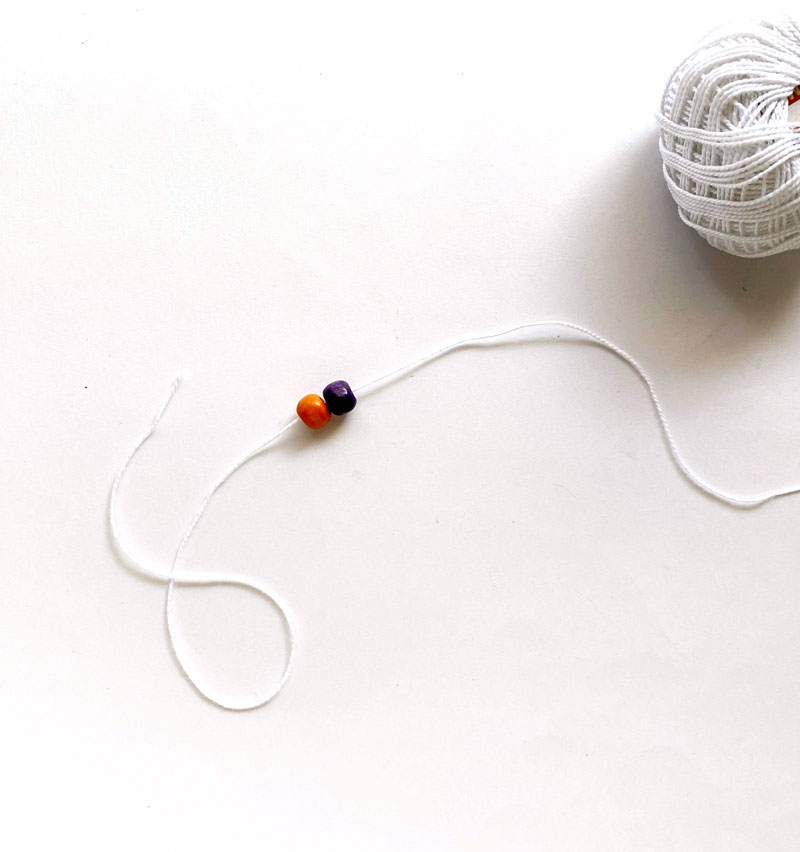
13: Gather your beads and thread. String the beads through the thread. Tie a knot at the end so the beads stay in place..
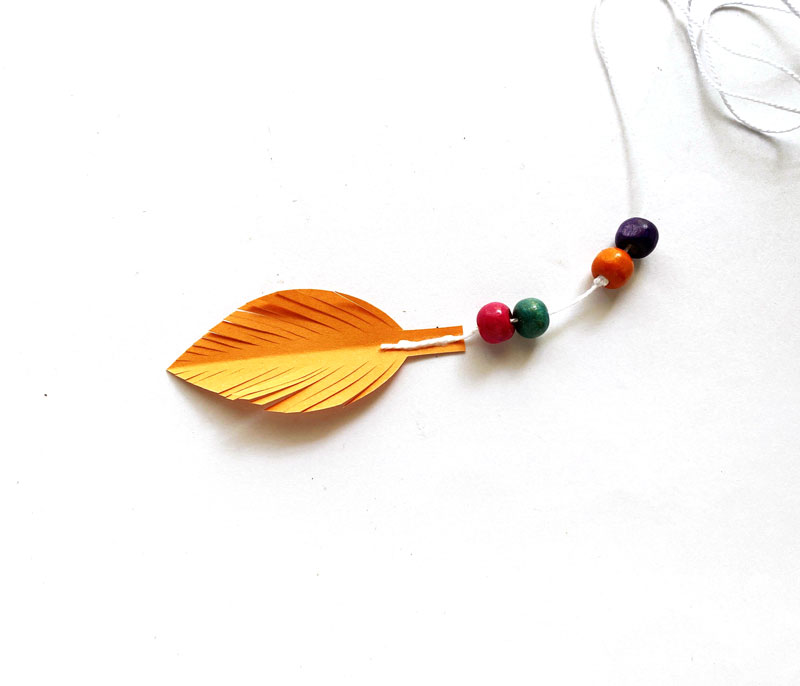
14: Glue a paper feather to the end of the beaded thread.
15: Repeat the process to glue the rest of your feathers to beaded string.

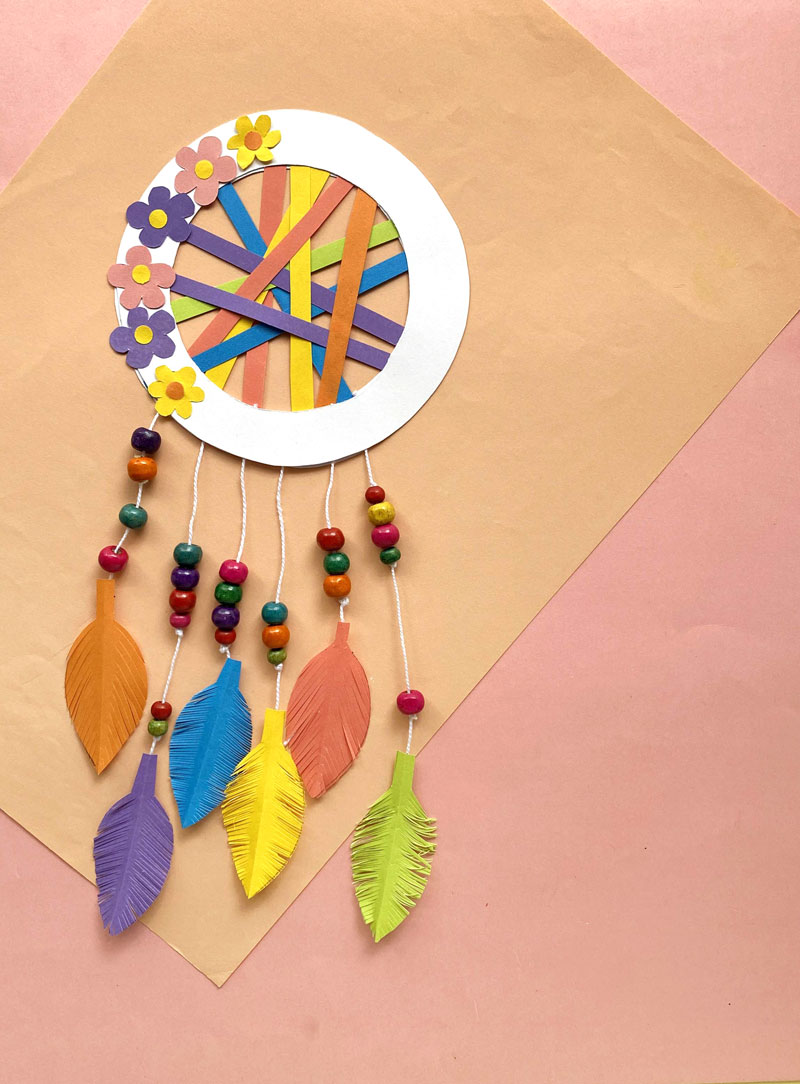
16: Glue the loose end of the decorated strings to the the base that you prepared.
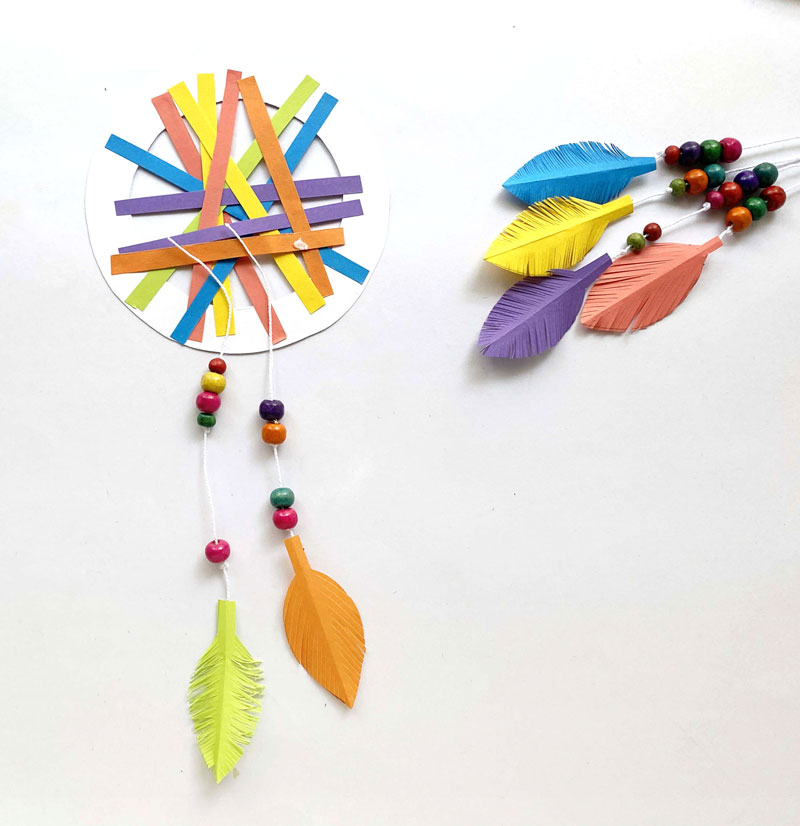
17: Take the second ring and glue it over the first ring.
18: If you’d like, cut out the flowers from the templates and glue them onto the base for to decorate it.
Your paper dreamcatcher is complete! Which colors will you make yours and how will you decorate it? Got any variations to add? Comment below!
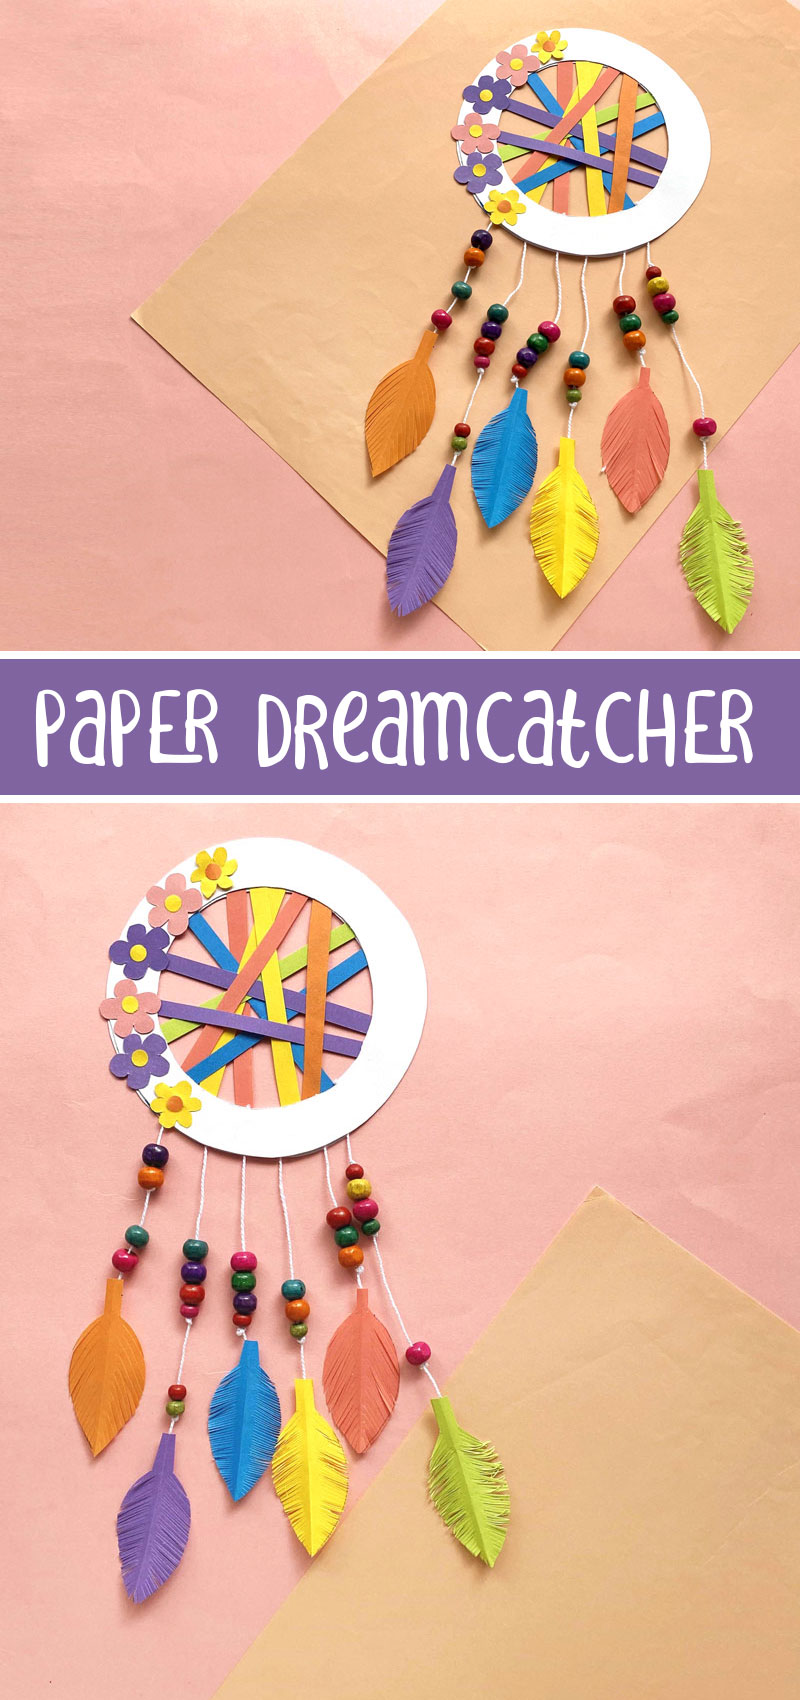
Beads and Feathers Paper Dream Catcher
Materials
- Cardstock
- Craft Paper
- Scissors
- Tacky Glue
- Cotton Twine
- Craft Beads
- Pencil
- Ruler
Instructions
1: Gather the supplies and print out the PDF template. Cut out a square piece of colored craft paper.
2: Fold the paper in half.
3: Cut the paper using the feather template.
4: Make thin diagonal cuts on the curved side of the paper to simulate feathers. Start cutting from the opened end of the fold, but don't cut all the way to the centerfold.
5: Keep making thin diagonal cuts all the way to the top of the feather.
6: Open the fold.
7: Repeat the process until you have several feathers.
8: Take white cardstock paper.
9: Cut out the circle bases for the dream catcher from the cardstock paper.
10: Use the craft paper to cut out paper strips in a variety of colors.
11: Glue the paper strips to each side of the circular base, so that it crosses over the empty middle like a bridge.
12: Glue each paper strip across the middle of the base at various angles, letting them overlap each other.
13: Gather your beads and thread. String the beads through the thread. Tie a knot at the end so the beads stay in place.
14: Glue a paper feather to the end of the beaded thread.
15: Repeat the process to glue the rest of your feathers to beaded string.
16: Glue the unfeathered end of the decorated strings to the the base that you prepared.
17: Take the second base and glue it over the first base.
18: Cut out the flowers from the templates and glue them onto the base for to decorate it.