
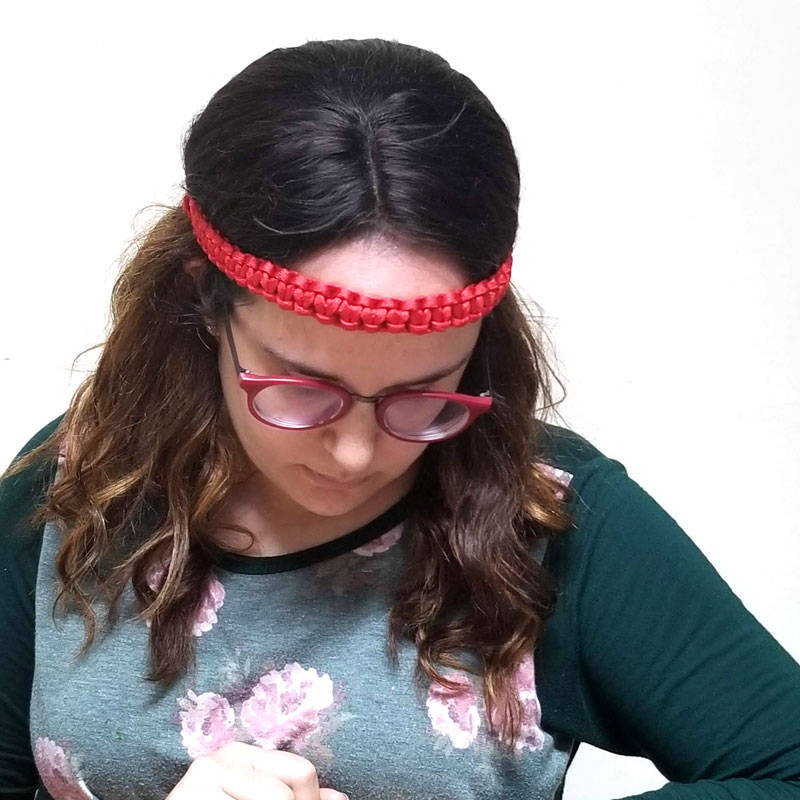
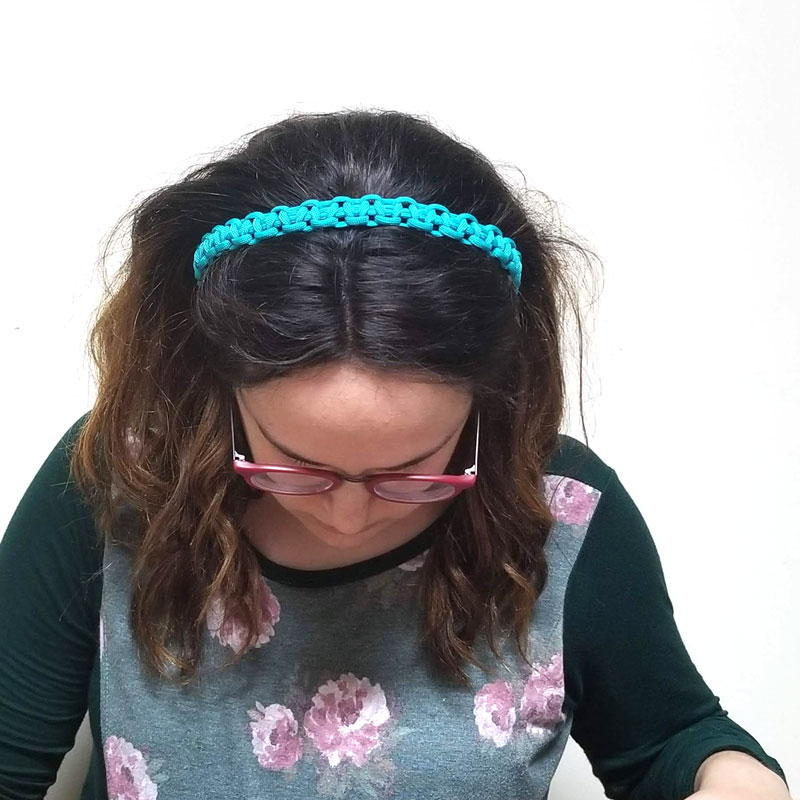
Paracord Headbands – Learn the Cobra Knot!
Make these simple paracord headbands – a perfect project for those looking to get started with paracord crafts, or just for fun! Check out these cool crafts for teens and then scroll down to add this one to your list! Disclosure: this post contains commissioned images and links.
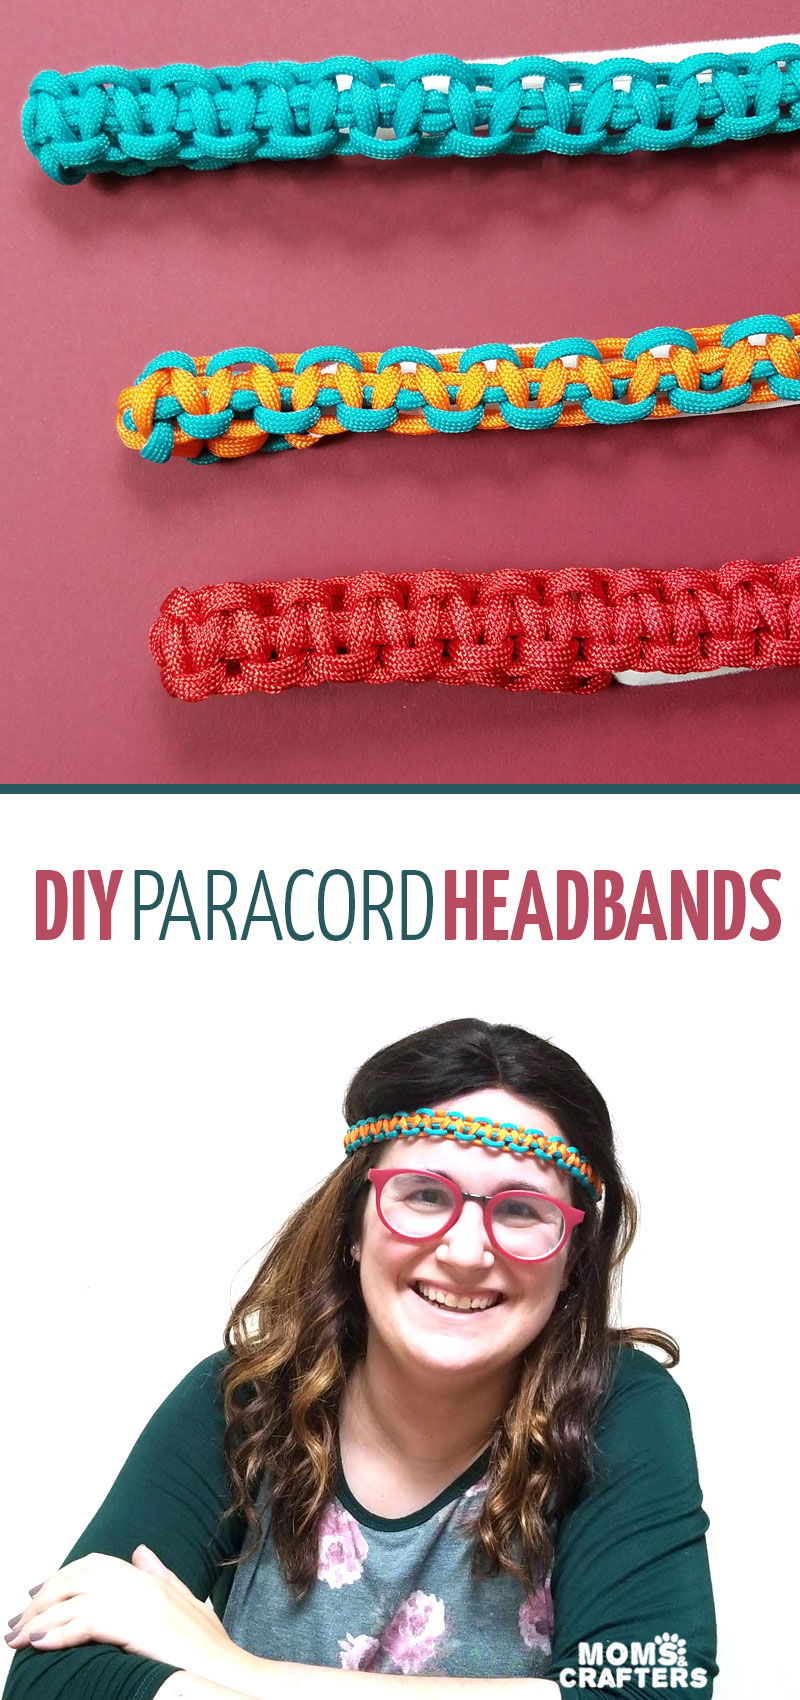
The unique thing about paracord crafts is that its fans come in every shape and form. It’s viewed as a “rugged” craft usually, and when I was looking for ideas personally to learn, I mostly found survival-focused ideas, bracelets, complex stitches.
I just loved the cool colors mixed with the rope-like look of paracord. The sturdiness of it is a nice bonus.
So I decided to some up with something that works for those of us who just want to make something pretty using paracord. I picked up a few colors and created these paracord headbands.
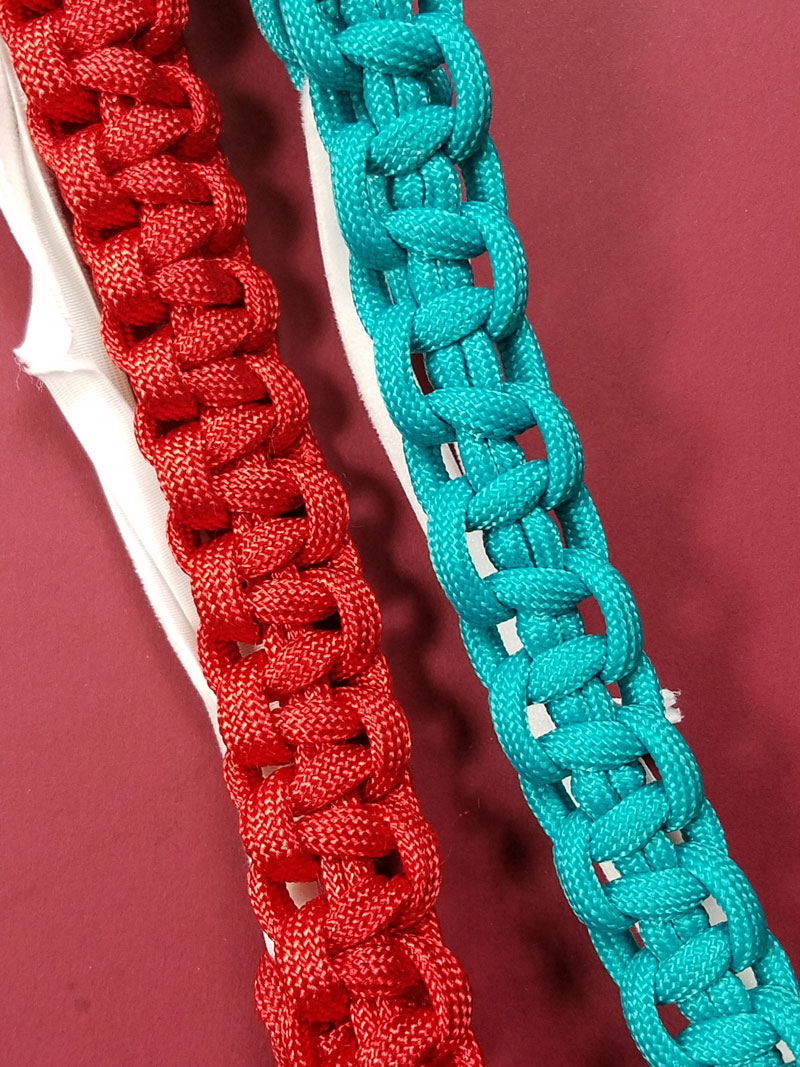
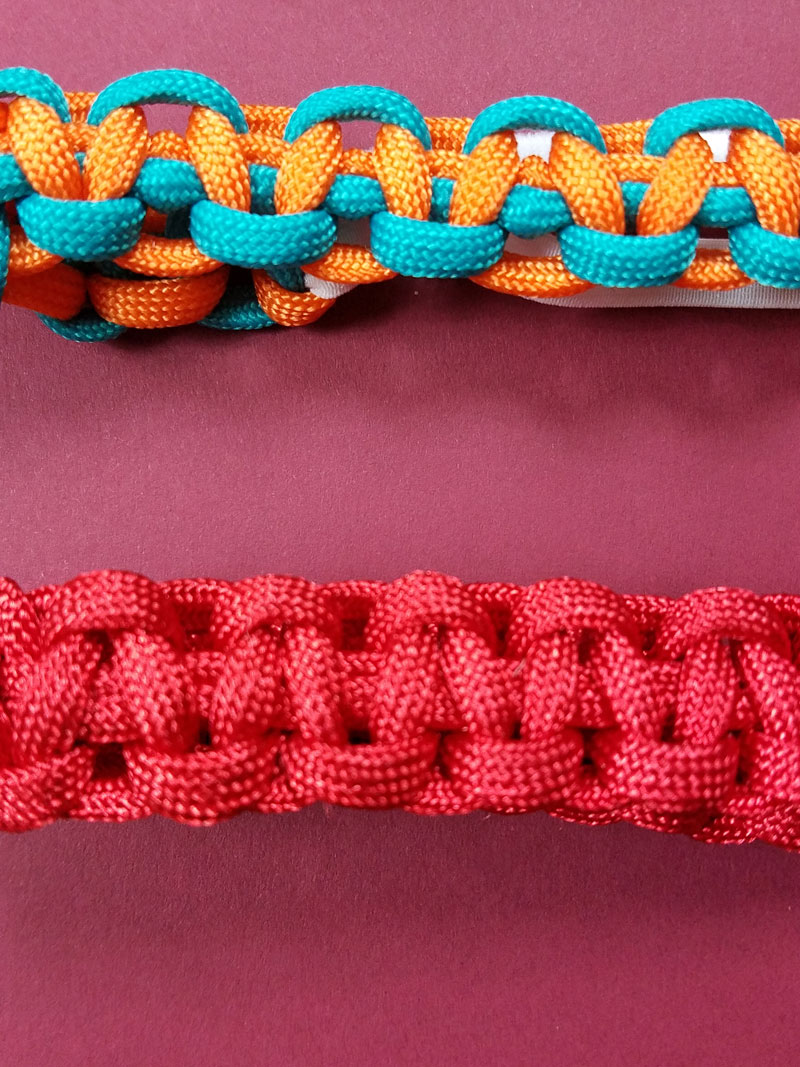
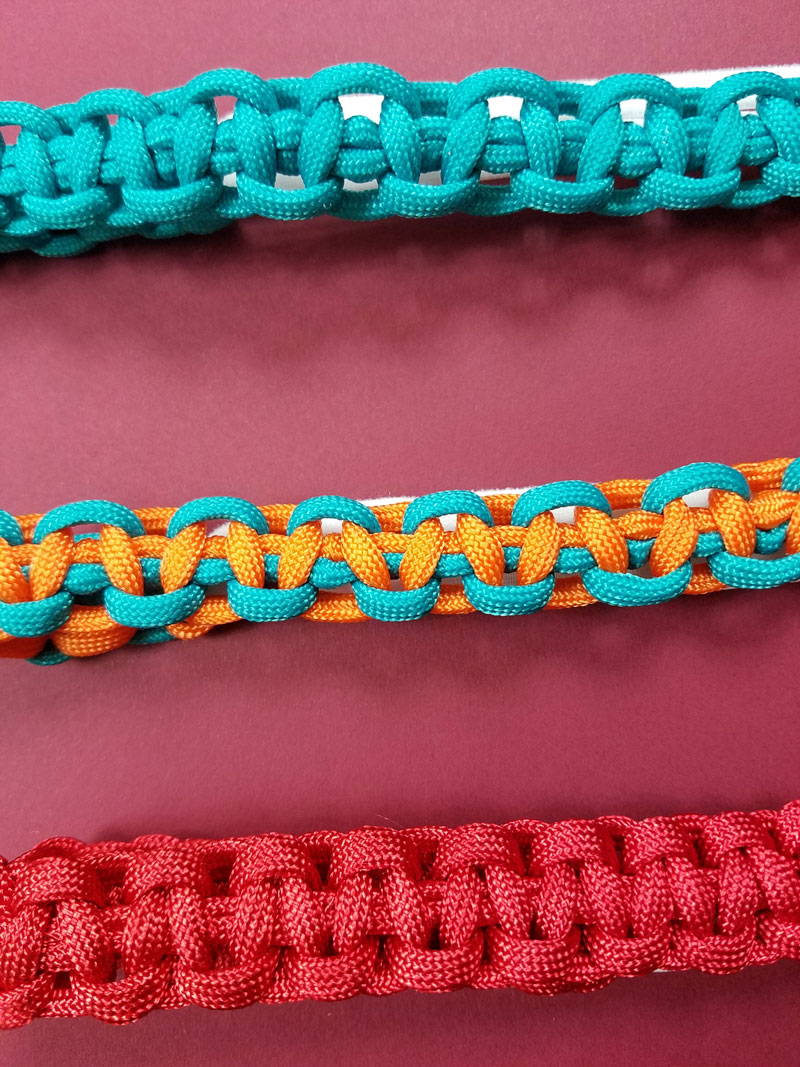
To make this, I used the very basic Cobra knot. You can use this knot to make anything – bracelets, dog collars, zipper pulls, and of course, paracord headbands.
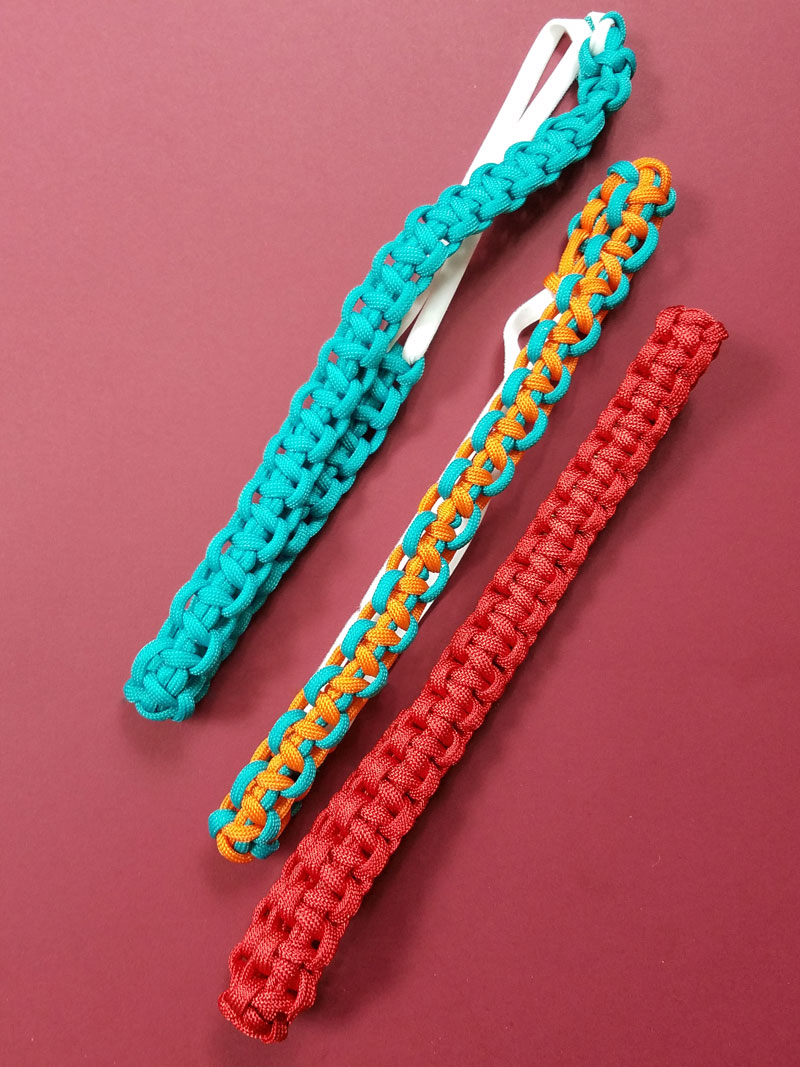

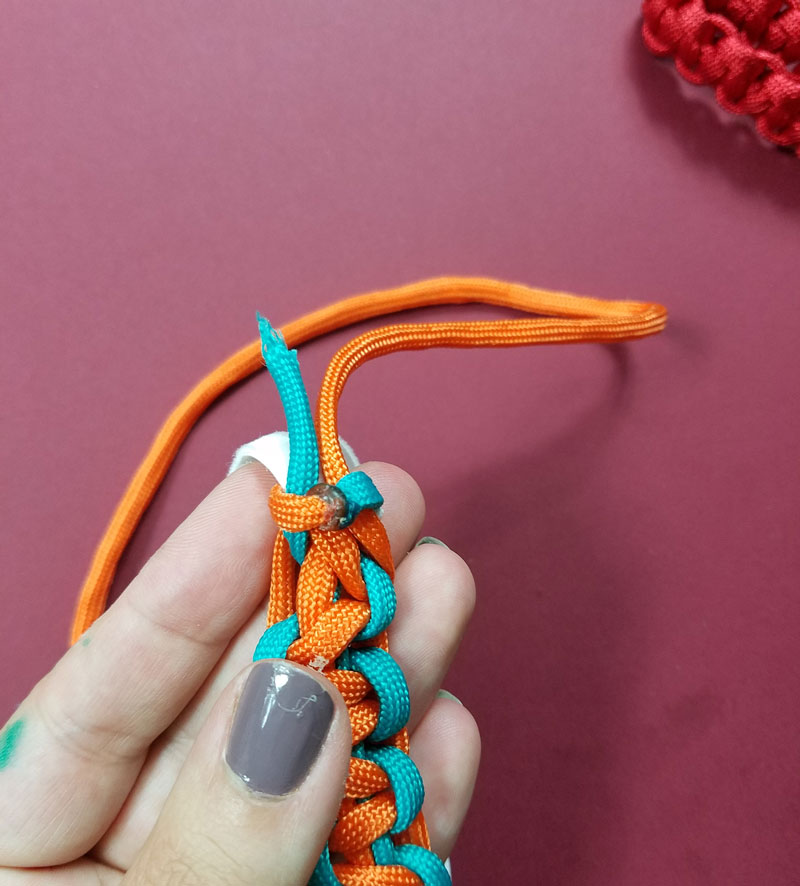
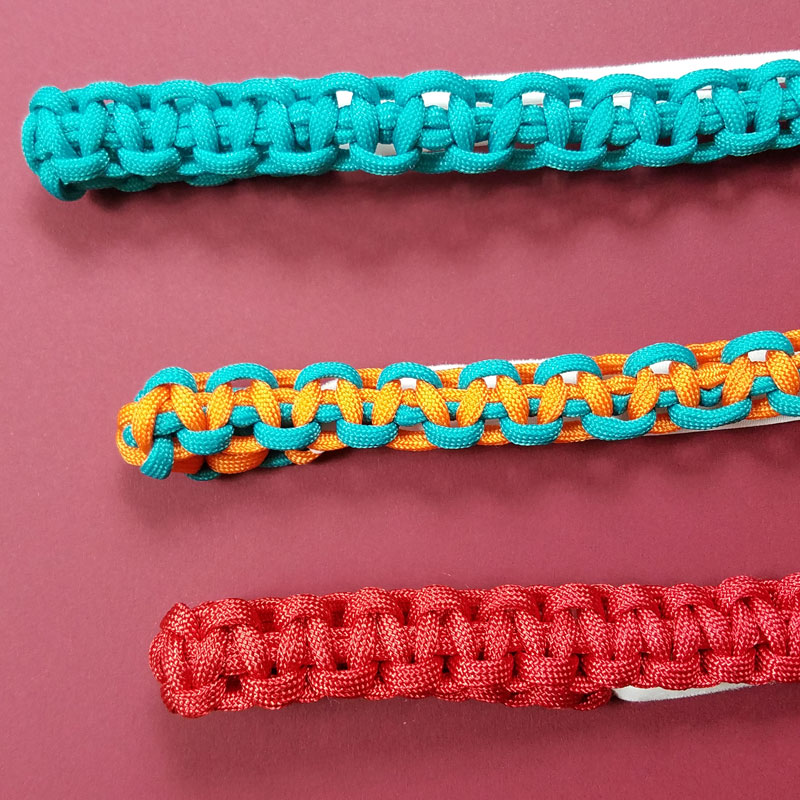
I also made one using two tones. To do this, you do need to melt two colors together using a lighter – so don’t allow kids to do this and exercise caution. I’d recommend doing this over a sink or glass of water that you can dunk it into if needed. My inner cord caught fire when melting my two colors. I was able to put it right about – but you do need to be prepared for this.
Most people would melt the ends, but I was nervous to put my flame too close to the elastic that I used. Instead, I glued my final knots in place to hold it shut.
Anyway, I do feel like a little girl wearing these paracord headbands, but they’re also kind of cute! I’ll probably hand them down to my nieces now that I created the tutorial.
What you need to make Paracord headbands:
- Paracord – each skein I used was 18 feet. I used more than half when I loosened it. If you want to make it tighter, account for about a skein per headband.
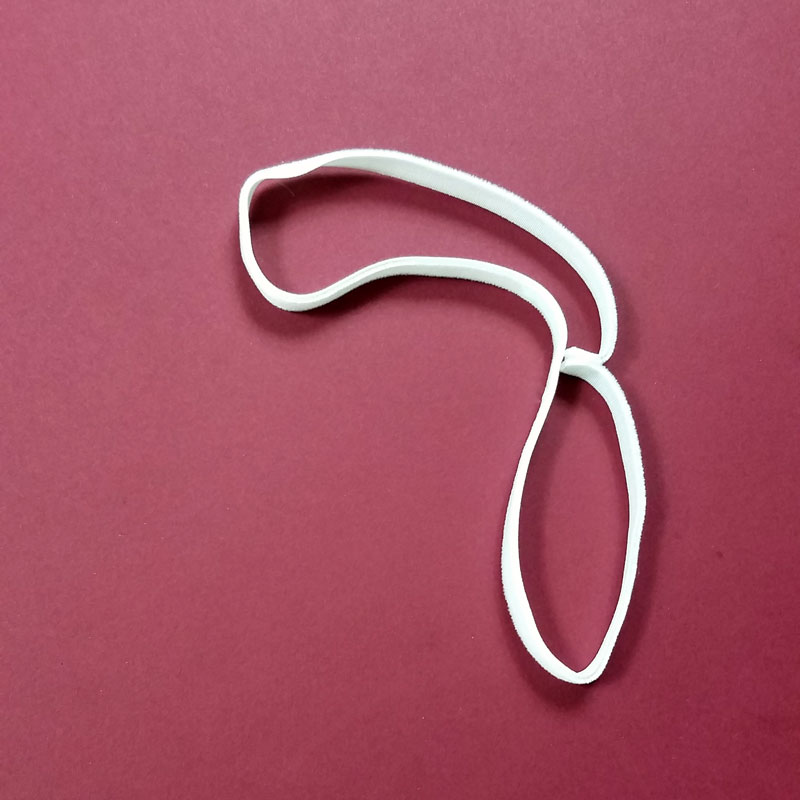
- Elastic – either about 8 inches, or you can use a large hair elastic with lots of stretch.
- Scissors
- Glue (I used E6000)
How to make Paracord headbands:
Watch the video below if you like to learn that way, or scroll down for step-by-step instructions! You can see the slowed down, fully captioned video on my IGTV.
1. If you’re working with an elastic strip, create a loop by gluing or sewing it shut.
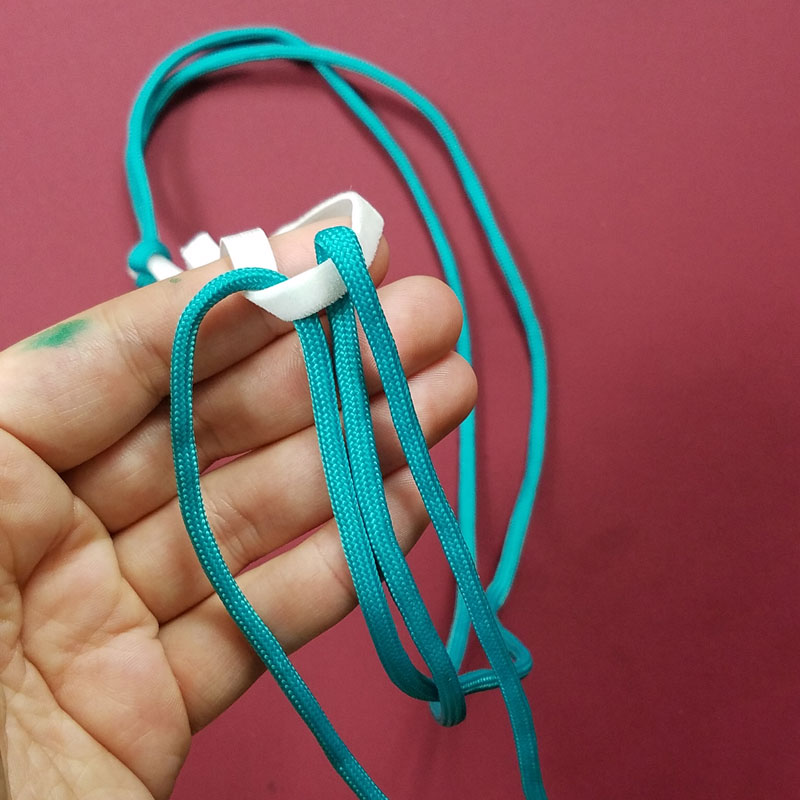
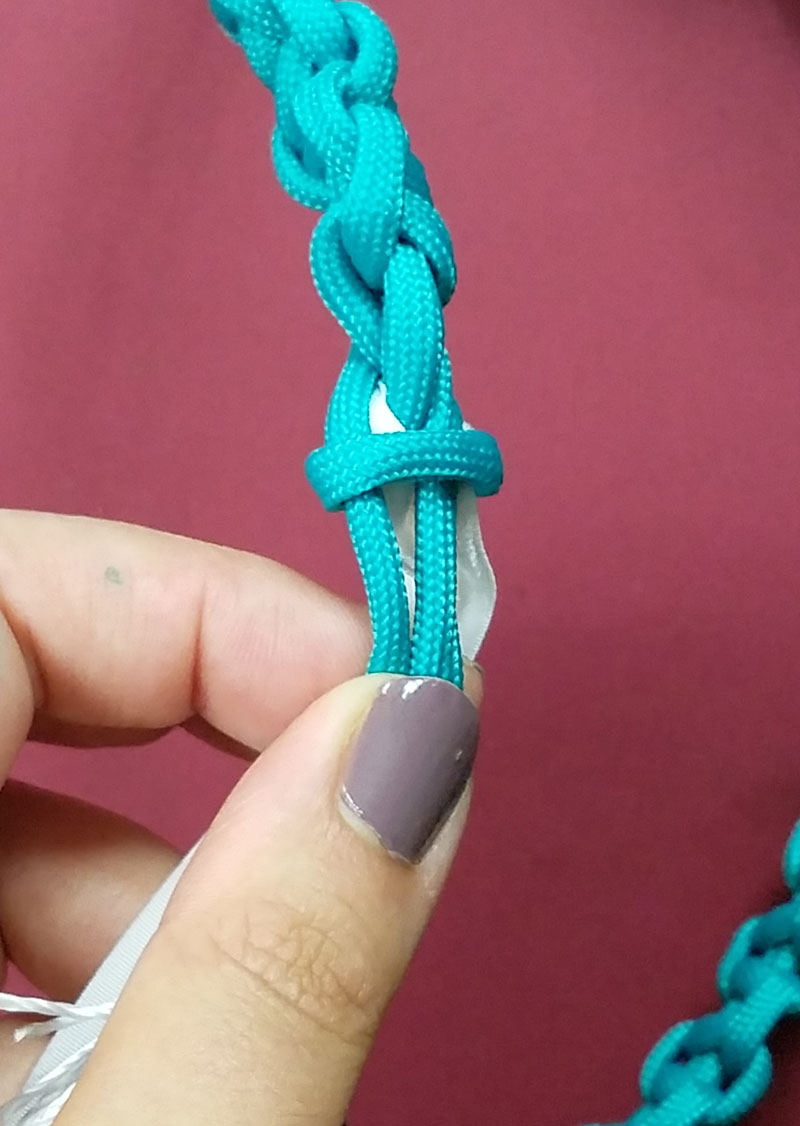
2. Fold your paracord in half. Place the folded part of the paracord through the elastic loop.
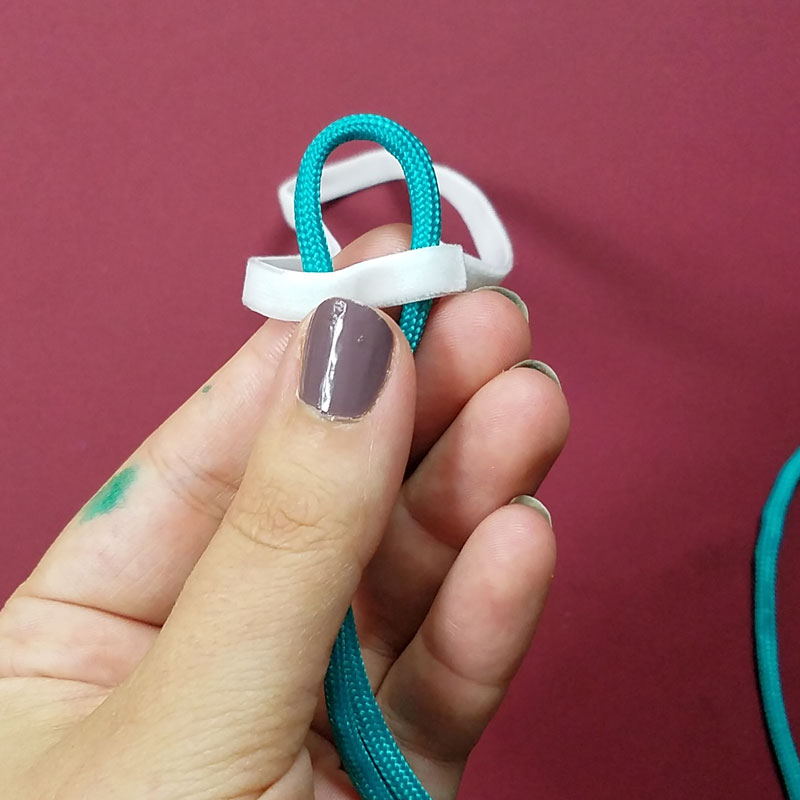
3. Bring the tips at the other end of your paracord up through the folded end.
Pull it tight so that your paracord is folded in half and secure around your elastic.
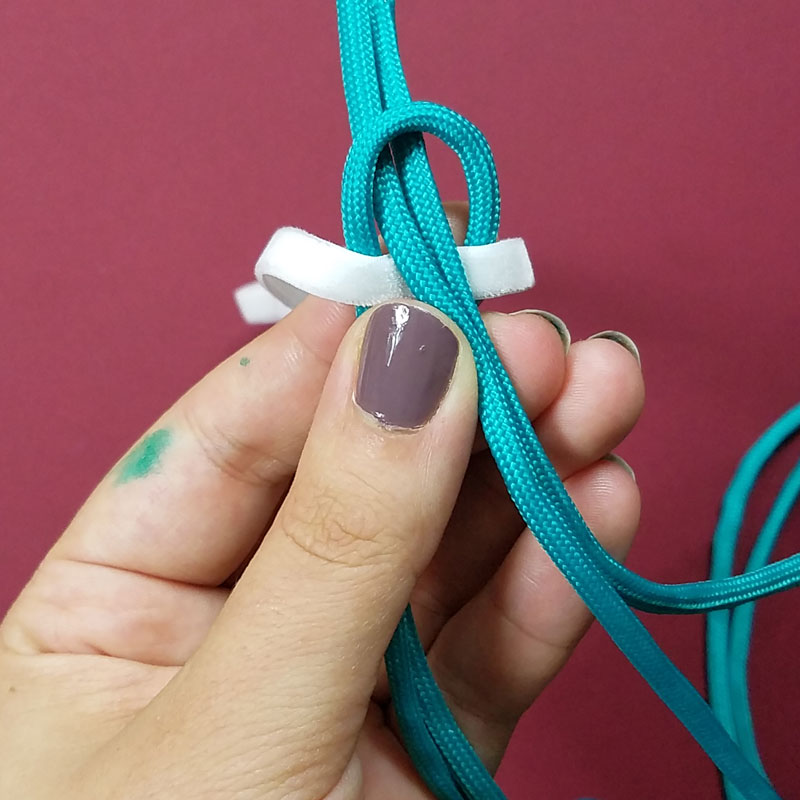
4. Measure how large you want your paracord headbands to be. Loop the paracord through the other end of the elastic, sizing your headband.
5. Fold down the two sides of your paracord so that they are to the right and the left of the center strands that formed your headband circle in step 4.
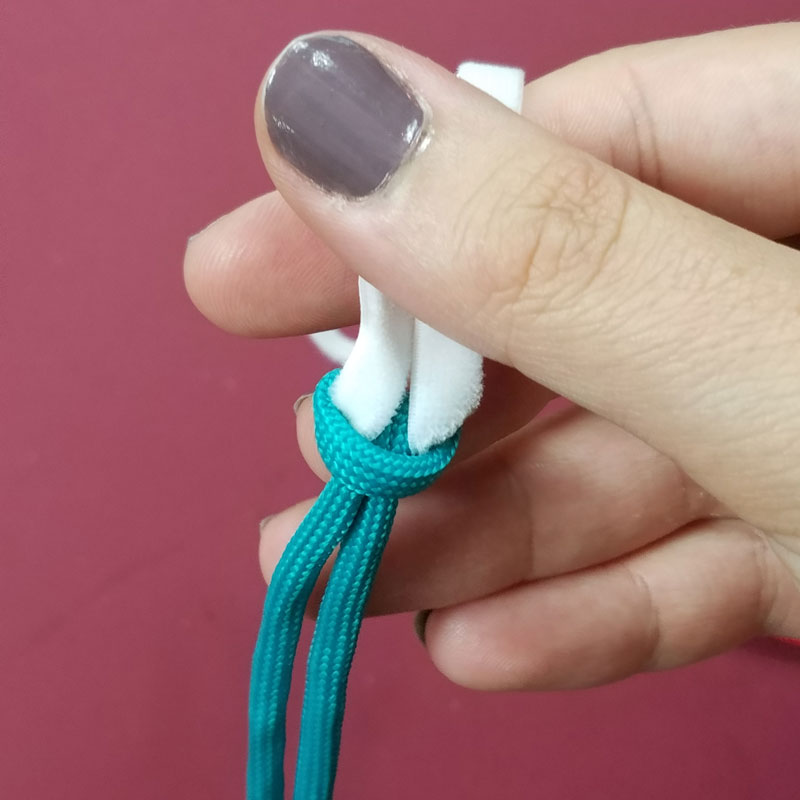
6. Time to tie your first knot! (note: in the photo you see it with one knot already secured – ignore that fact, the steps are the same!) Start with whichever side you feel comfortable starting with. For clarity, I’m going to teach you how to do this using the right strand first. Take the right strand and form a C, crossing it in over the two middle strands.
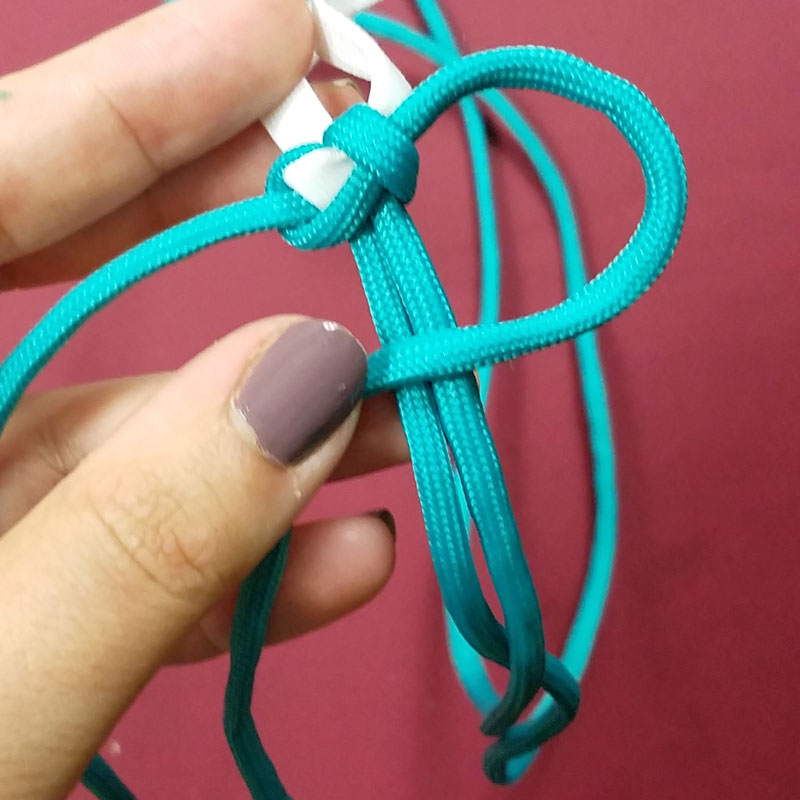
7. Take your left strand and place it on top of the right.
8. Pull it behind the center two.
9. And then thread it through the backwards C that you formed in step 6.
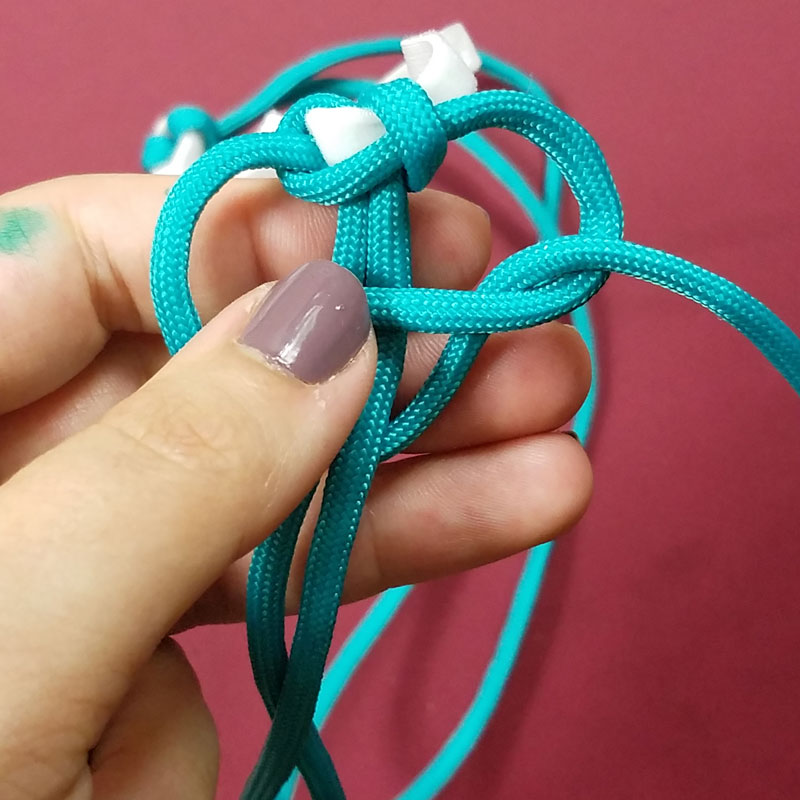
Pull it tight and then repeat in the reverse! Take the left strand and form a C. Place the right strand over the bottom horizontal line of the C, behind the center strands, and through the curve of the C from back to front. Pull tight. You’ll see this pattern forming after a few knots:
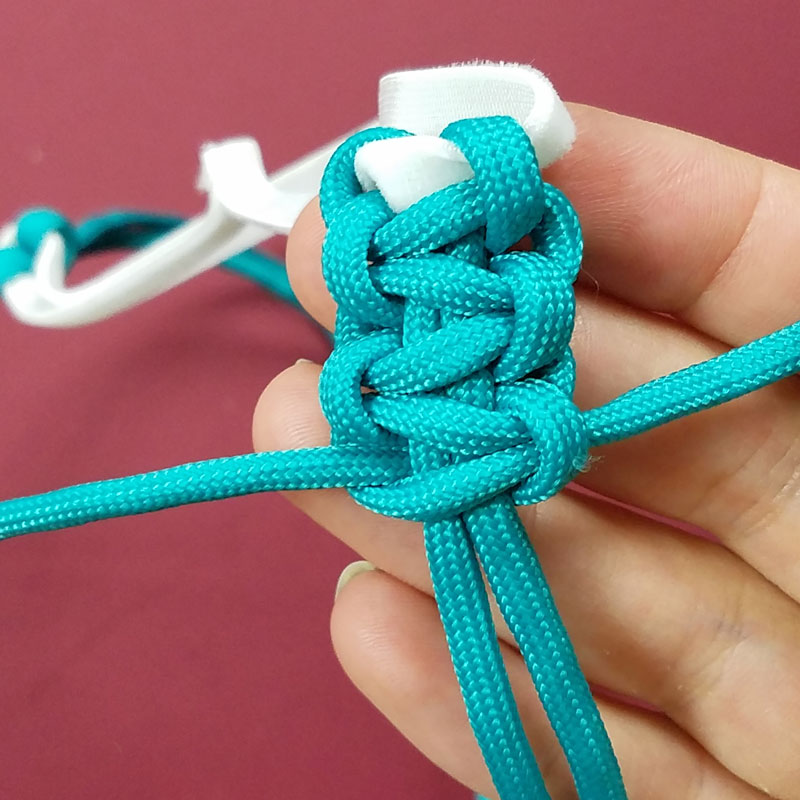
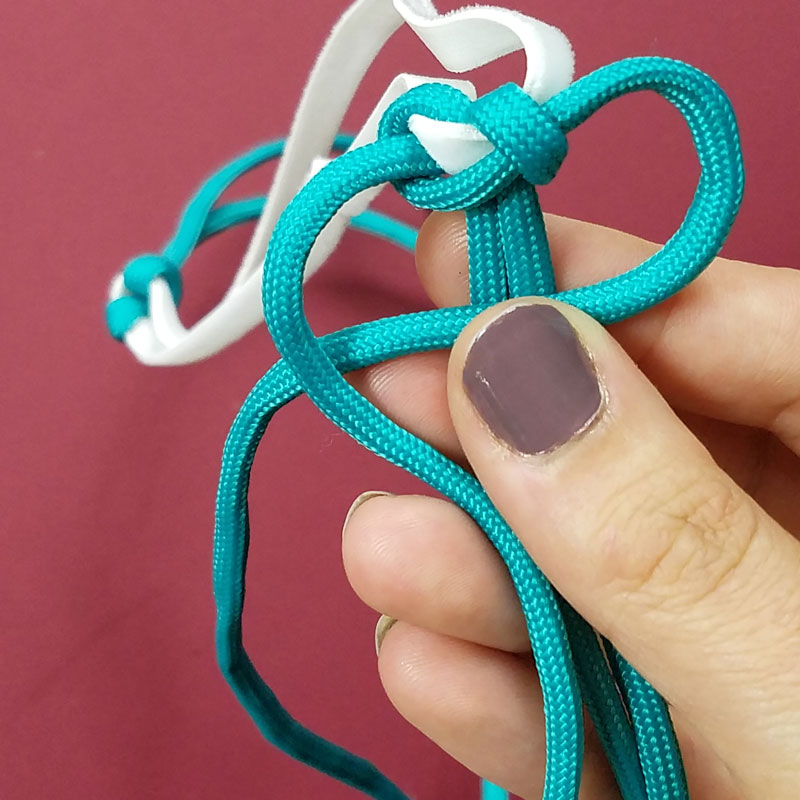
10. Keep on knotting. You’ll see that you can keep your pattern tight, or pull it once you’ve done a lot so that the holes show. The “proper” way would be to keep it tight, but because I didn’t want my paracord headbands to be too stiff, I pulled mine open so that it’s looser. Do this by gripping the elastic with one hand, and gently nudging the knots down starting from your first knots and ending with your most recent knots.
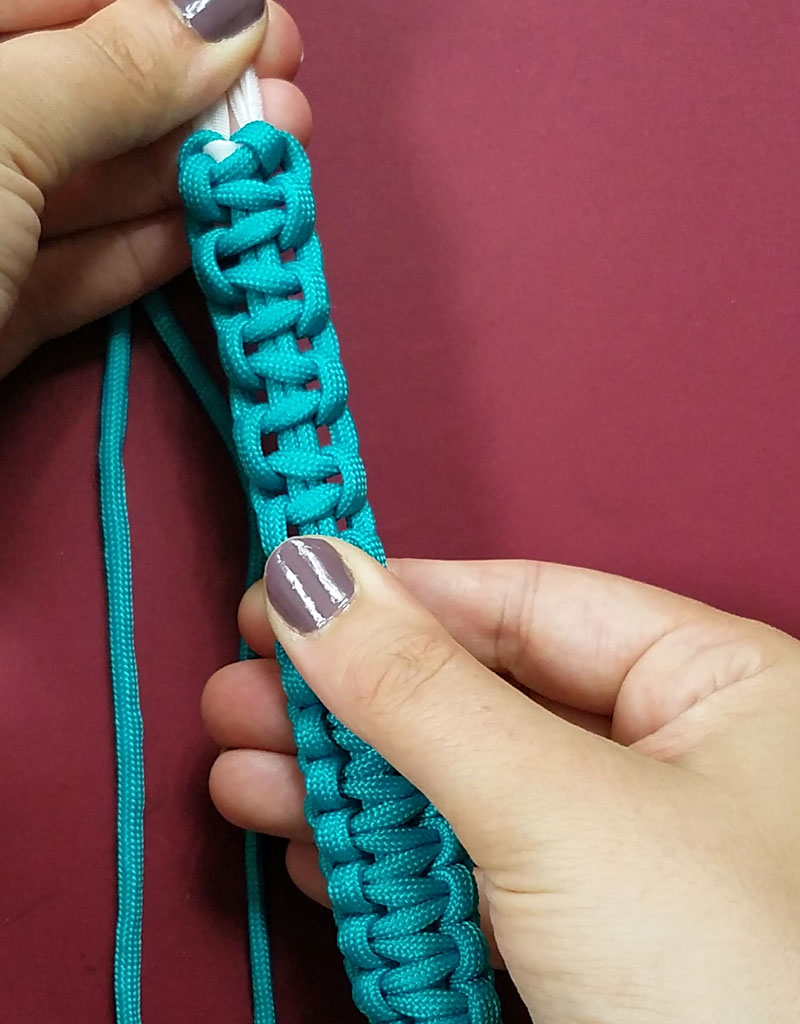
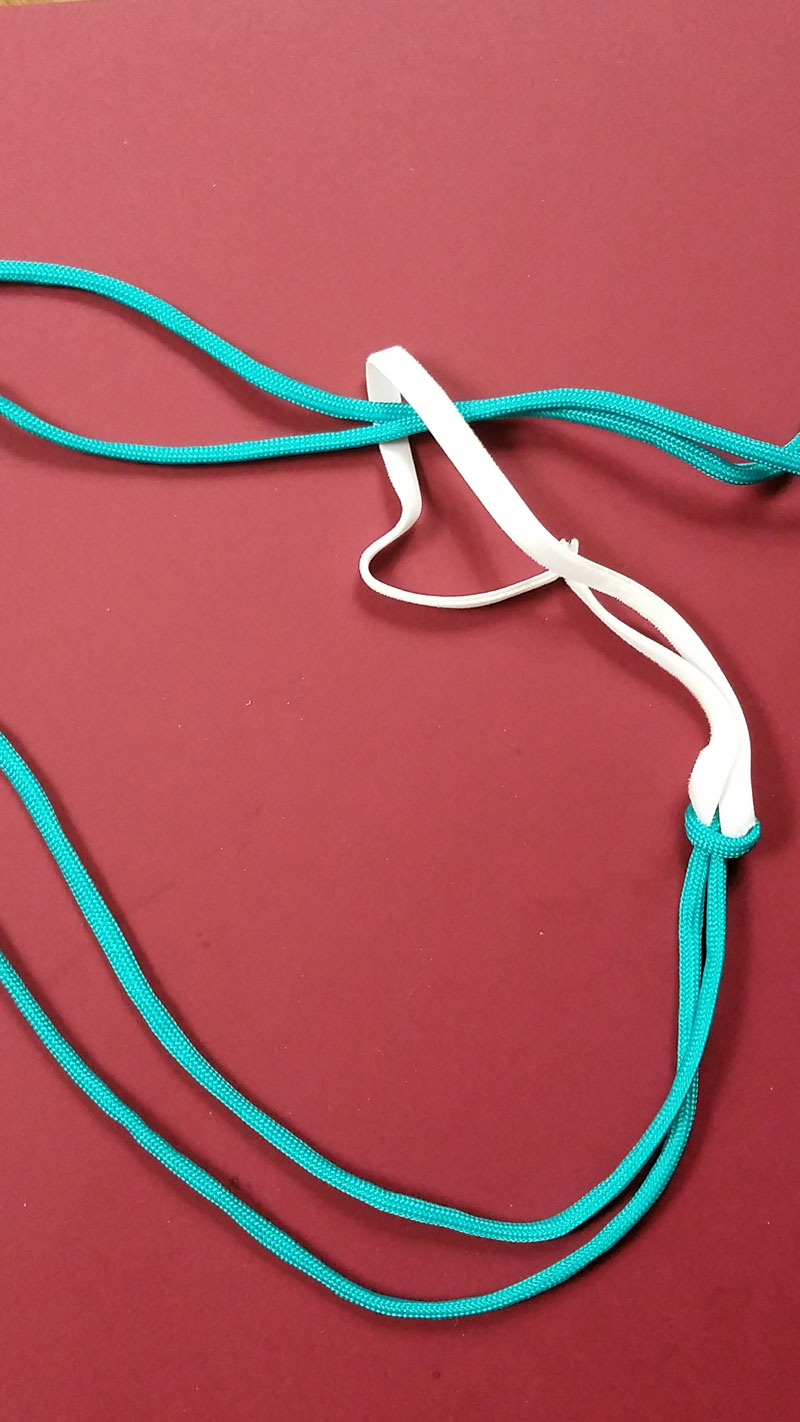
Continue knotting until you reach the end.
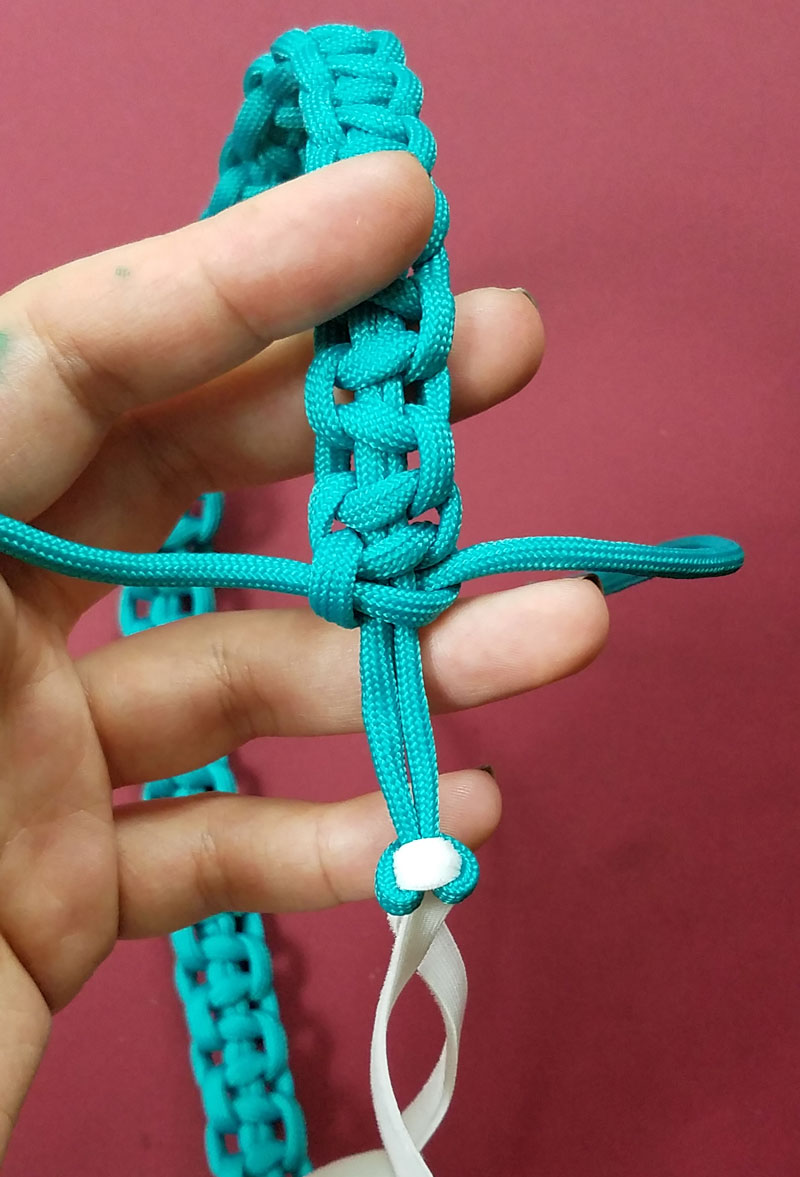
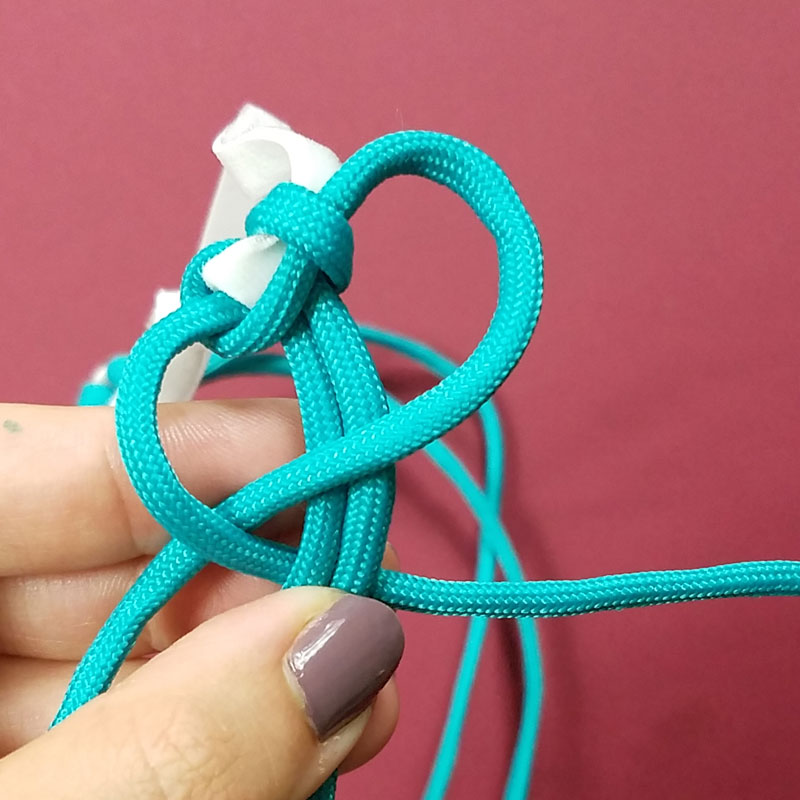
11. Since I wanted my knots to hold in place and not slide back up, I pulled them through the loop that I made in step 2 when first connecting the paracord to the elastic. Glue it in place. If you’re nervous leaving it as is, you can add an extra knot or two before gluing. When your glue is dry, trim your cords tight.
If you want to try connecting two colors at your own risk, hold the two strands together in one hand and a lighter in the other. Melt it using the lighter and then quickly connect the two sides, holding them together as pictured. Don’t touch the melted part until it has completely cooled – it gets HOT. Only grown ups should attempt this.

Try to hide your melted connected part in the finished product, if possible.

What are your favorite paracord crafts? Have you tried making your own paracord headbands? Comment below!
If you loved making your own paracord headbands, try these cool fashion crafts too:


I’m curious about the name “cobra knot”. I mean, I’ve done macrame over the years, and this was always just called a square knot. Done around core cords, but yeah – lark’s head knot for joining it to the elastic like you did, then square knots.
Could be just in the context of paracord? I learned it as a cobra knot.