
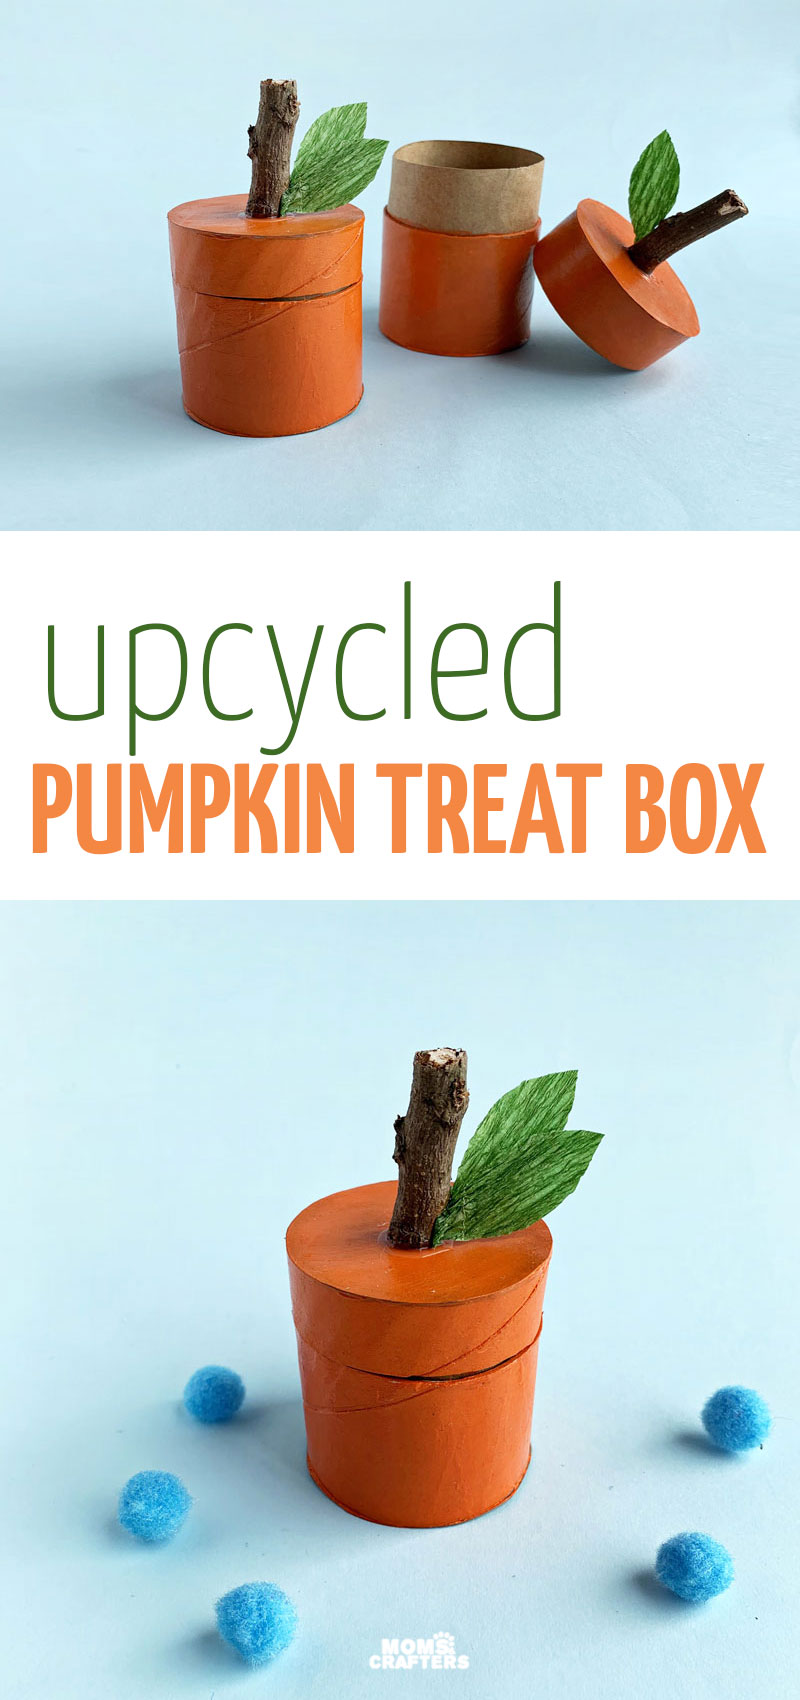
Toilet Paper Roll Pumpkin Box
Learn how to make a DIY recycled toilet paper roll pumpkin box for fall, Thanksgiving, or Halloween – whatever you’d like! If you prefer something scarier, add your own Jack O Lantern features, or try this monster craft invitation instead! This post contains affiliate links.
Toilet paper roll crafts can be quite versatile – more than you might think! A favorite use for cardboard tubes is to store things, as I discovered when I made this DIY pencil pouch a while ago.
These pumpkin boxes are perfect for little treats. Treats in a toilet paper roll, you ask?
Here’s the thing:
- Your treats will only touch the paper insert.
- You can split up a paper towel roll instead of a toilet paper roll
- My favorite trick: I either slide out the roll from the bathroom tissue before I use it OR I re-roll it right around the toilet paper holder. You gotta think like a crafter.
- Or, try the much more durable specially purchased craft tube option. They’re thicker and more durable than recycled ones, and they’re still recyclable.
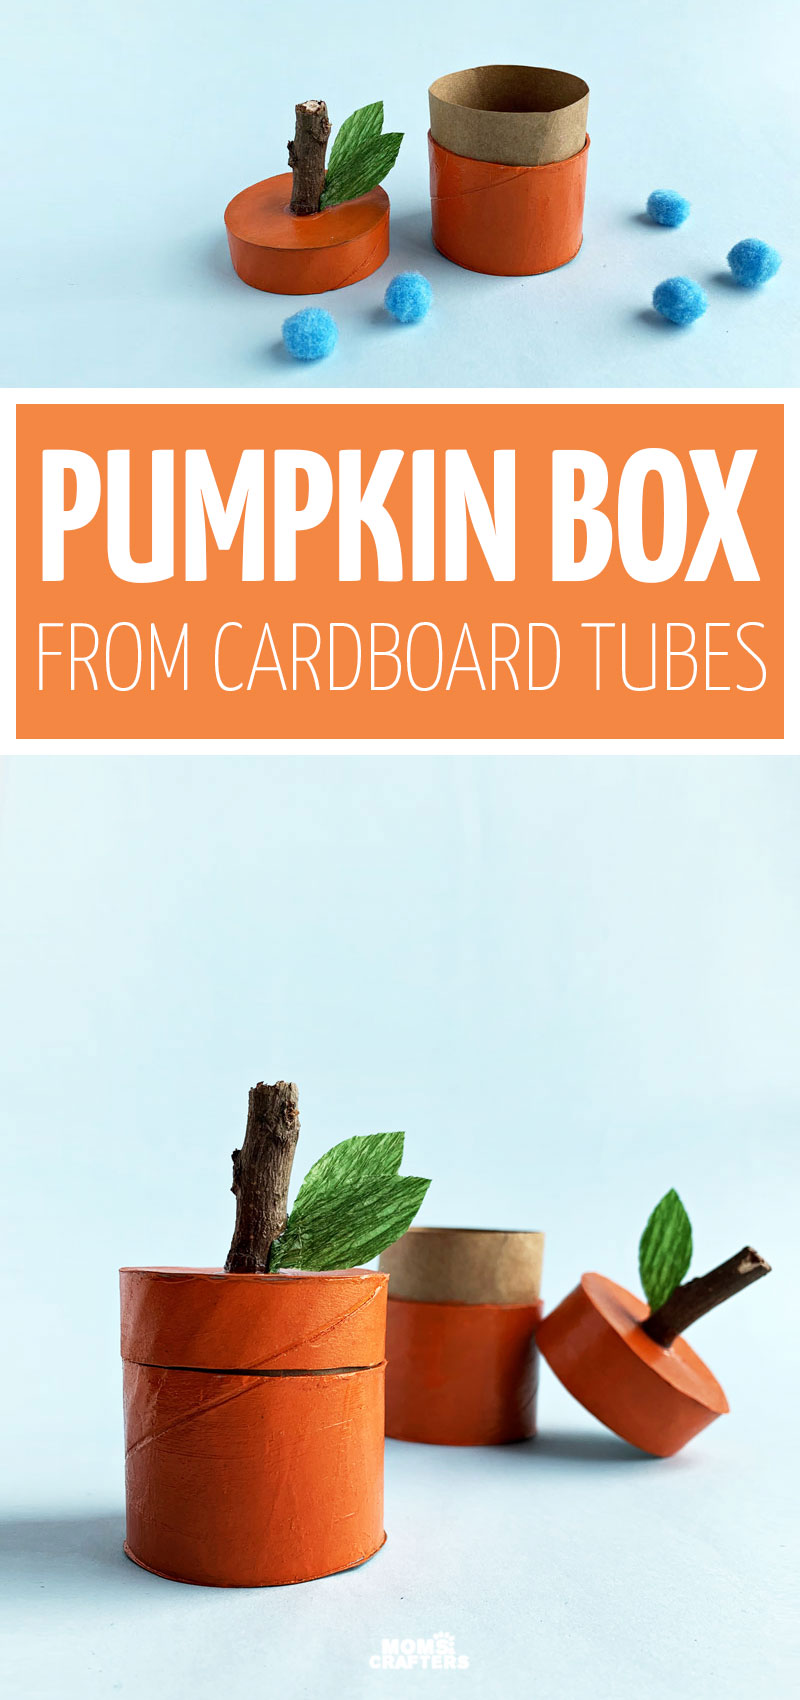
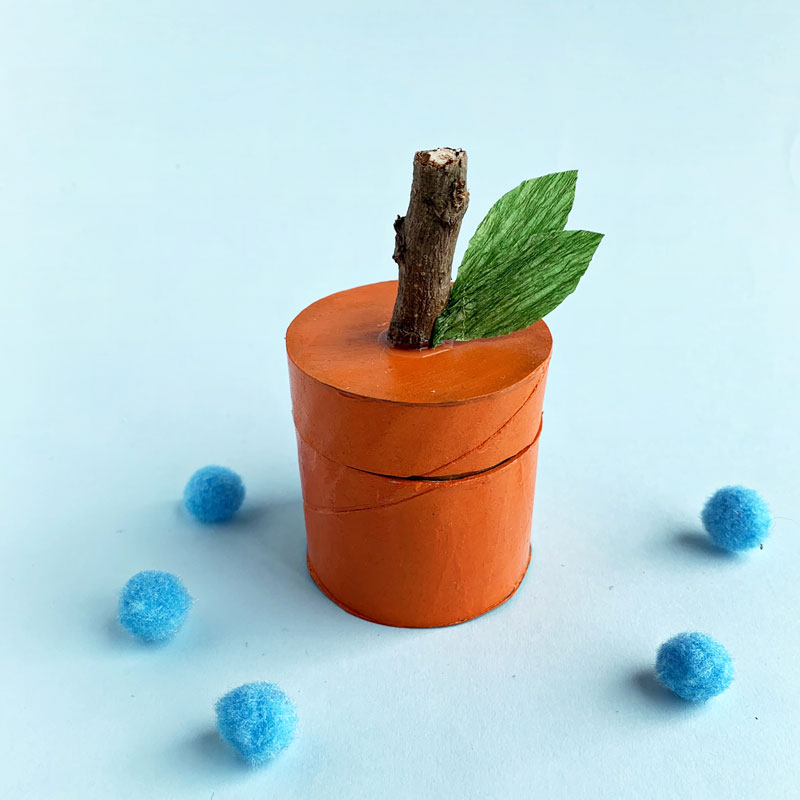
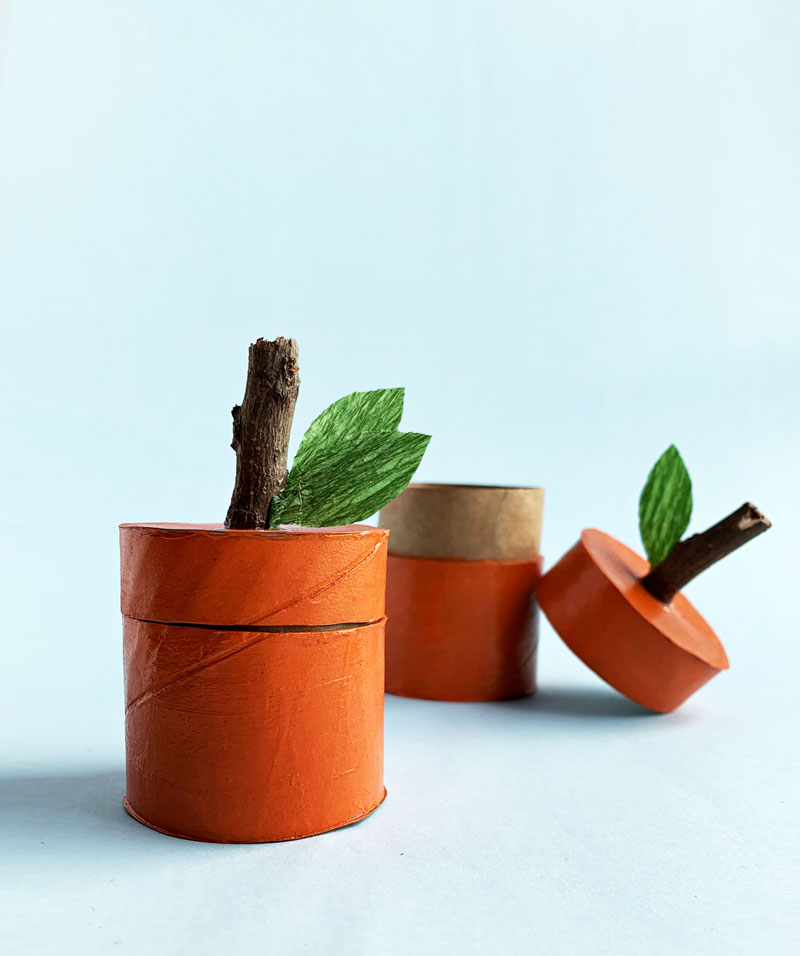
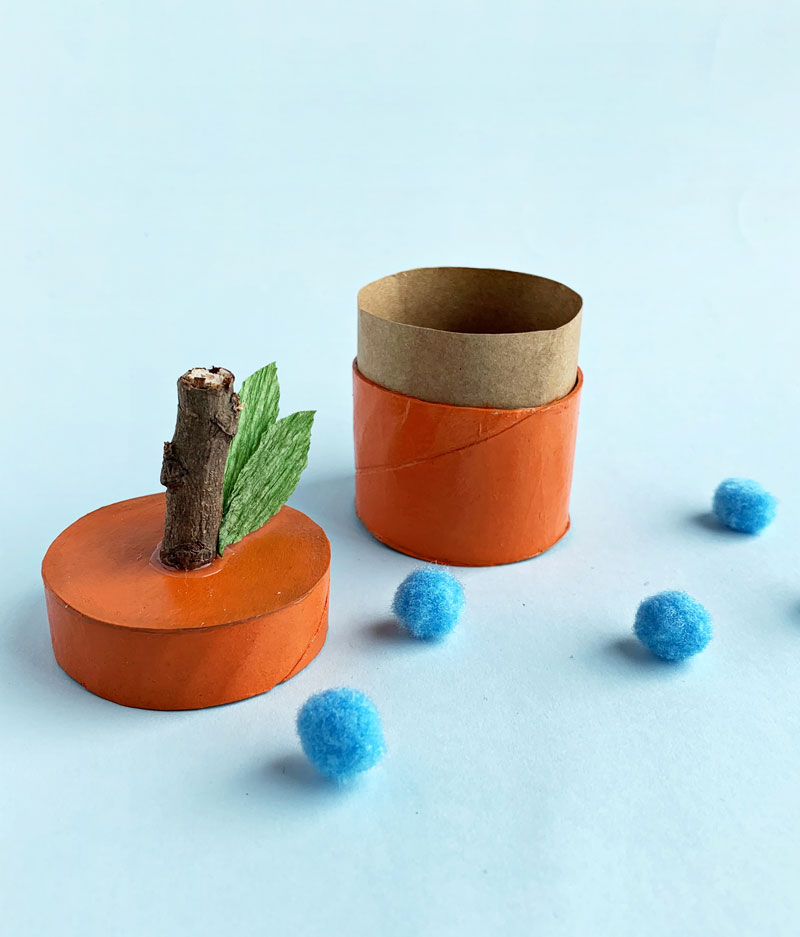
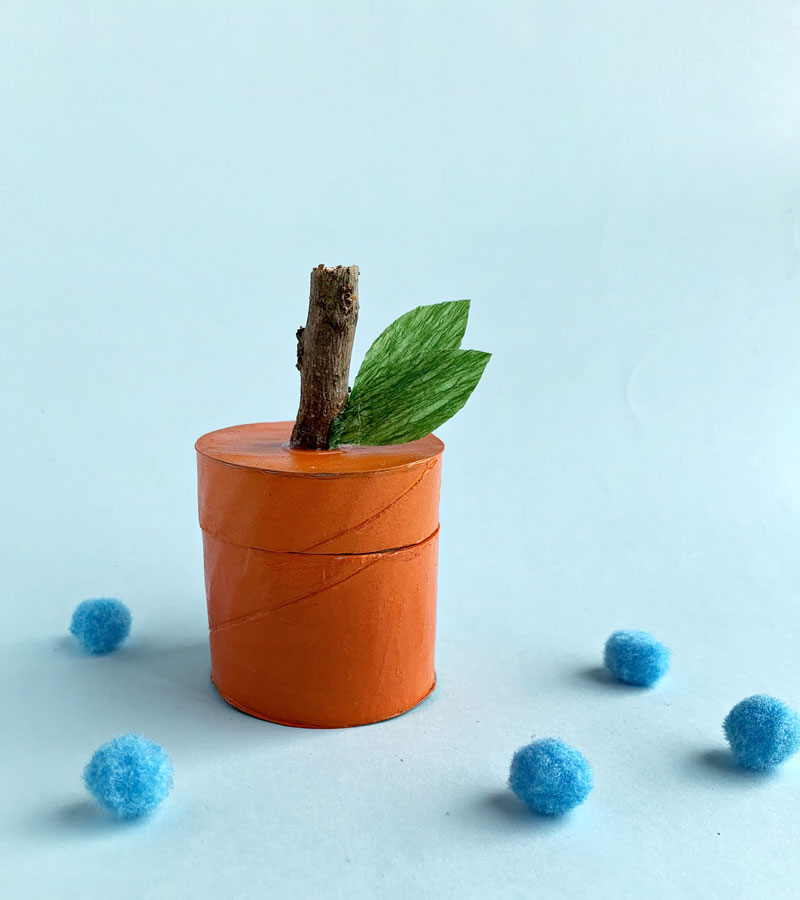
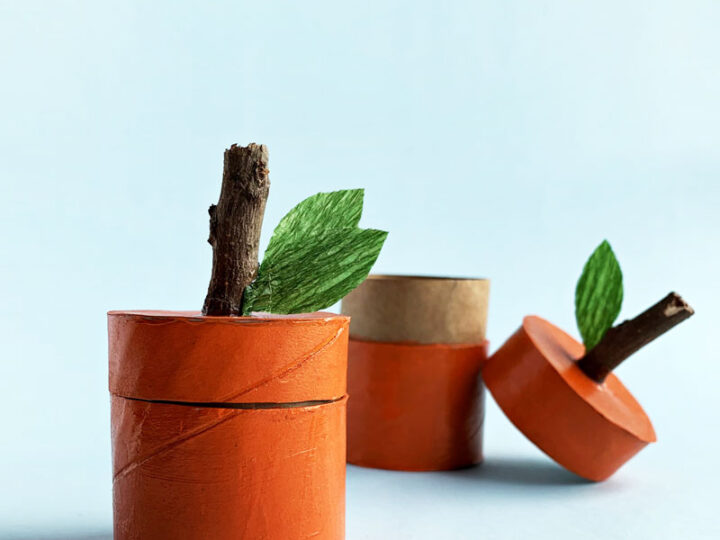
Don’t you just love the natural touches on this toilet paper roll pumpkin box? The crepe paper leaves can be replaced with actual leaves, but crepe paper is a nice, durable touch.

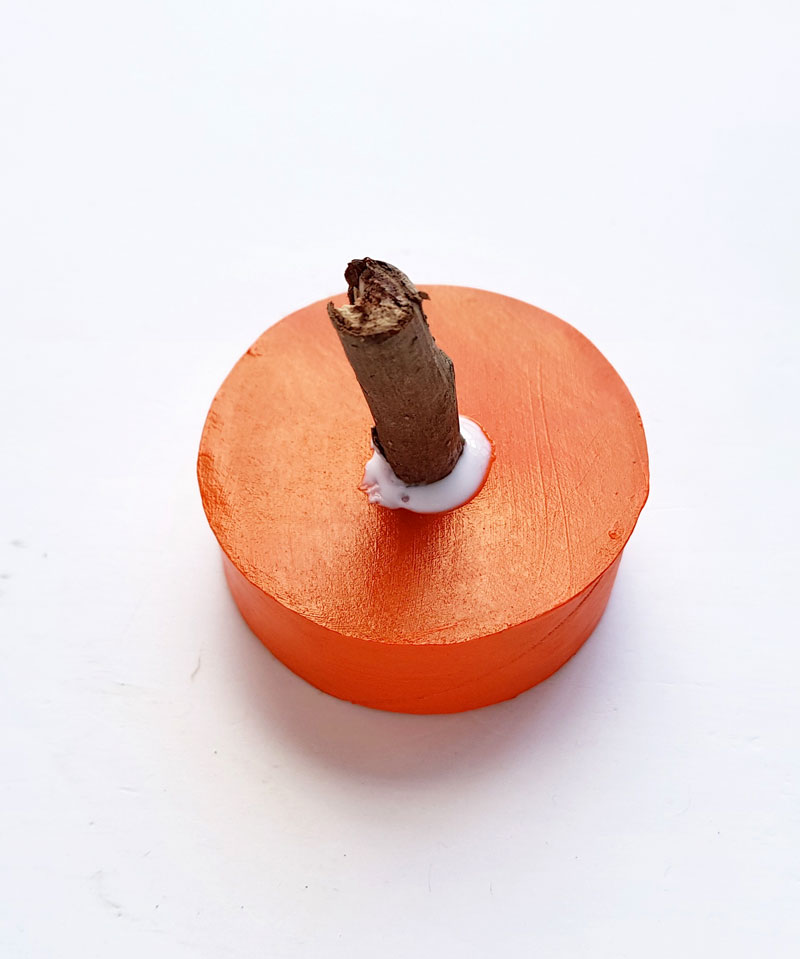
The pumpkin stem is an actual stick. It makes the final craft look so sophisticated and polished – not your kid’s toilet paper roll craft!
Although, kids can actually make this too – it’s that simple!
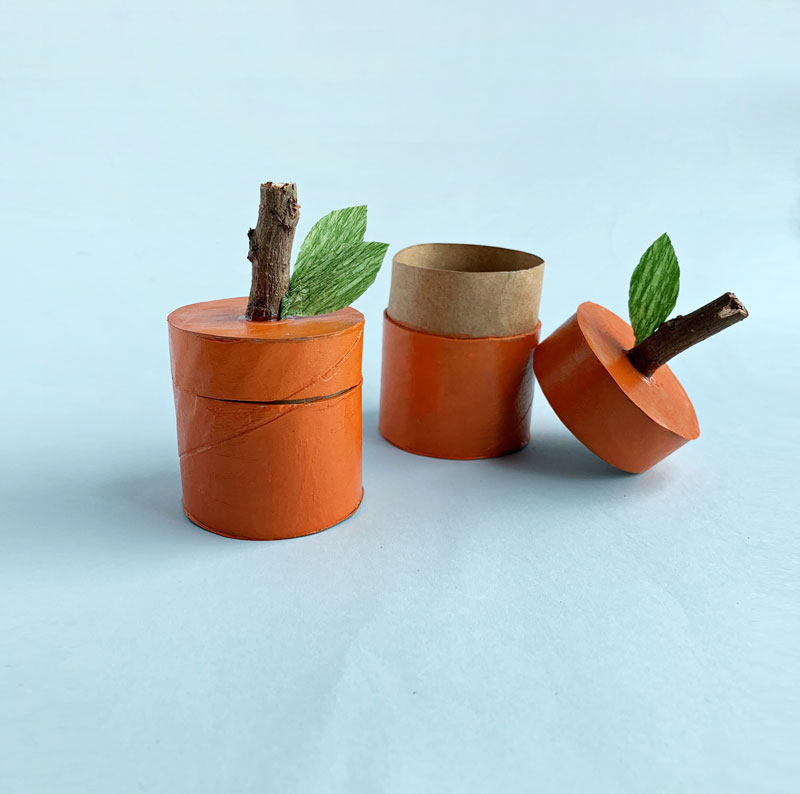
Use these as centerpieces/food holders, small gift boxes, party treats, or even just decorations to hold scented pine cone bits for the fall season!
What you need for this fun fall craft:
- Cardboard tube
- Kraft paper or similar
- Pencil
- Scissors
- Ruler
- X-Acto knife
- Craft glue – I recommend Tacky glue. Grown-ups can use hot glue for the stem.
- Orange Acrylic paint
- Paint brush
- Dry twig
- Optional: green crepe paper
How to make a toilet paper roll pumpkin box:
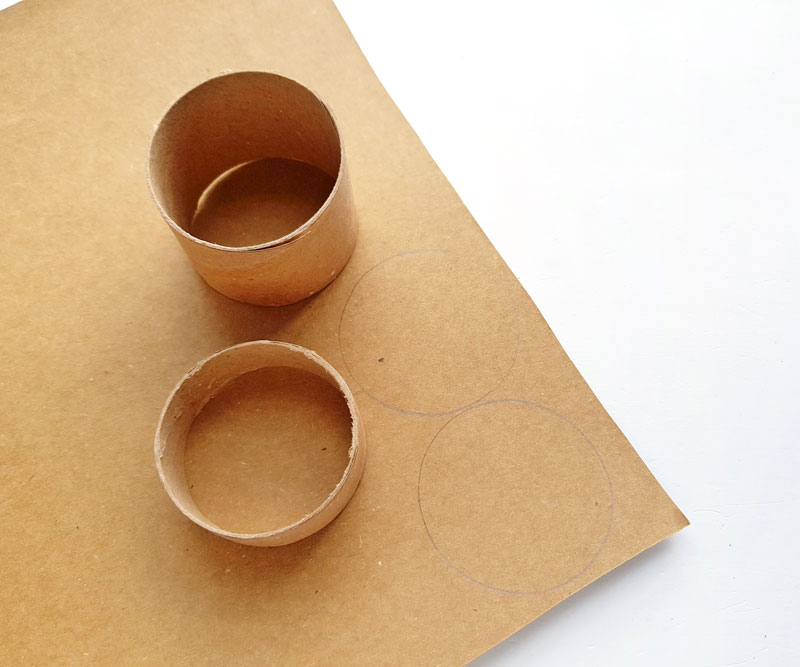
1. Using a ruler, mark your toilet paper roll in the spots you want to cut it for the height of your box and lid.
2. Use an x-acto knife to cut out the parts for the box and the lid from the toilet paper roll.
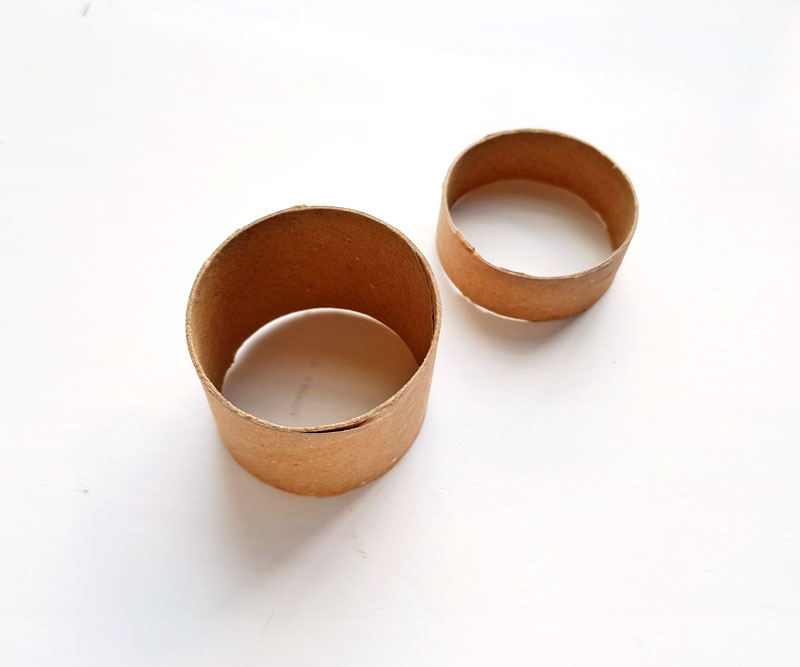
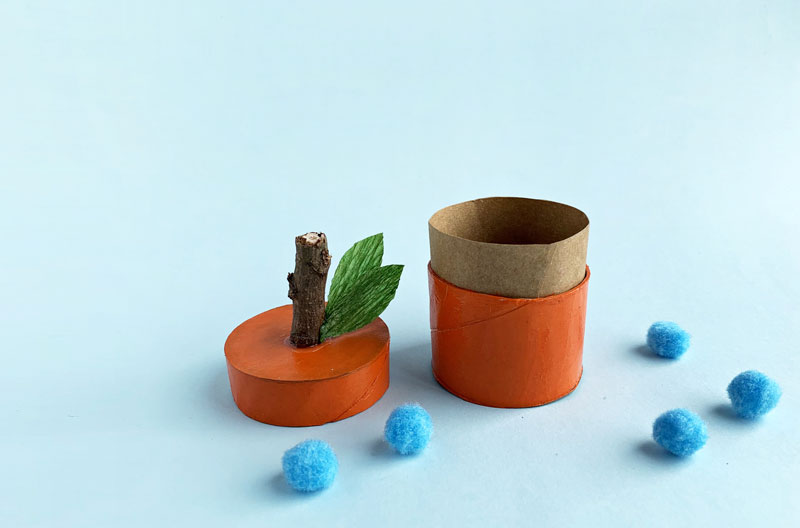
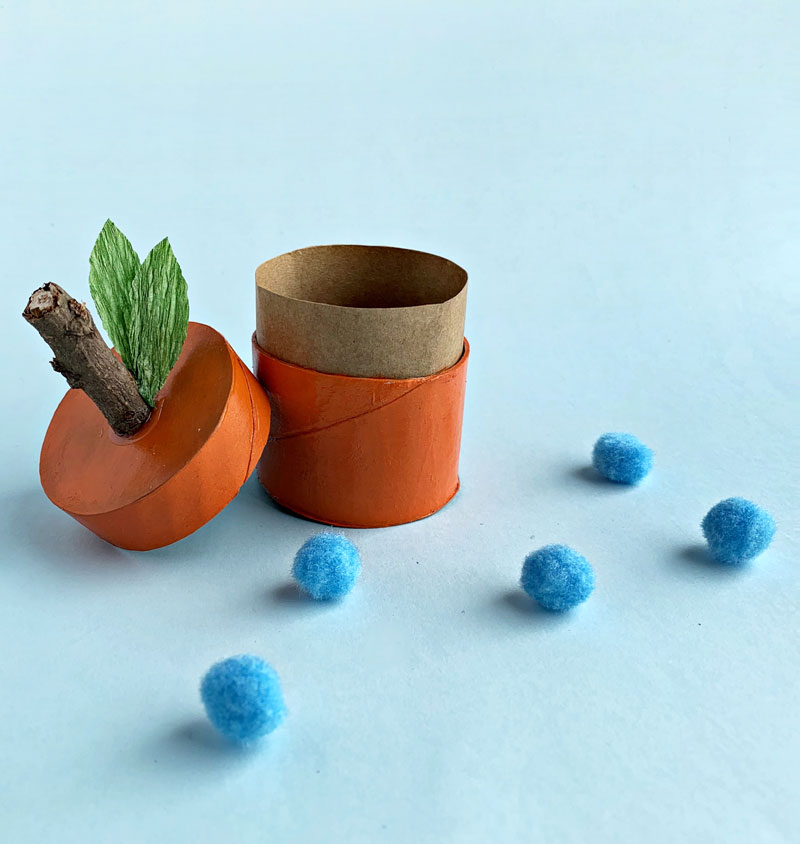
3. Place the roll on a piece of Kraft paper. Trace the diameter of your tube twice (once for the bottom of the box and 1 for the top of the lid).
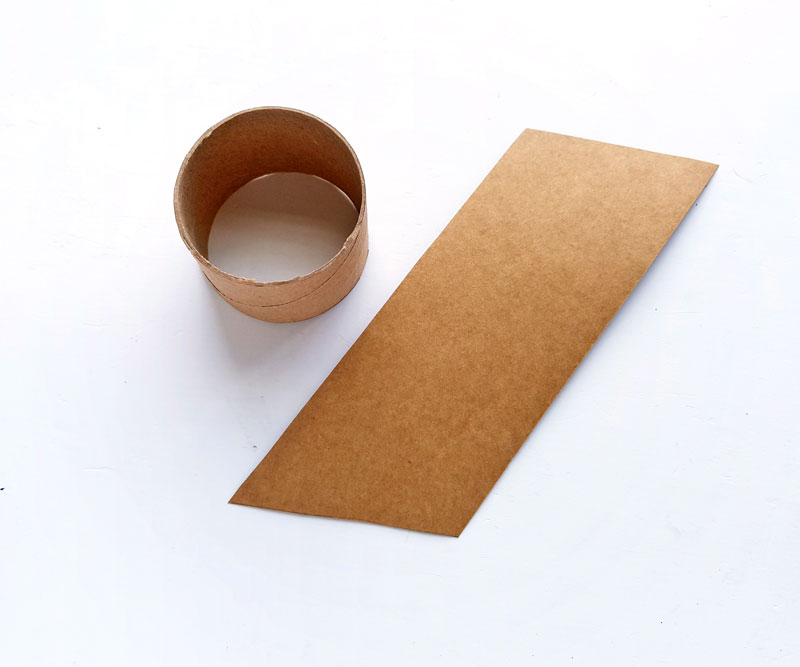
4. Cut out a long strip from Kraft paper. The length can be of any measurement for this step but the width of the strip should be sum of the box and lid’s height.
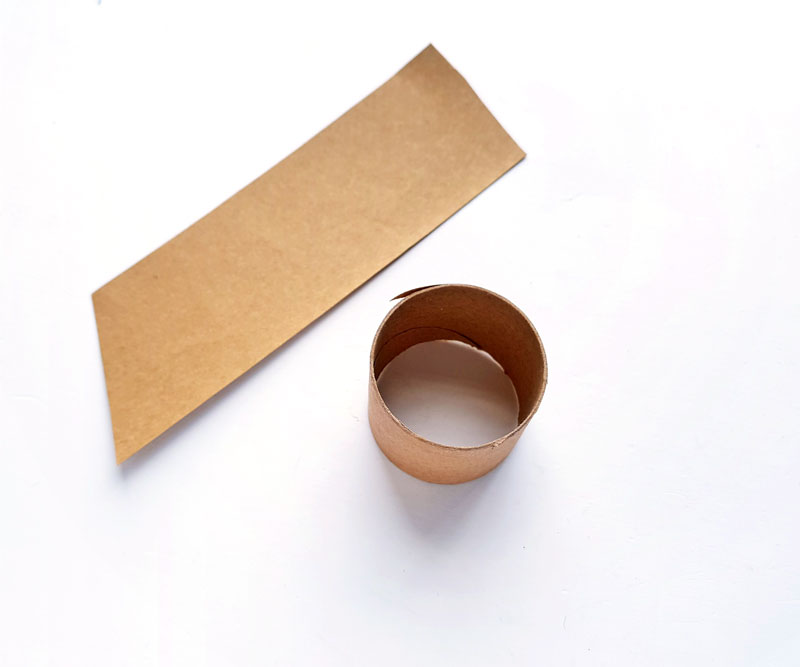
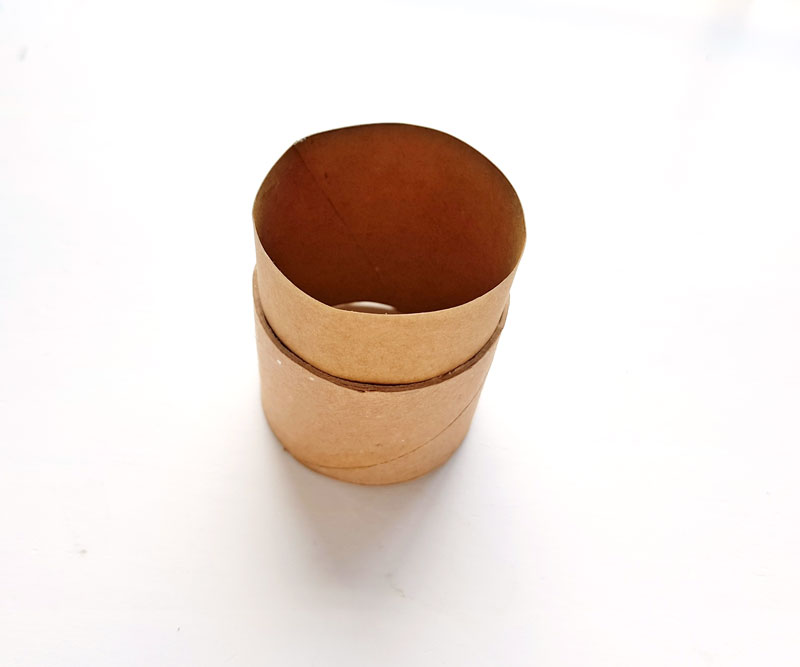
5. Roll and place the strip inside the portion of your cardboard tube that you cut for your box, making sure that the bottom end hits the base of your roll. Use a pencil to mark the edge where the strip overlap meets the main part of the strip.

Trim it to size.
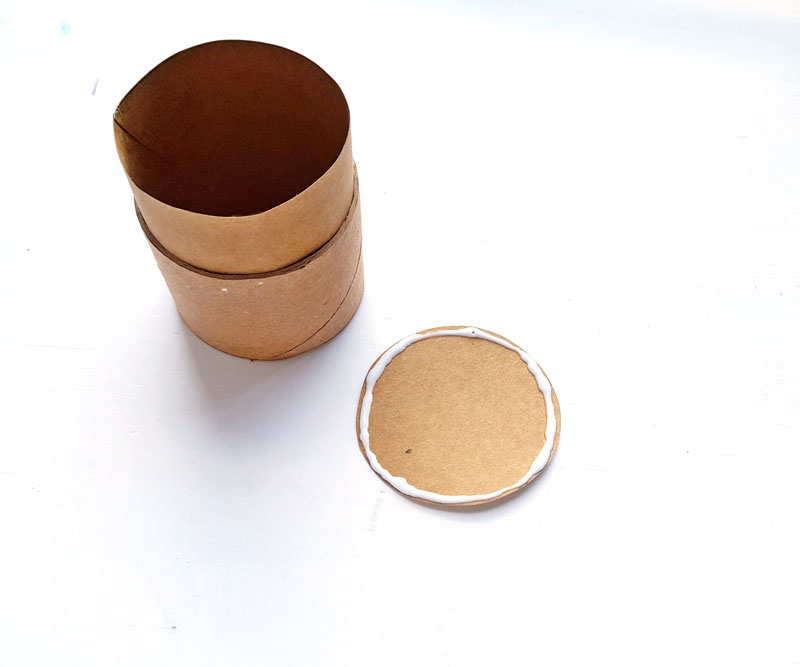
6. Apply craft glue on the inner surface of the box .
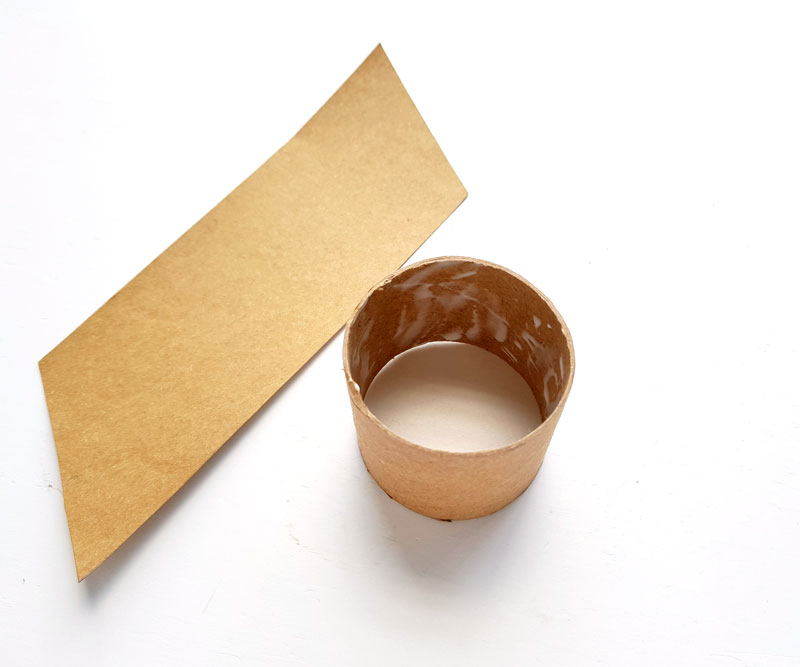
7. Now carefully roll the Kraft strip and place it inside the box. Press the insert against the inner surface of the box body to make sure that they are glued securely.
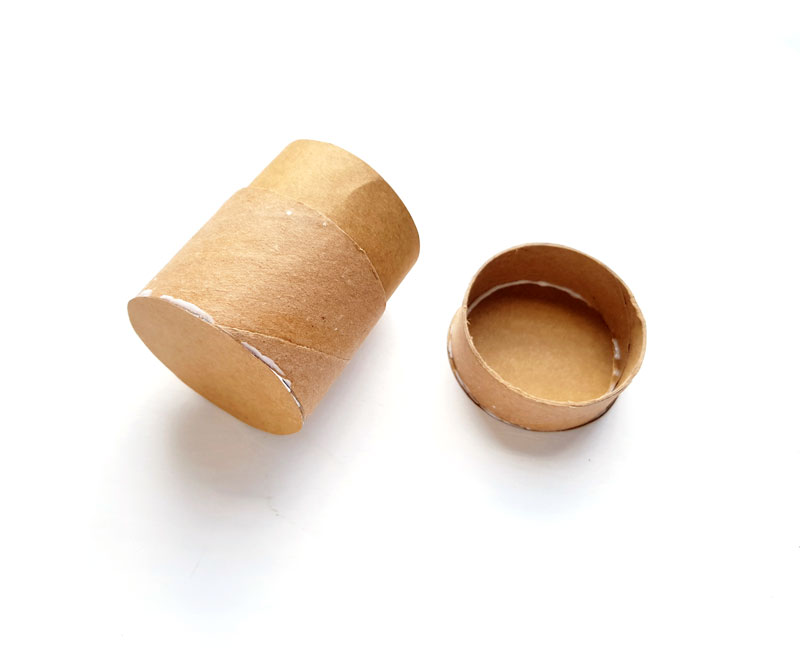
8. Cut out the 2 circles traced in step 3. Attach 1 of the circle cutouts to the bottom side of the box (the side level with the Kraft insert) and attach the other circle on the top of the toilet paper roll cut out for the lid.
9. Apply 1 or 2 coats of orange acrylic paint. Allow it to dry completely.
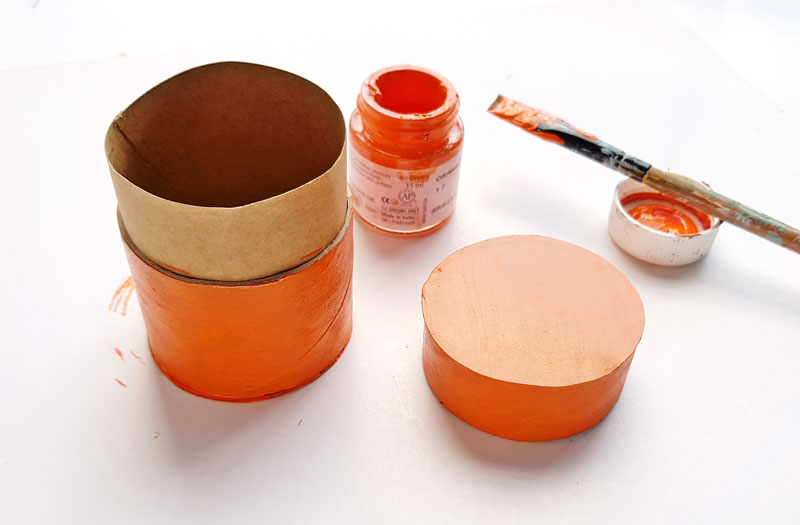
10. Once the paint is dry; attach a small dry twig to the center of the lid’s top.
If you’d like some green as well, add a crepe paper leaf or two and you’re good to go!
What will you be putting in this toilet paper roll pumpkin box? What’s your favorite way to craft with cardboard tubes? Drop your comments below!
Toilet Paper Roll Pumpkin Box
Learn how to make a DIY recycled toilet paper roll pumpkin box for fall, Thanksgiving, or Halloween. Use as centerpieces/food holders, small gift boxes, party treats, or even just decorations to hold scented pine cone bits for the fall season!
Materials
- Cardboard tube
- Kraft paper or similar
- Pencil
- Scissors
- Ruler
- X-Acto knife
- Craft glue - I recommend Tacky glue. Grown-ups can use hot glue for the stem.
- Orange Acrylic paint
- Paint brush
- Dry twig
- Optional: green crepe paper
Instructions
- Using a ruler, mark your toilet paper roll in the spots you want to cut it for the height of your box and lid.
- Use an x-acto knife to cut out the parts for the box and the lid from the toilet paper roll.
- Place the roll on a piece of Kraft paper. Trace the diameter of your tube twice (once for the bottom of the box and 1 for the top of the lid).
- Cut out a long strip from Kraft paper. The length can be of any measurement for this step but the width of the strip should be sum of the box and lid’s height.
- Roll and place the strip inside the portion of your cardboard tube that you cut for your box, making sure that the bottom end hits the base of your roll. Use a pencil to mark the edge where the strip overlap meets the main part of the strip. Trim it to size.
- Apply craft glue on the inner surface of the box .
- Now carefully roll the Kraft strip and place it inside the box. Press the insert against the inner surface of the box body to make sure that they are glued securely.
- Cut out the 2 circles traced in step 3. Attach 1 of the circle cutouts to the bottom side of the box (the side level with the Kraft insert) and attach the other circle on the top of the toilet paper roll cut out for the lid.
- Apply 1 or 2 coats of orange acrylic paint. Allow it to dry completely.
- Once the paint is dry; attach a small dry twig to the center of the lid’s top.
- If you'd like some green as well, add a crepe paper leaf or two and you're good to go!
Notes
If you're concerned about using toilet paper tubes for treats, consider the following:
- Your treats will only touch the Kraft paper insert.
- You can split up a paper towel roll instead of a toilet paper roll
- My favorite trick: I either slide out the roll from the bathroom tissue before I use it OR I re-roll it right around the toilet paper holder. You gotta think like a crafter.
- Or, try the much more durable specially purchased craft tube option. They're thicker and more durable than recycled ones, and they're still recyclable.
Recommended Products
As an Amazon Associate and member of other affiliate programs, I earn from qualifying purchases.
-
 How to Make Jewelry Out of Anything: A Complete Out-of-the-Box Jewelry Making Guide for Teens and Teens-at-Heart!
 -
 Paper Airplanes Templates
 -
 Learn With Play Kids Activities Ebook
 -
 Little Red Riding Hood puppets
 -
 Sewing Shirt - Vintage Sewing Machine Sketch - Women's short sleeve t-shirt in red, green, blue,...
I LOVE the look of the twig. That is such a great idea. I’ve been getting really into paper roll crafts lately. Definitely doing to have to give this a try!
Thanks – hope yours comes out great!