
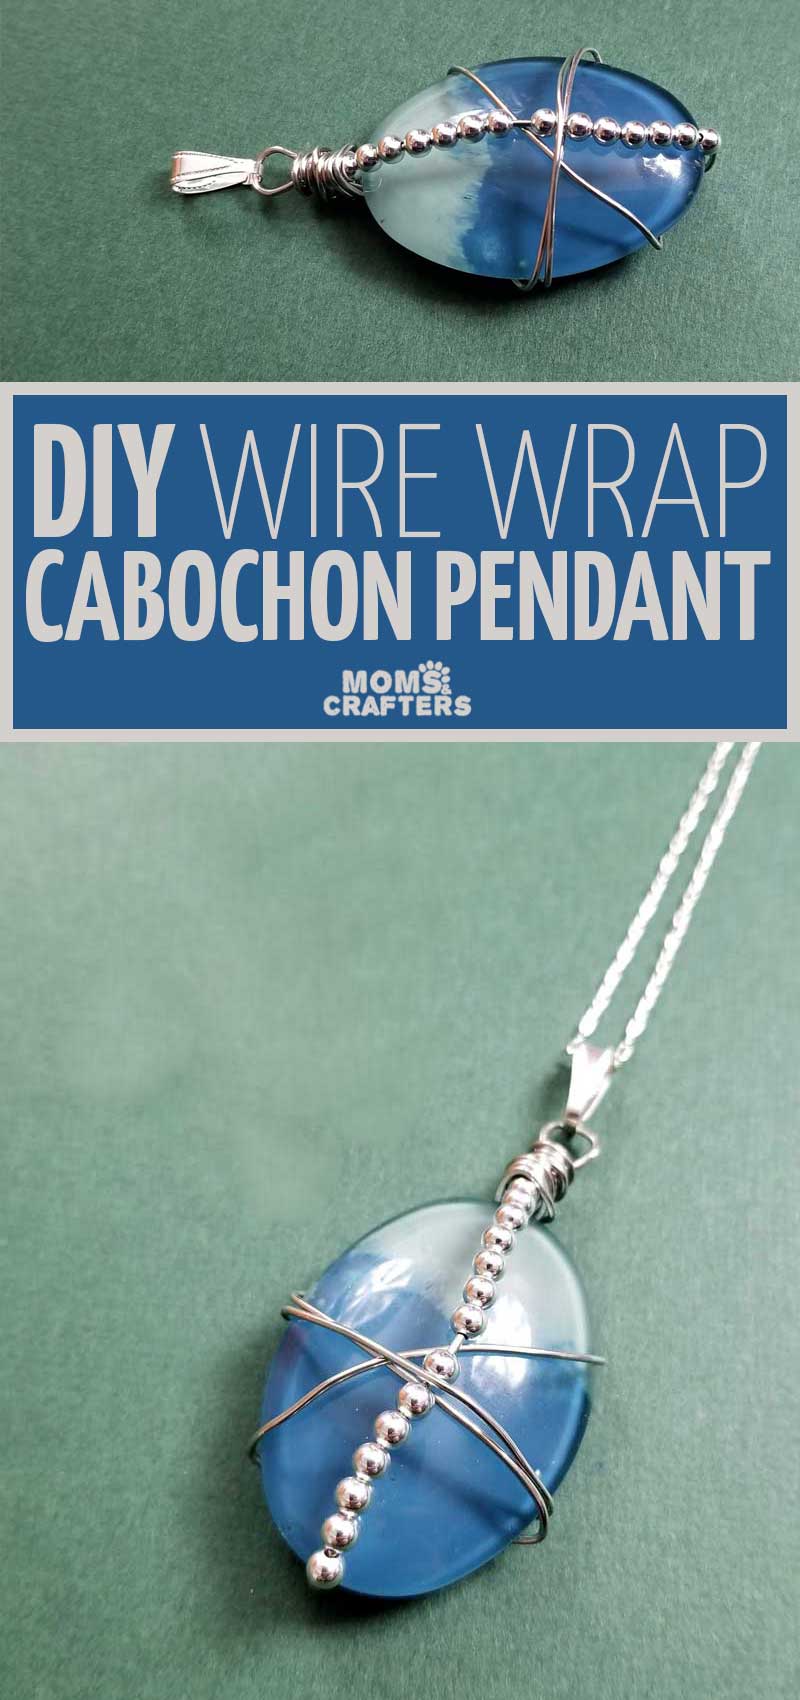
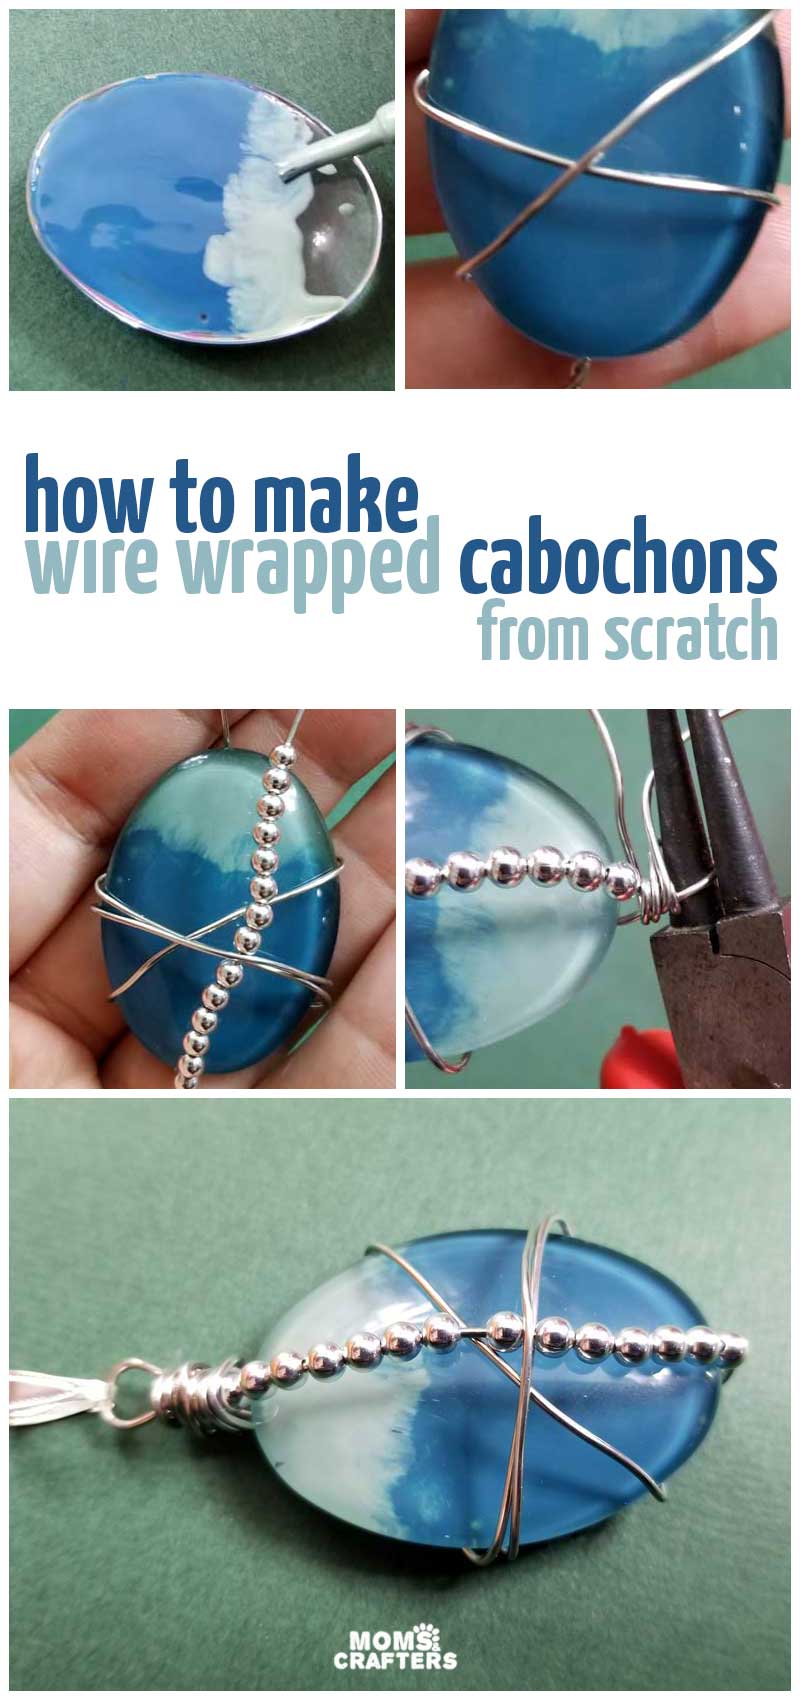
Wire Wrap Cabochon DIY Tutorial
I think one of the biggest mysteries for beginner jewelry makers is how to make a wire wrap cabochon NOT fall out of its wrapping. In this post I’ll be sharing a fun wire wrapping project for beginners. You can also check out my necklace wire wrap which is more elaborate if you prefer a more advanced project. Disclosure: this post contains affiliate links.
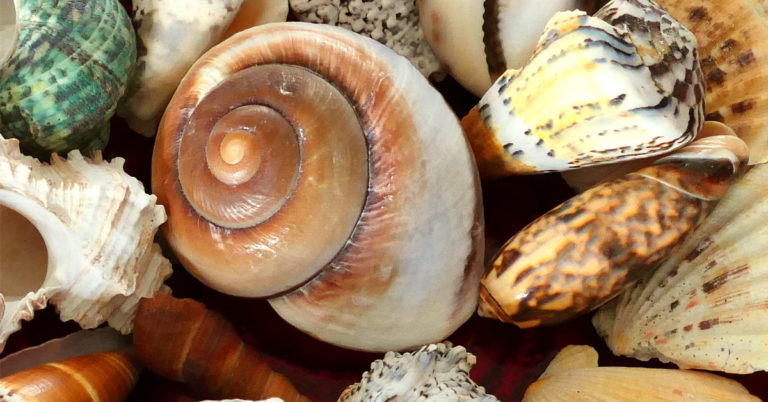
A cabochon is a flat backed, un-faceted, and un-drilled stone that is typically used in settings in jewelry making. However, they are very popular for wire wrapping.
You can get cabochons for pretty cheap in all sorts of stones. They tend to really show off the natural veining of whichever stone you are using.
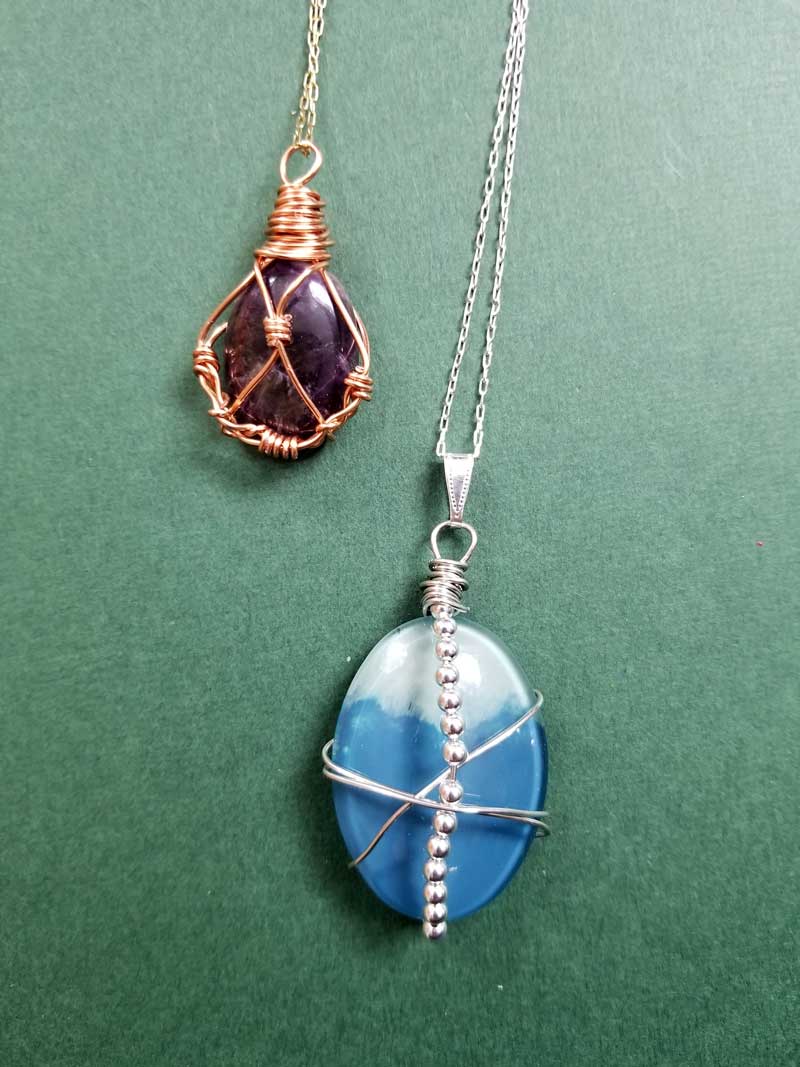
However, for this tutorial, I did something new. Instead of wire wrapping a gemstone cabochon, I took a plain glass dome and made my own look. You can now find the tutorial for the wire wrap stone below too.
I did this for two reasons:
- I couldn’t find those blasted cabochons anywhere (I stole the amethyst one from a piece I had already done!) just when I needed them to share with you how to wire wrap cabochon pendants.
- I love creating my own look, and this is the perfect way to do it!!
To make this wire wrap cabochon, I blended two colors of nail polish on the back. I love making nail polish crafts – I have never outgrown the teen crafts stage and get enormous pleasure from covering surfaces with nail polish.
I also don’t have patience to let it dry so nail polish is perfect. Only, I learned the hard way with this one that you gotta give it time when you want to use it for a wire wrap cabochon because if it’s not totally cured your cabochon is gonna look like it has a bad mani…
This wire wrap cabochon tutorial is really simple. It’s not one of those elaborate twisted designs – it’s a great one for beginners.
It shows you the basics of getting an un-drilled stone to stay inside a basic wire wrap setting and it’s the perfect place to start with wire wrapping pendants.
If you’re a jewelry making beginner, you can check out my list of best places to buy beads online. I also put together a jewelry making supplies for beginners guide as well as a separate guide to beads for beginners.
Want to learn how to make jewelry out of anything? Get the book!
Video:
What I love so incredibly much about wire wrapping is that the possibilities are endless. You take minimal supplies and you can make a work of art.
Thickness matters when wire wrapping – the thicker the wire, the more it’ll hold its shape, but the harder it’ll be to work with.

I have always taken a more free-form approach to wire wrapping, because I find that the art is made best that way. Below, I have included a step-by-step tutorial for making a wire wrap cabochon, however, I recommend that once you follow a tutorial once to grasp the basics, you try to free-freeform and come up with your own patterns.
What you need to make this wire wrap cabochon:
- A large-ish cabochon. The larger it is, the easier it’ll be for a beginner to work with -0r-
- Glass cabochons – and –
- Nail Polish (I use cheap brands like Sinful Colors for crafts)
- 20 gauge wire. You can use thicker and thinner but this is a good thickness that holds its shape well enough for this project, but it’s not too hard to work with.
- Accent beads – I recommend 3mm metal seamless rounds
- Jewelry making pliers: round nose, chain nose, flush cutters
- A snap-on pendant bail
- A finished chain
How to wire wrap a cabochon pendant:
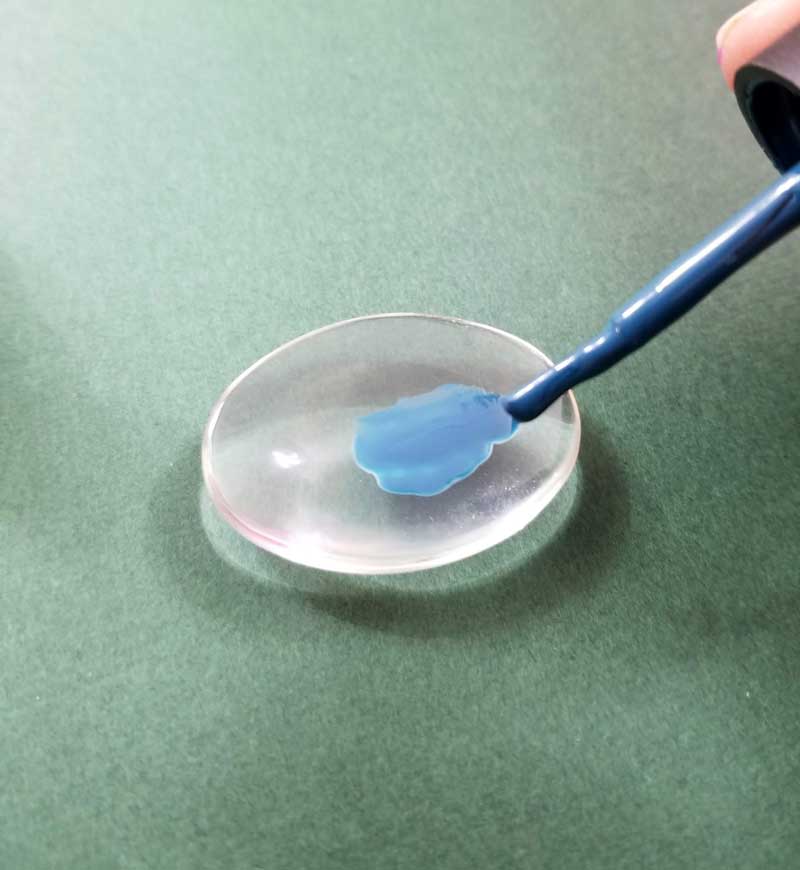
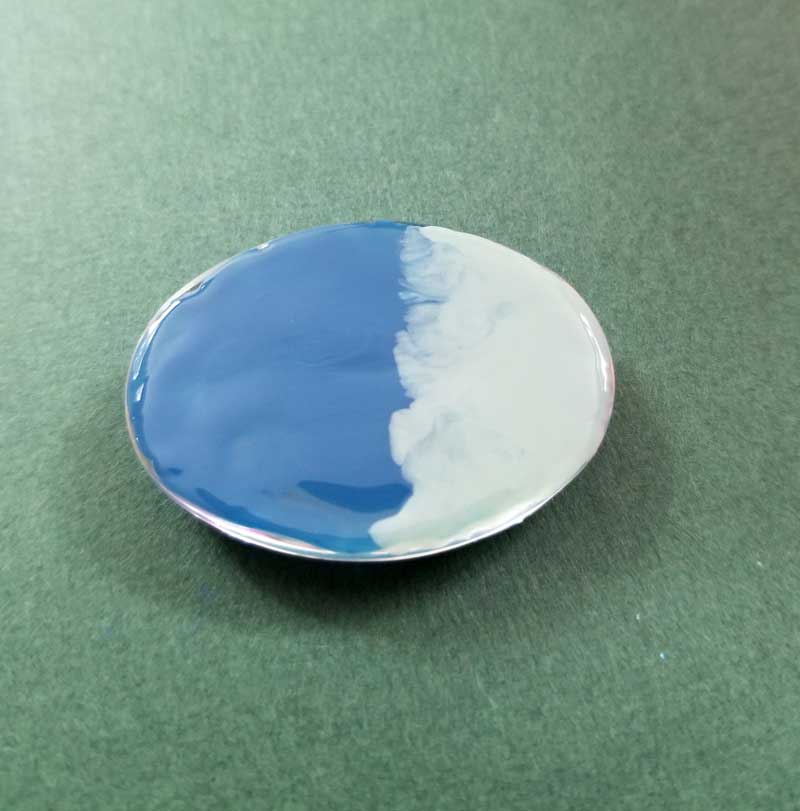
1. Apply your first color of nail polish.
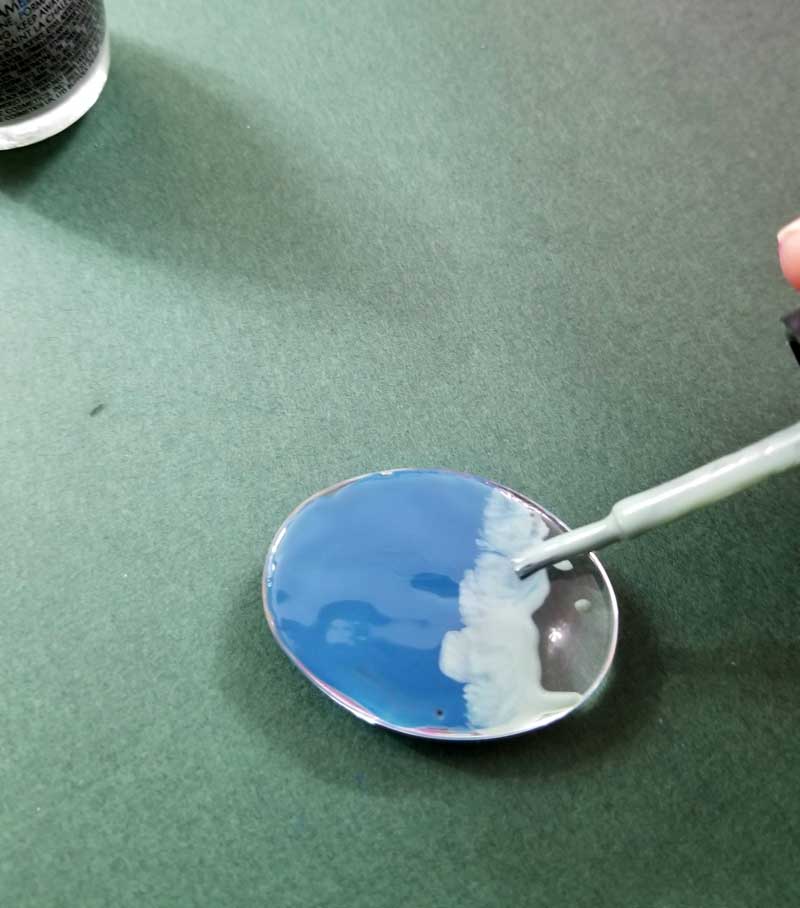
2. While it’s still wet, apply your second color. Blend it in a bit with the first for a more natural look. Of course, you can make up your own design.
3. You may need to apply a second coat. Allow it to dry completely. I’d give it a day to really dry enough to be able to handle wirework.
4. Cut a nice long piece of wire – 18-24 inches long. Place your cabochon on it.
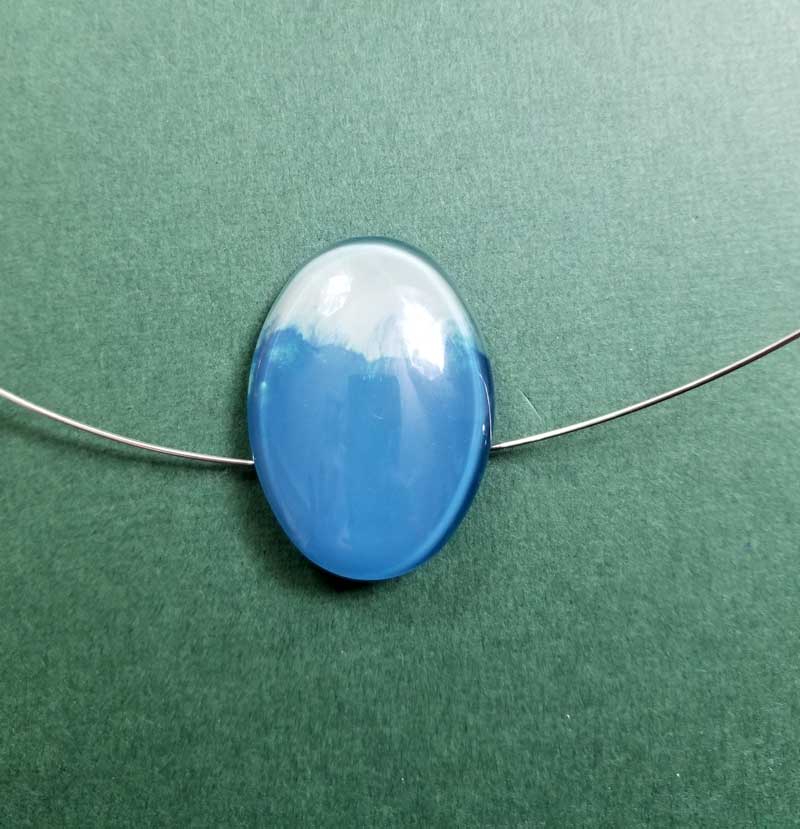
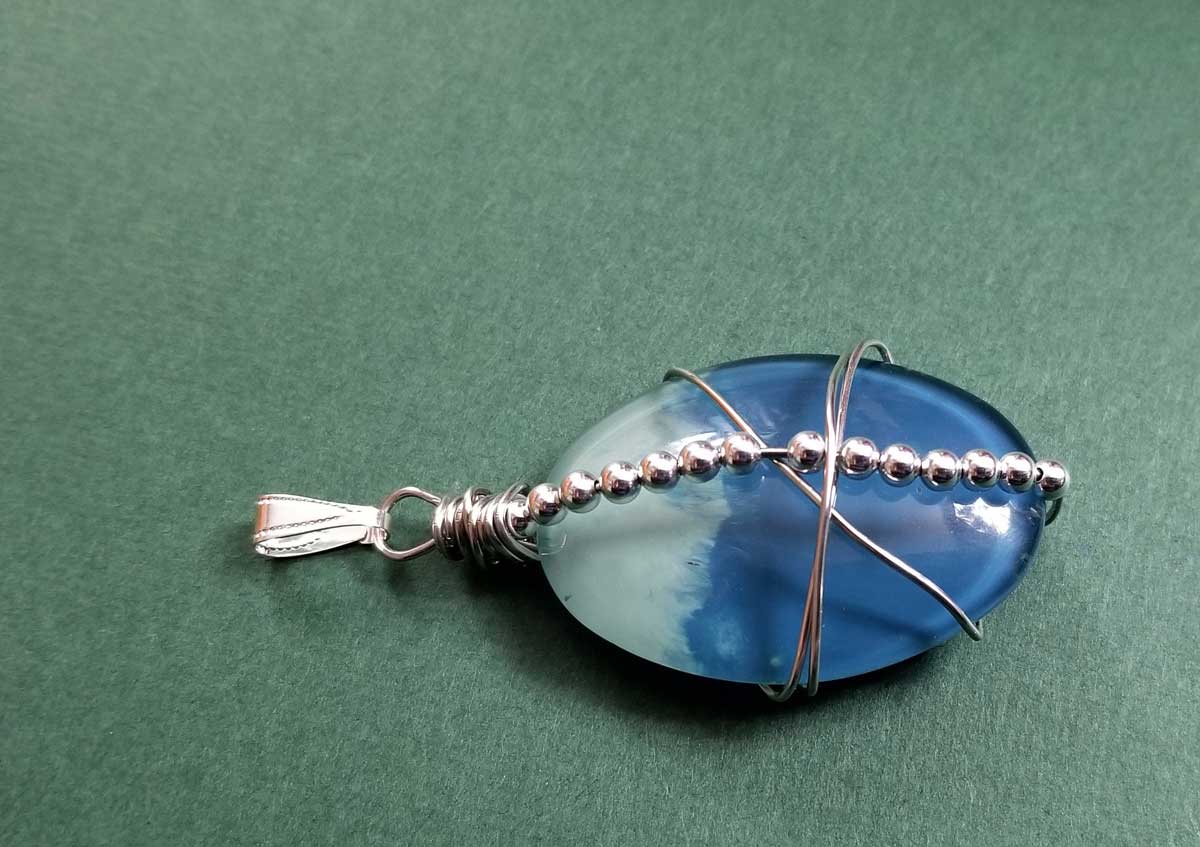
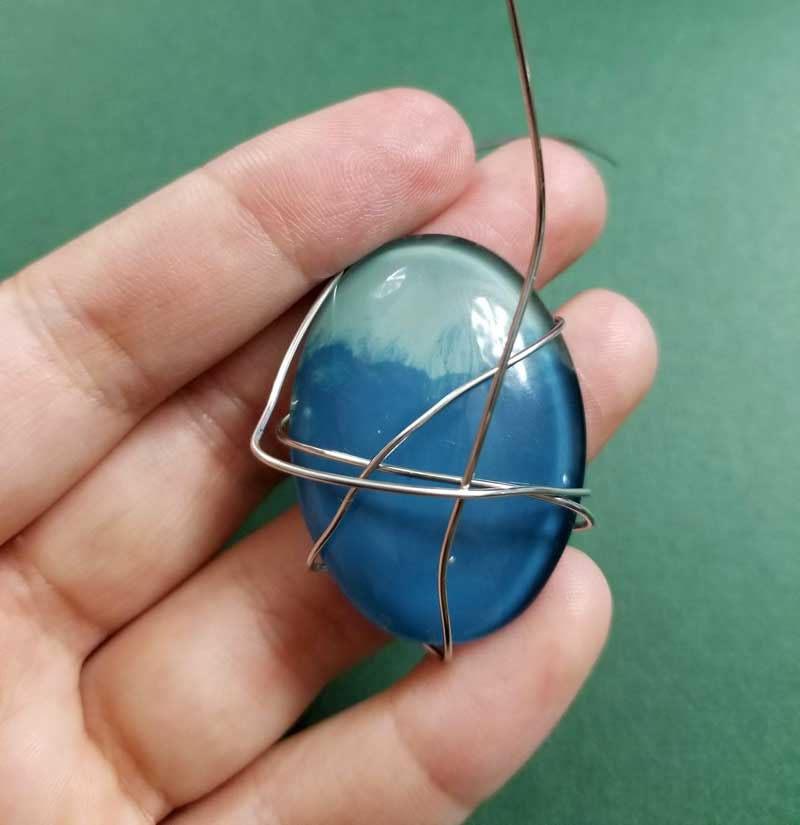
5. Bring each side of the wire to the front and back around to the back forming an x in the front. Try to get the sizing right so that it sits against your cabochon. But don’t expect your cabochon to stay in place – fix your shaping, and place the cabochon back in if it slips out.
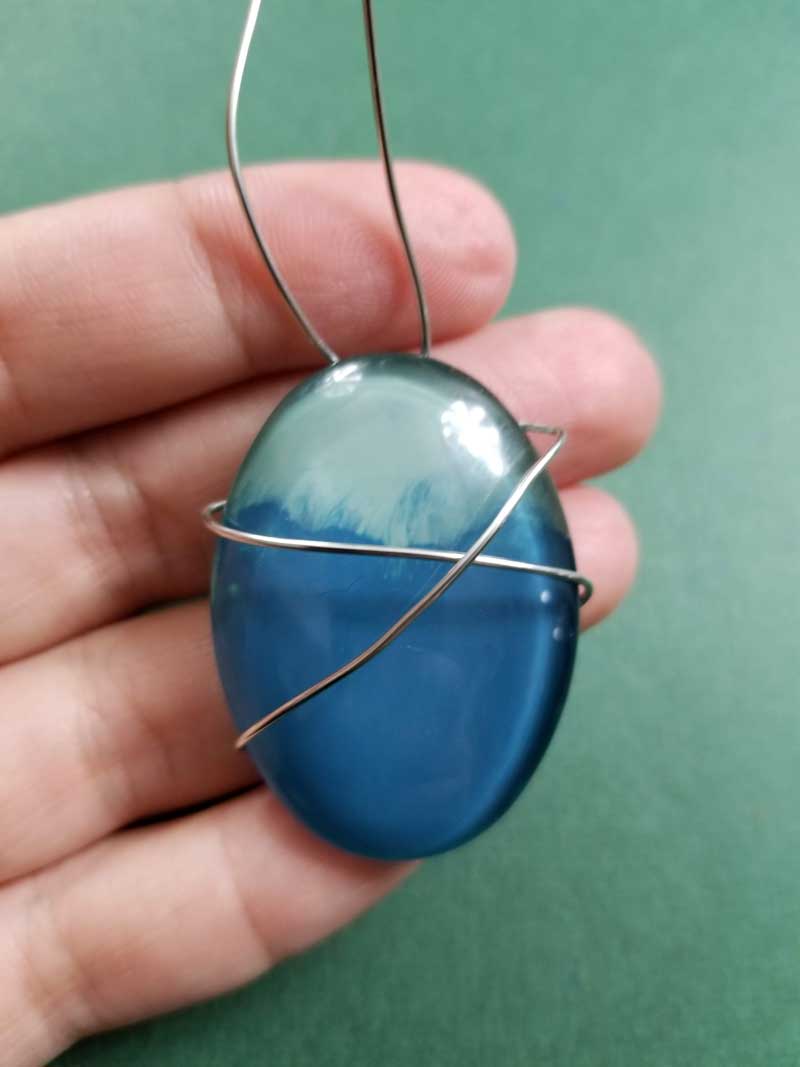
6. Bring the wires in the back so toward the bottom of your cabochon. Twist the two wires together on the back. Position the X right as you do this, fixing it as you go along.
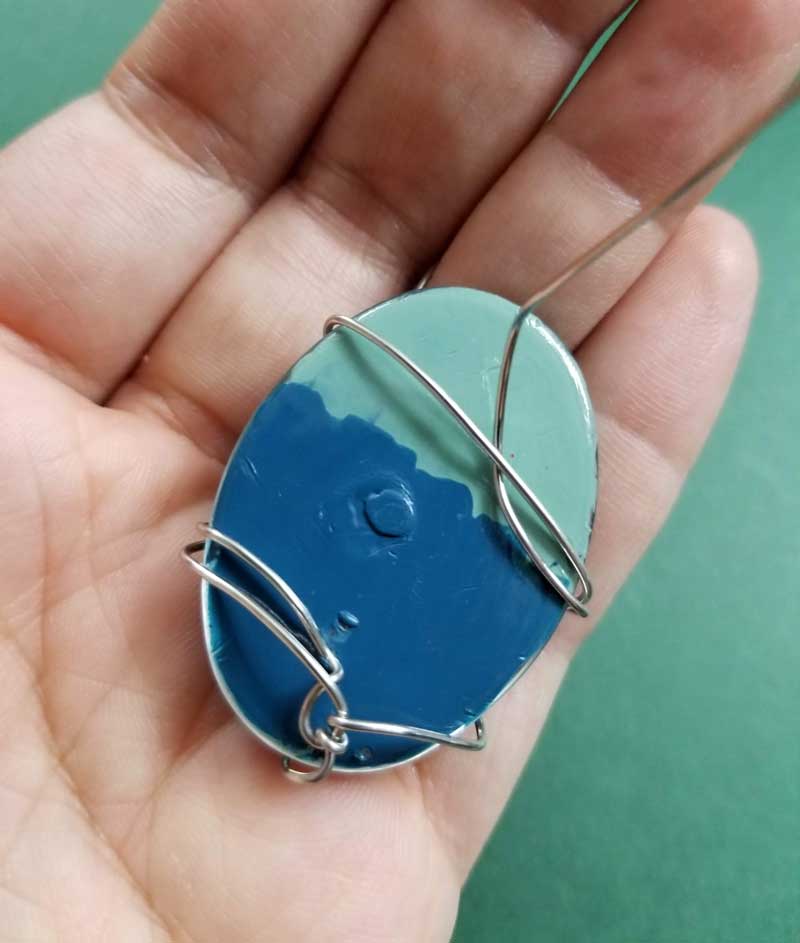
7. Bring one wire up front – that’ll help create a “cage”that doesn’t allow the cabochon to slip out from the bottom. You don’t need a ton of wrapping here but just enough so that there’s no opening large enough for the stone. Bring the other one up so that it doubles up with one wire of the X and goes over the vertical wire.
8. The wire that doubled up with the X (the one that’s now on the left of the cabochon in the photo above) needed something to catch onto to bring it back to the top. So I threaded it under the top cross-line in the back. You can see that my back got a bit scraped up but it doesn’t show in the front. This doesn’t happen on a real stone.
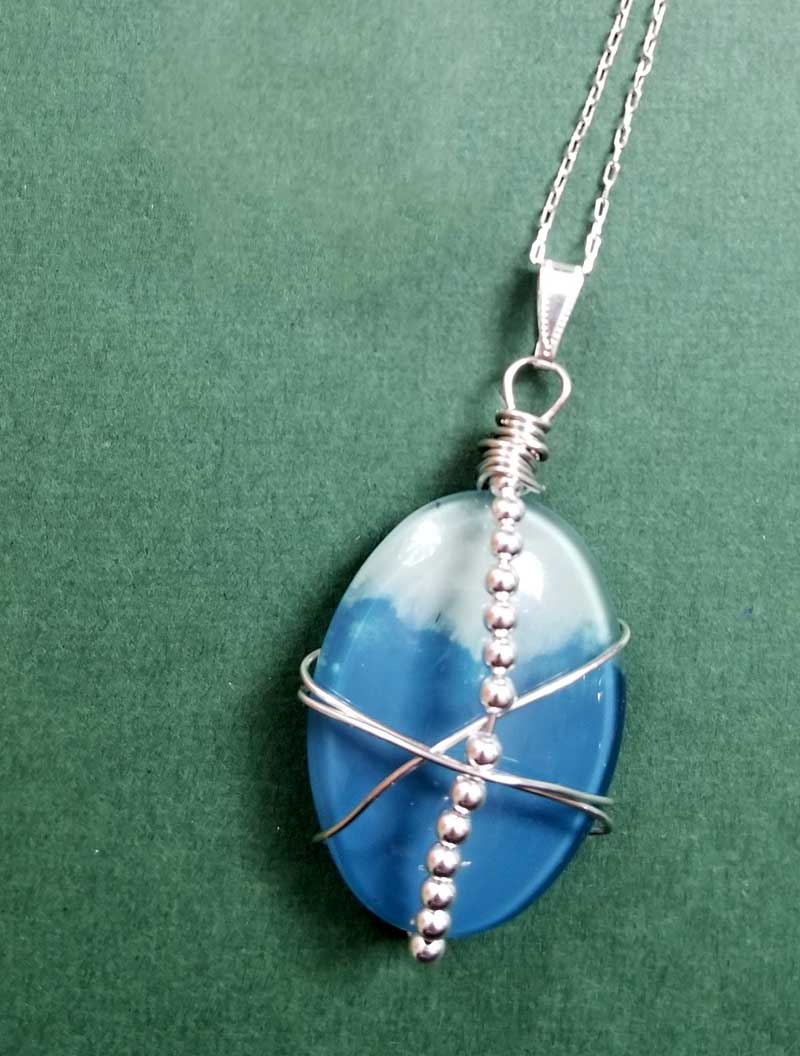
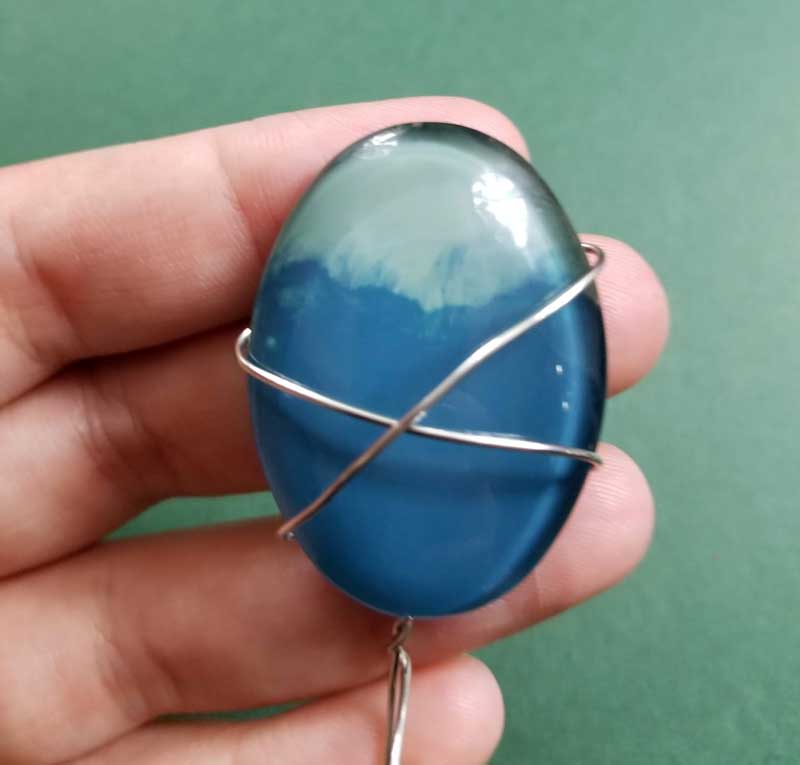
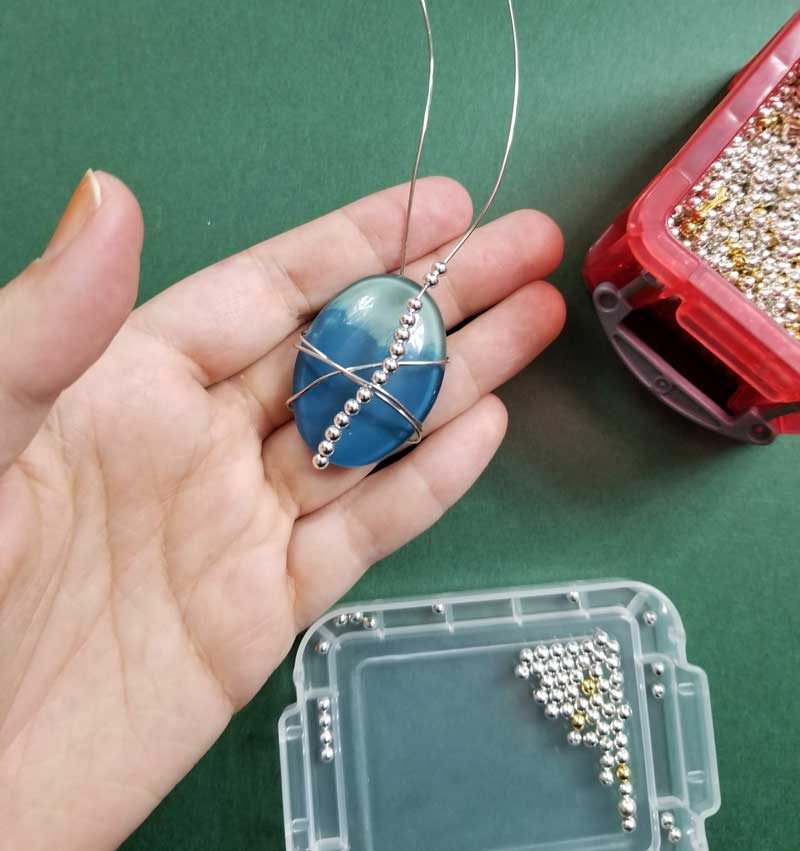
9. On every wire wrap cabochon pendant, I like to put something to “ground” it. When you make an elaborate design or work with thicker wire, you tend to have more of a visually appealing pattern. When you free-form, things can get messy if you’re not careful. That’s why I doubled over one side of my X before. That’s also why I added a string of accent beads on the wire that goes vertically in front. Just thread on your accent beads so that they cover the wire.
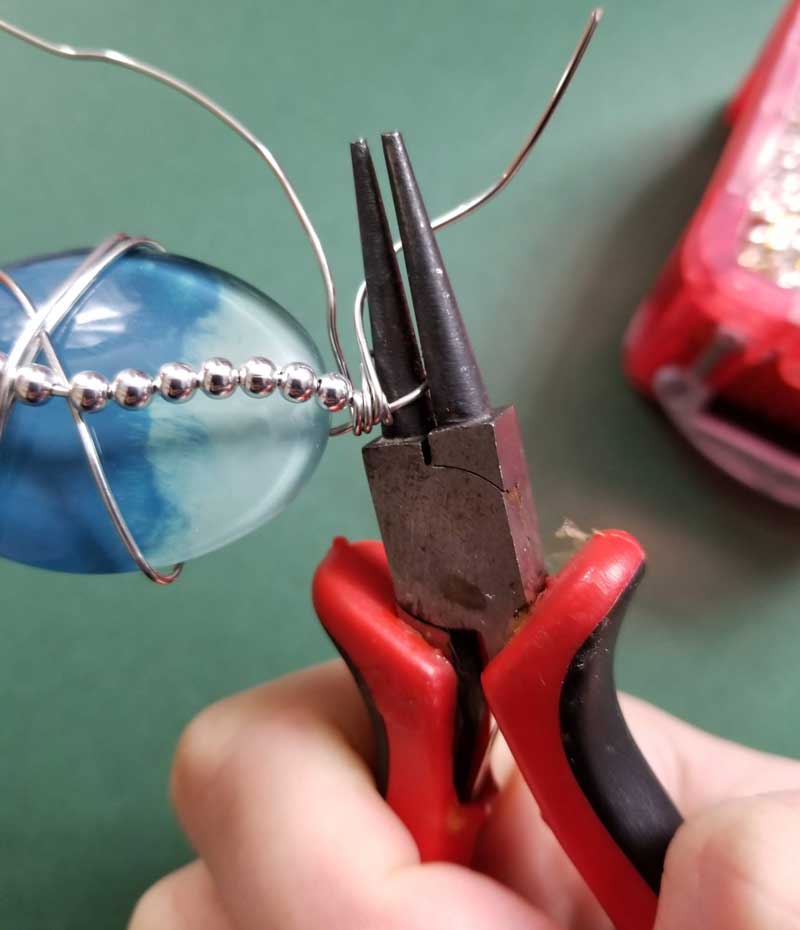
10. Test to make sure your cabochon is really secure by wiggling it around a bit. Now you’ll be sealing your piece. You should have two wires back at the top of your cabochon. Twist one a couple of times around the other to “lock” your piece so that you can finish it off more freely.
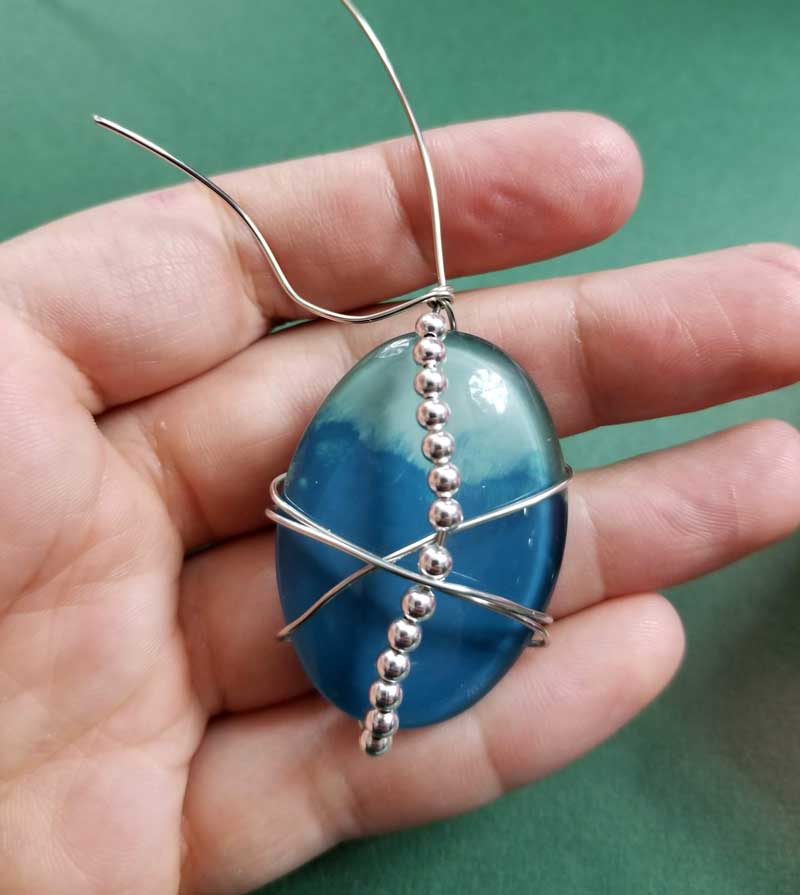
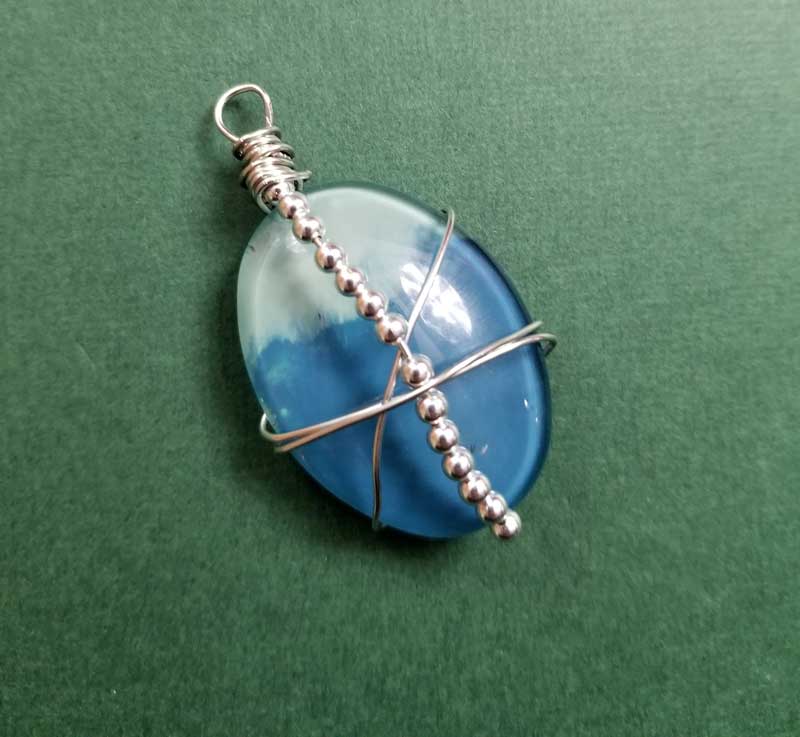
11. Form one wire into a loop at the top using your round nose pliers. Twist the end around the base of the wire a few more times. When you do this wrapping, make sure to keep it as neat as possible for a polished look.
12. Finish off your loop by wrapping as much as you’d like and then trimming any leftover wire. I like to leave a nice chunk of wire wrap there – I just like how it looks. Tuck in any sharp ends so that they’re not exposed. .
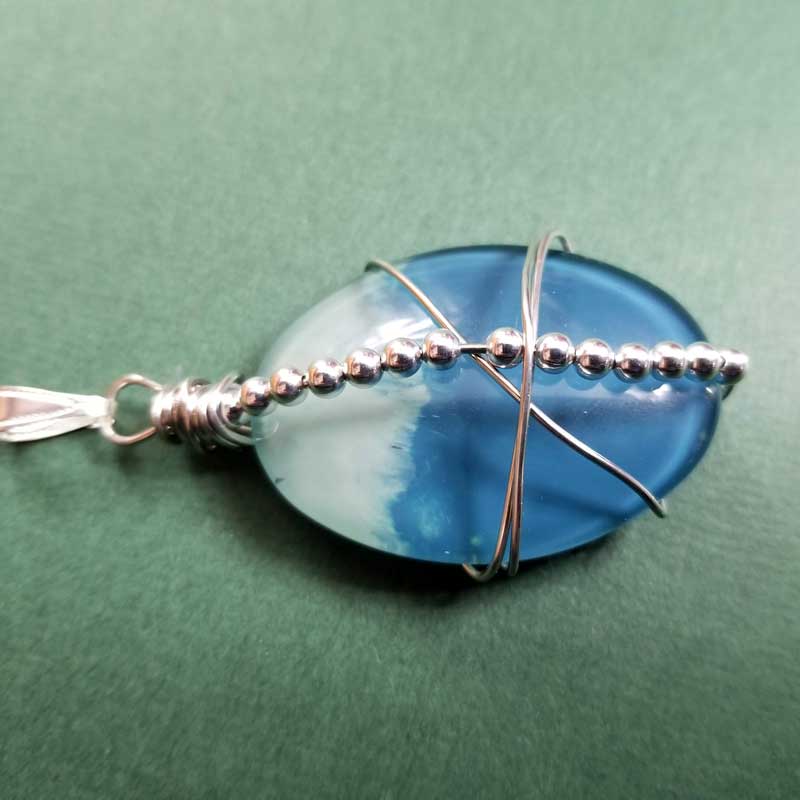
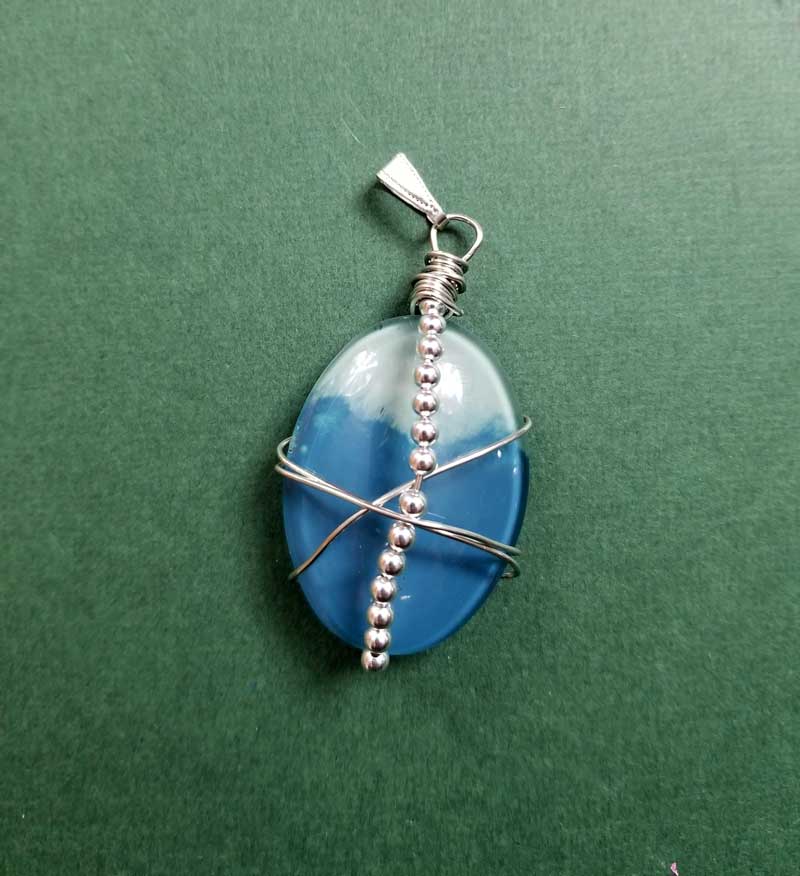
13. Snap on a pendant bail and you’re done!
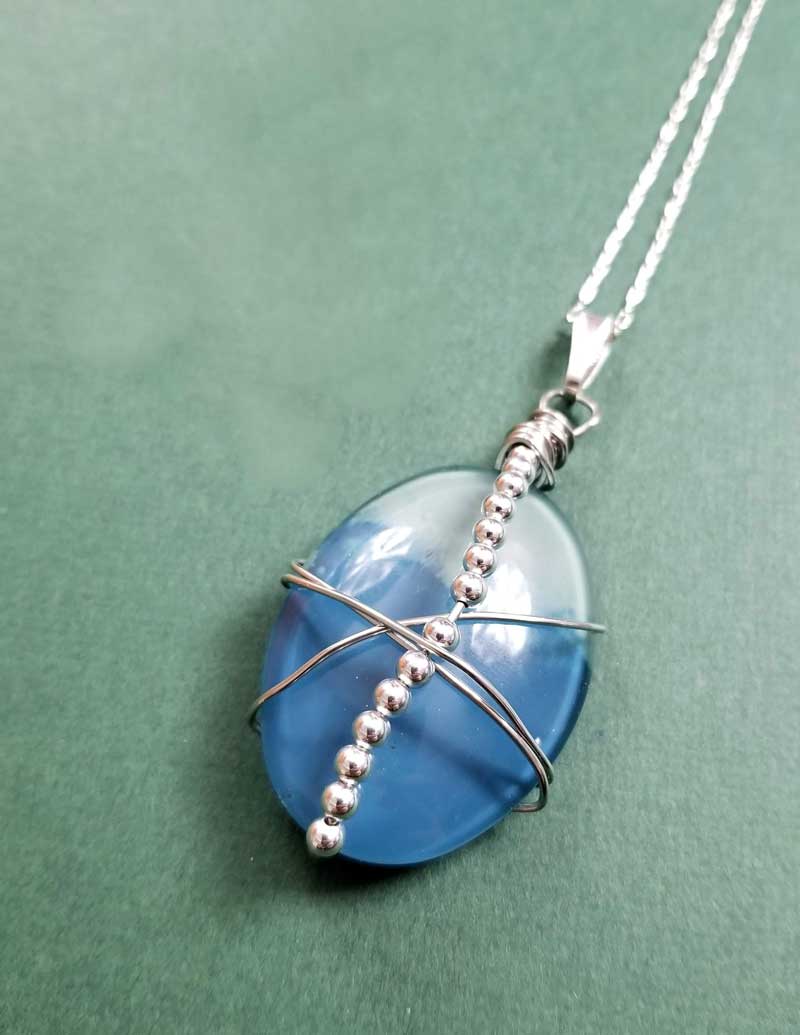
Wear it on a nice, delicate chain to show off your work!
Have you ever made a wire wrap cabochon? Do you prefer elaborate patterns or simpler, more modern designs? Comment below!

It looks easy enough. We will see. Thanks for the directions
Pleasure – good luck!
Can you also use this method with uneven cut stones, or is there a more suitable method for this? Thanks.
Hi Sandi, sorry for the delayed response! For uneven stones, I usually use a more freeform technique rather than a symmetrical one like this. Here’s one that I did a while ago: https://www.momsandcrafters.com/gold-nugget-jewelry-cheap/