
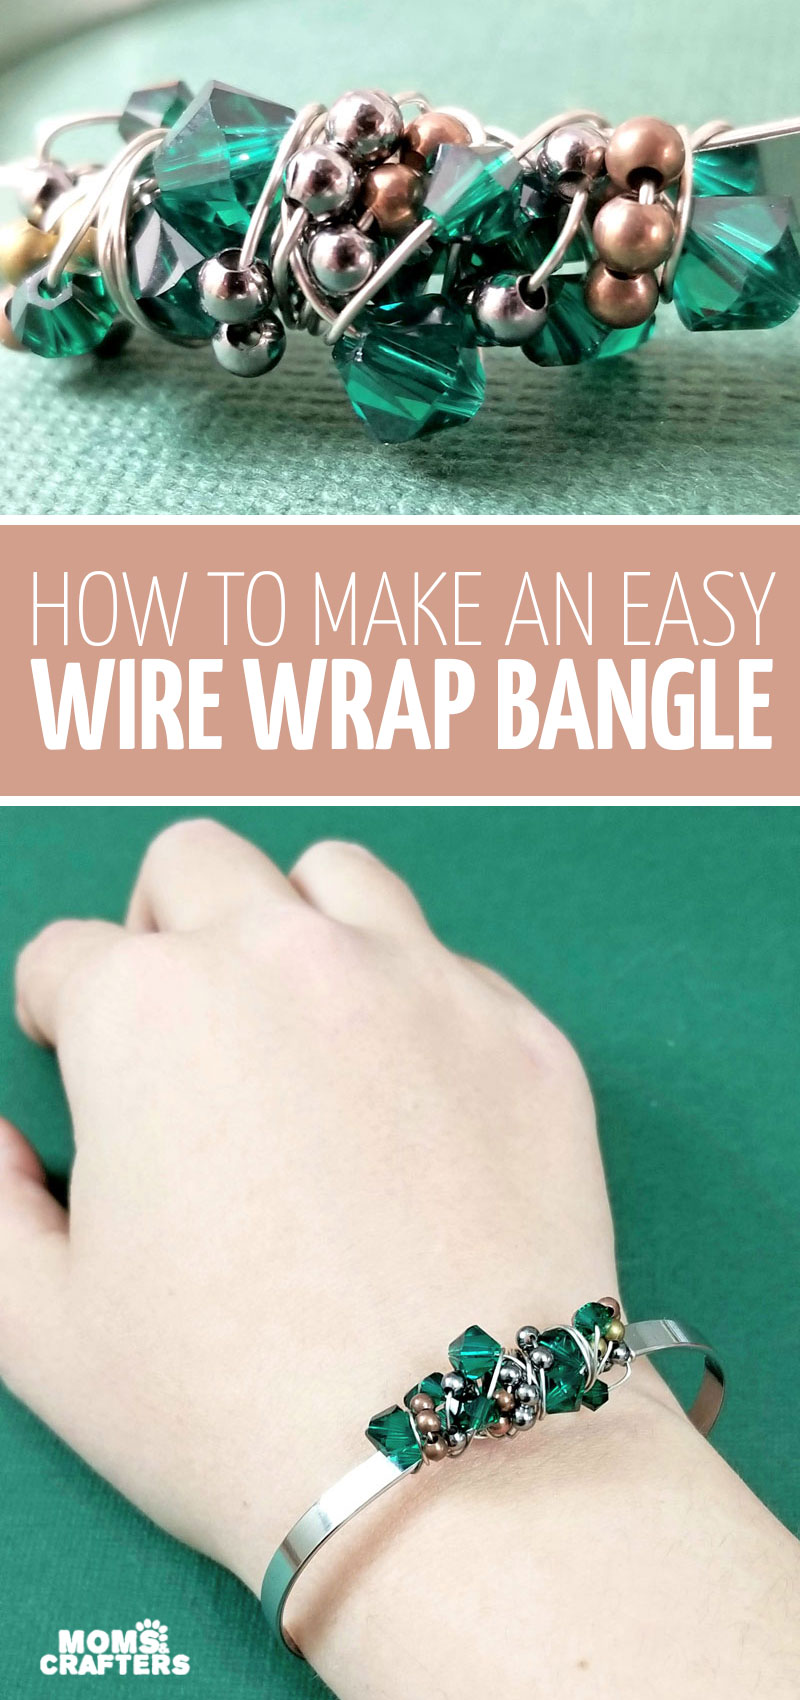
The Stunning Sloppy Wire Wrapped Bangle Bracelet Tutorial
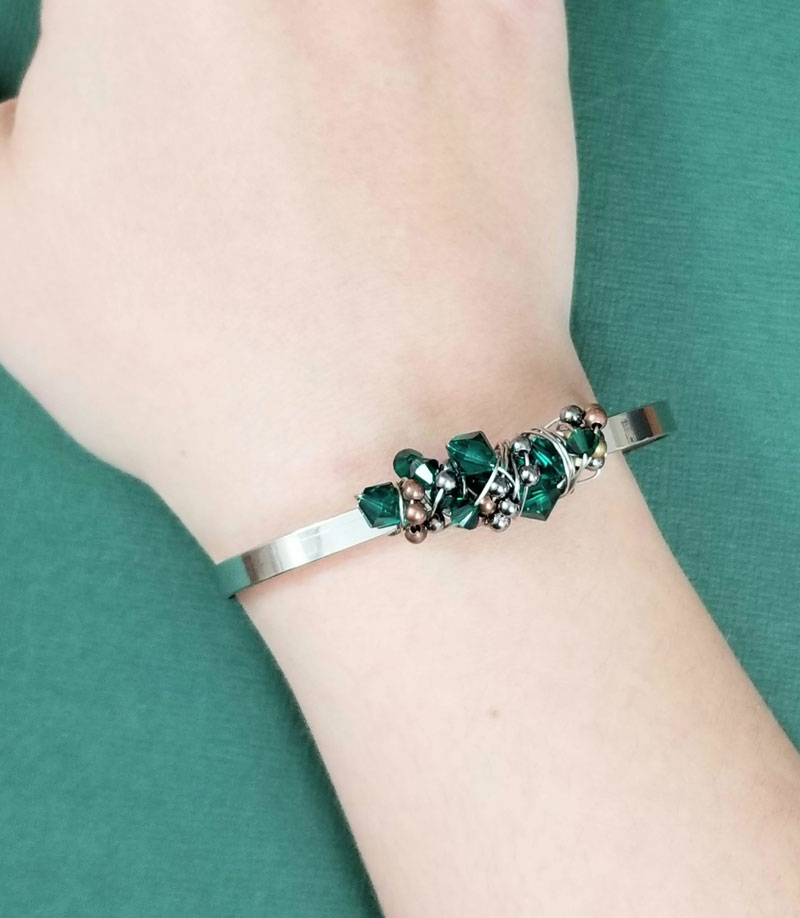
Ah, the stunning sloppy wire wrap on this little emerald beauty! This wire wrapped bangle bracelet tutorial is not one of those neat, perfect, exact ones like this wire bracelet DIY tutorial but it’s absolutely beautiful – in an artsy, abstract way! I made it for myself as a splurge (yep, some crafts are splurges though it’s not expensive either) and it’s one of my all-time favorite pieces that I’ve ever made (and that’s saying a lot). This post contains affiliate links.
Wire wrapping might seem like some ridiculously advanced method, only for the bold and brazen, but truth be told, you can do anything with wire.
Case in point, when I was a fresh jewelry maker, in my teens, I randomly strung some pearls on wire, shaped it into a heart, attached a key ring, and called it “handbag bling”.
But frankly, it was too flimsy.
So I took another, thicker wire, and wrapped it around the open heart shape. And I immediately fell in love. I turned that into my “signature” bracelet look – you can see a tutorial for this method to make a wire wrapped gemstone bracelet.
Since then it’s morphed into this necklace wire wrap tutorial, this wire wrapped bracelet, and many many more abstract wire wrapped creations.
The truth is, I love not only the freedom of creation in this wire wrapped bangle bracelet tutorial, but also the carefree look that it creates.

And the method is simple enough that I’ve done it successfully with groups at parties and single-session workshops, with people who have never made jewelry before!
And my favorite feature of all: it’s open-ended. As in, make it how you like it! Do what you want with it! Have fun! Don’t be boring! Be adventurous.
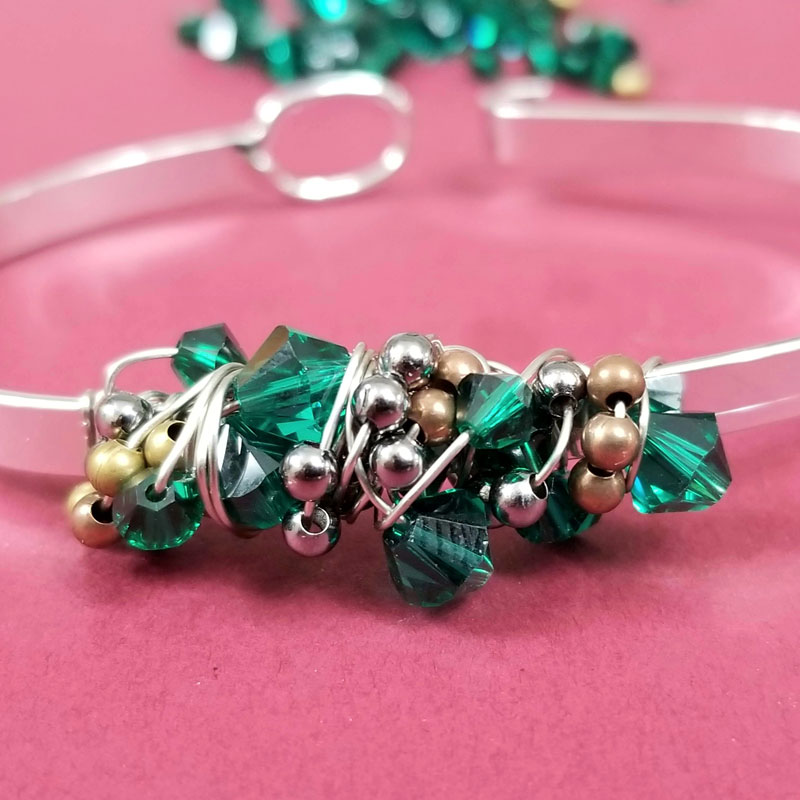
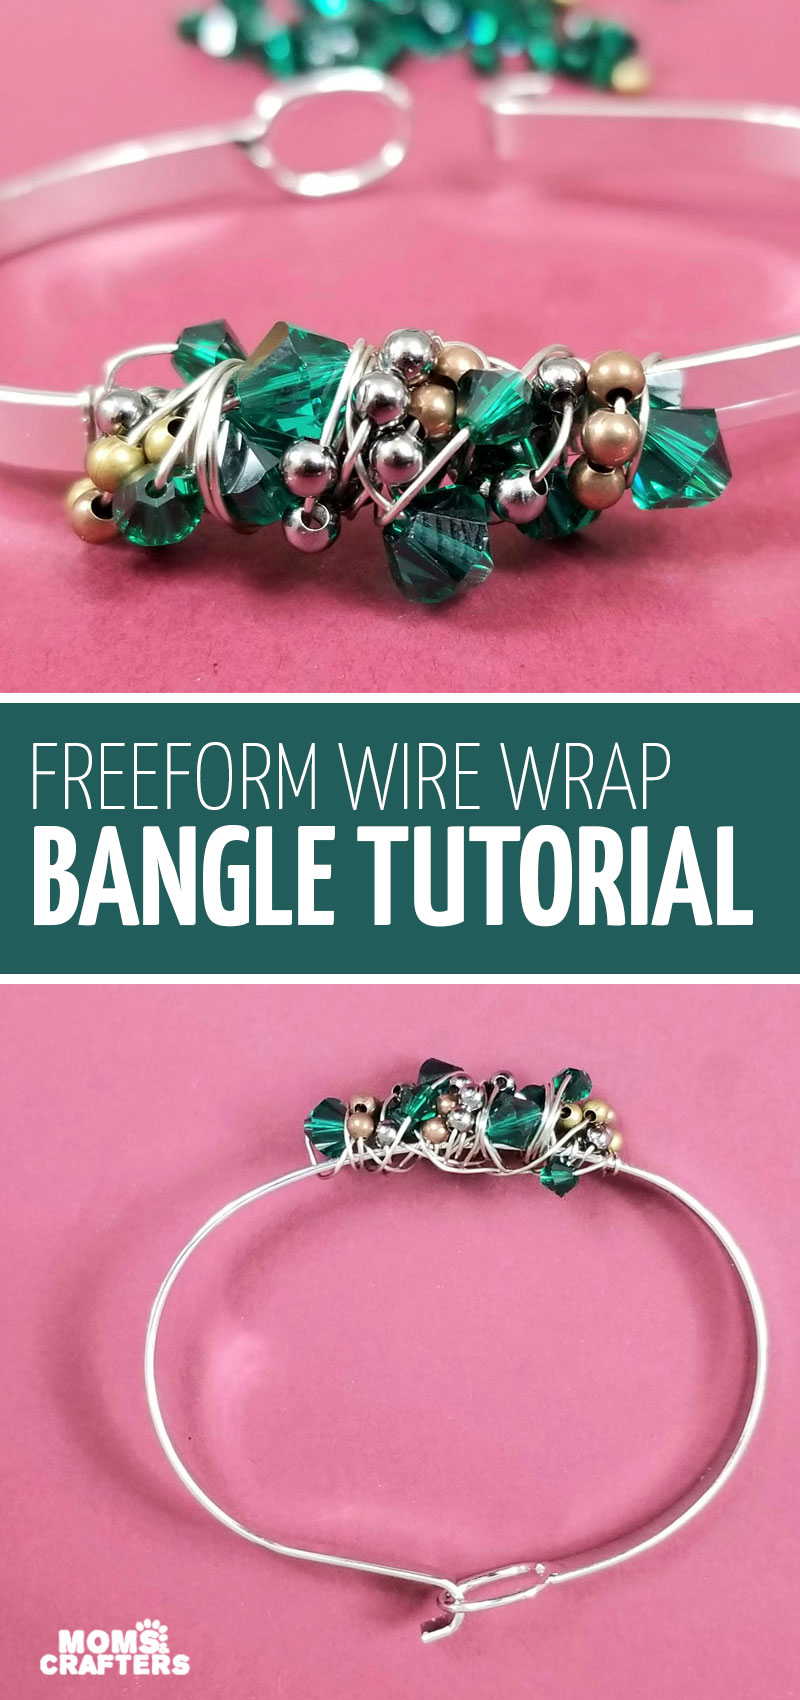
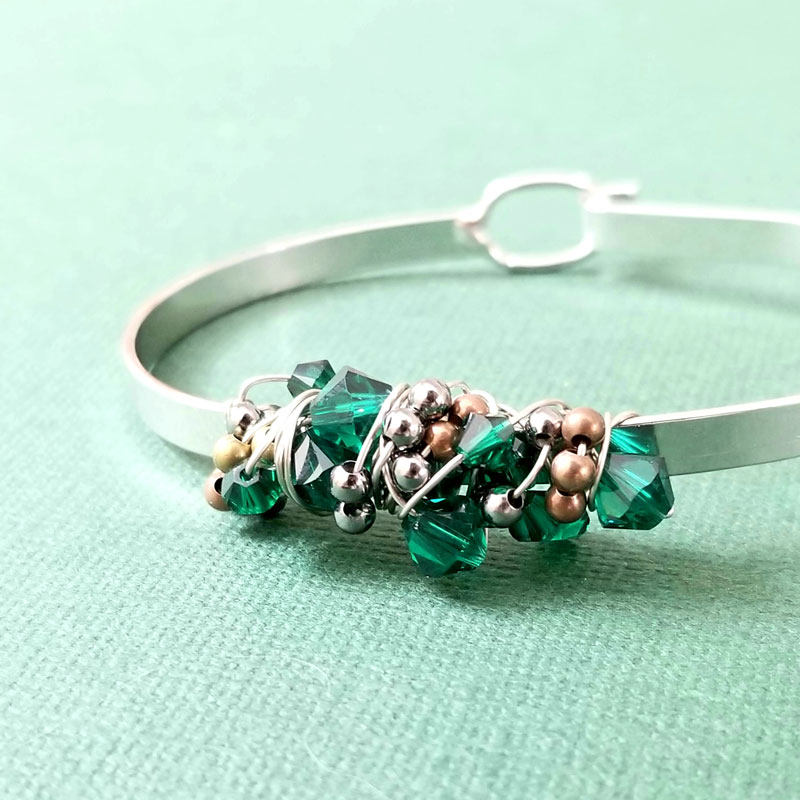
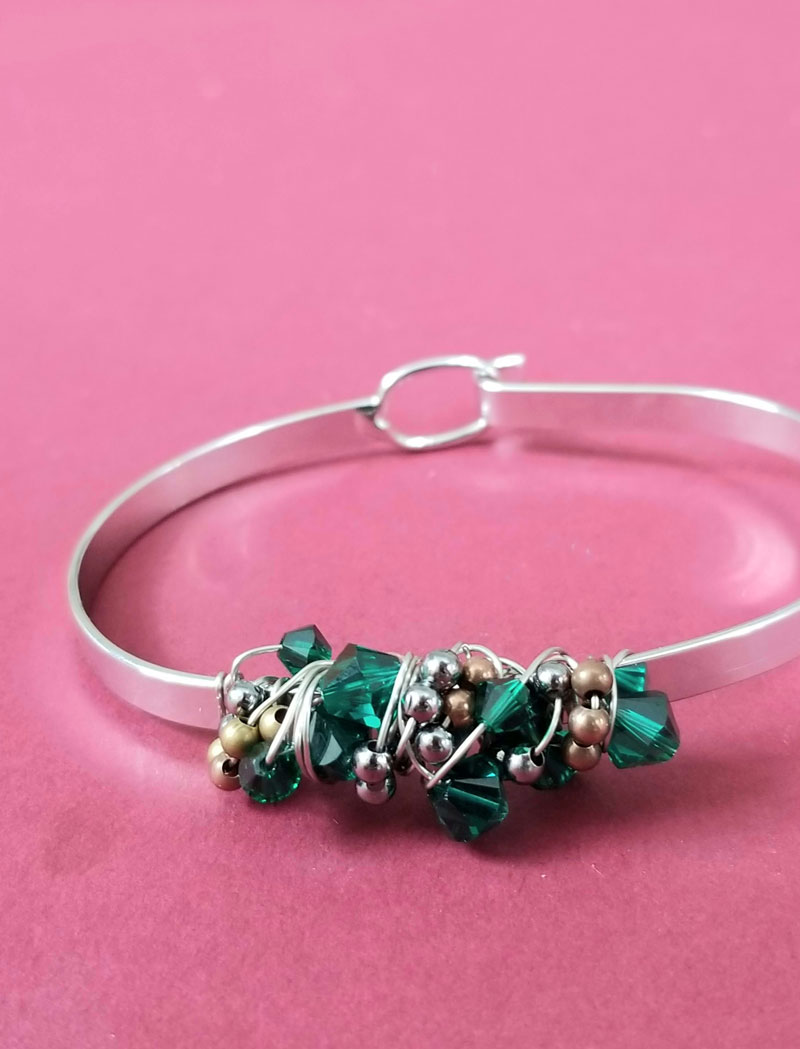
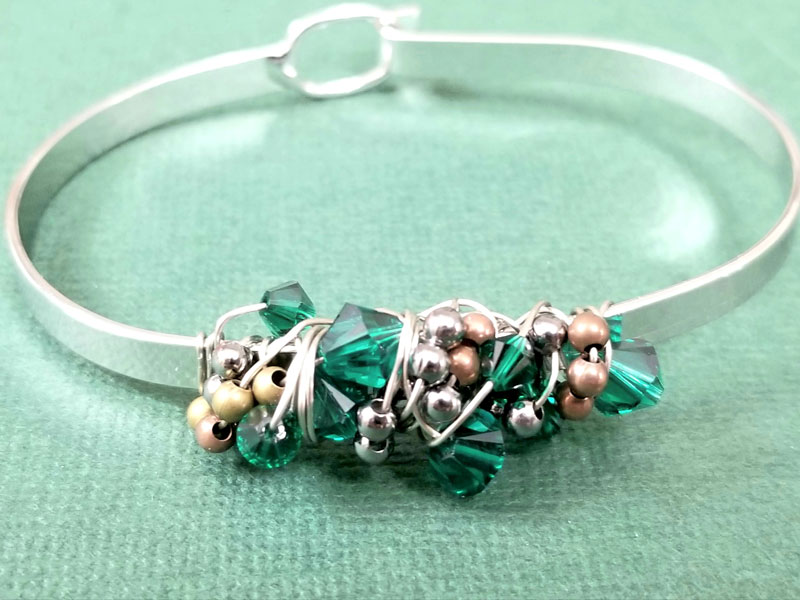
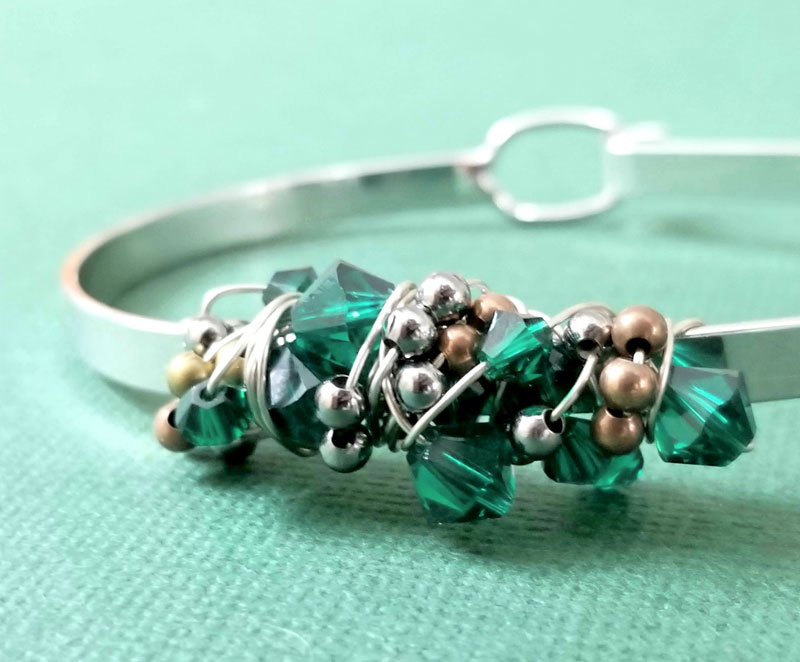
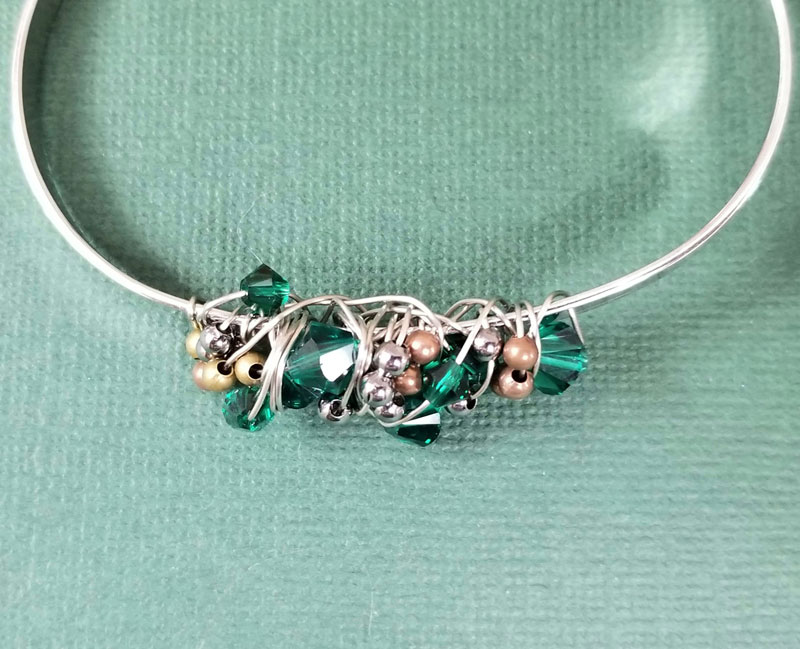
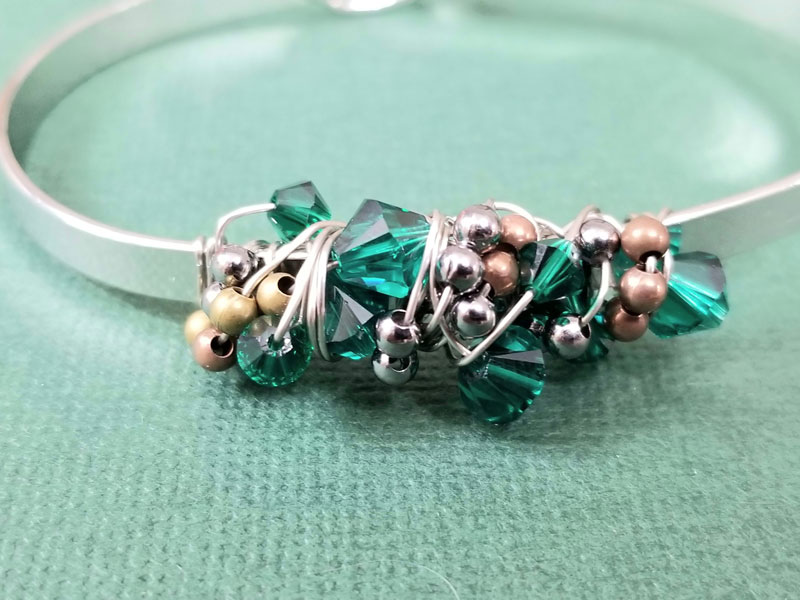
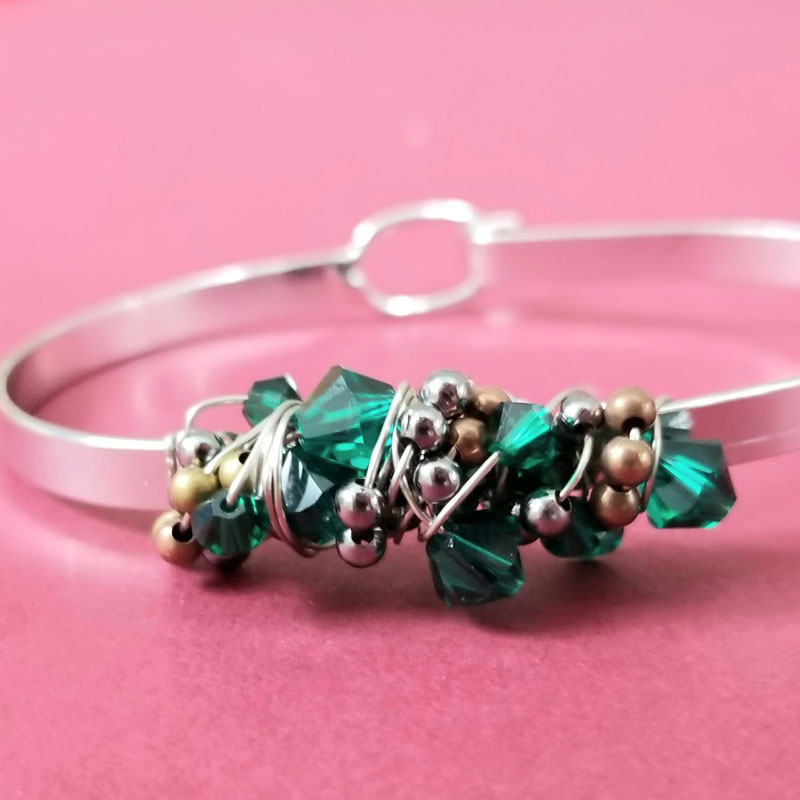
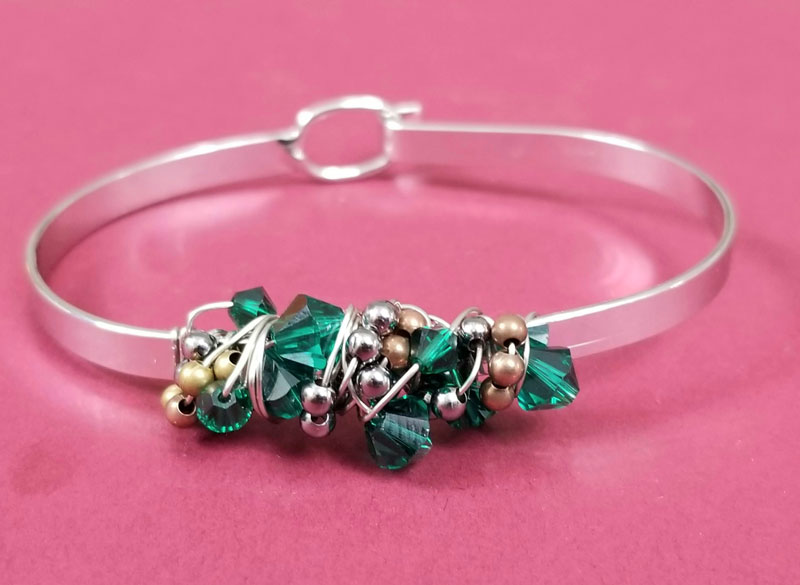
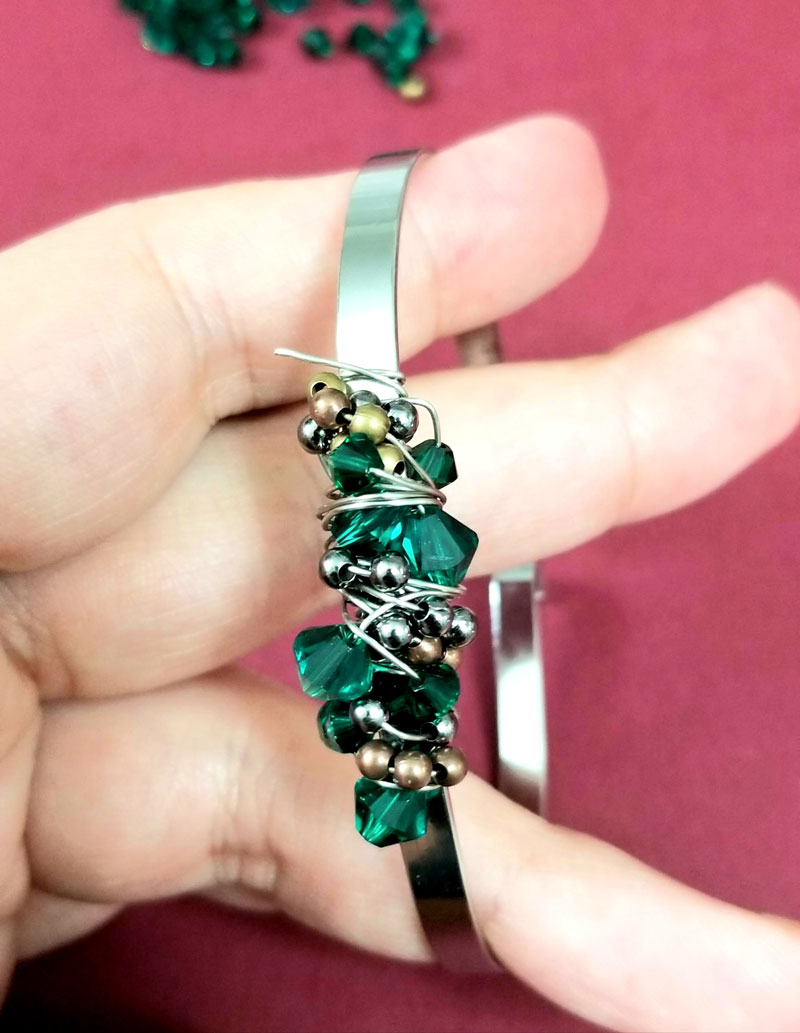
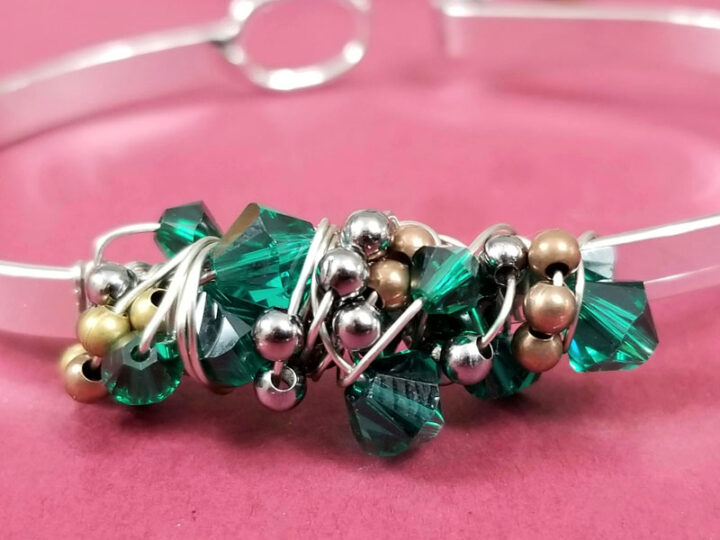
So this particular wire wrapped bangle bracelet tutorial was crafted using emerald green Swarovski bicones in a 4mm size for a touch of sparkly color. I made it to match a dress I got for Passover from H&M.
I also used mixed metallic beads to tone it down. The beauty of the mixed metallics didn’t quite show as I’d wished, but it does still look nice. I have another tutorial coming soon with just these beads where they are really beautiful, so if you’re on the fence if you should get these or not, my advice would be… of course!

The base is an inexpensive, solid bangle. The disadvantage of this tutorial is that the very base piece isn’t a “bulk crafting item” – rather it’s upgrading a simple piece of jewelry.
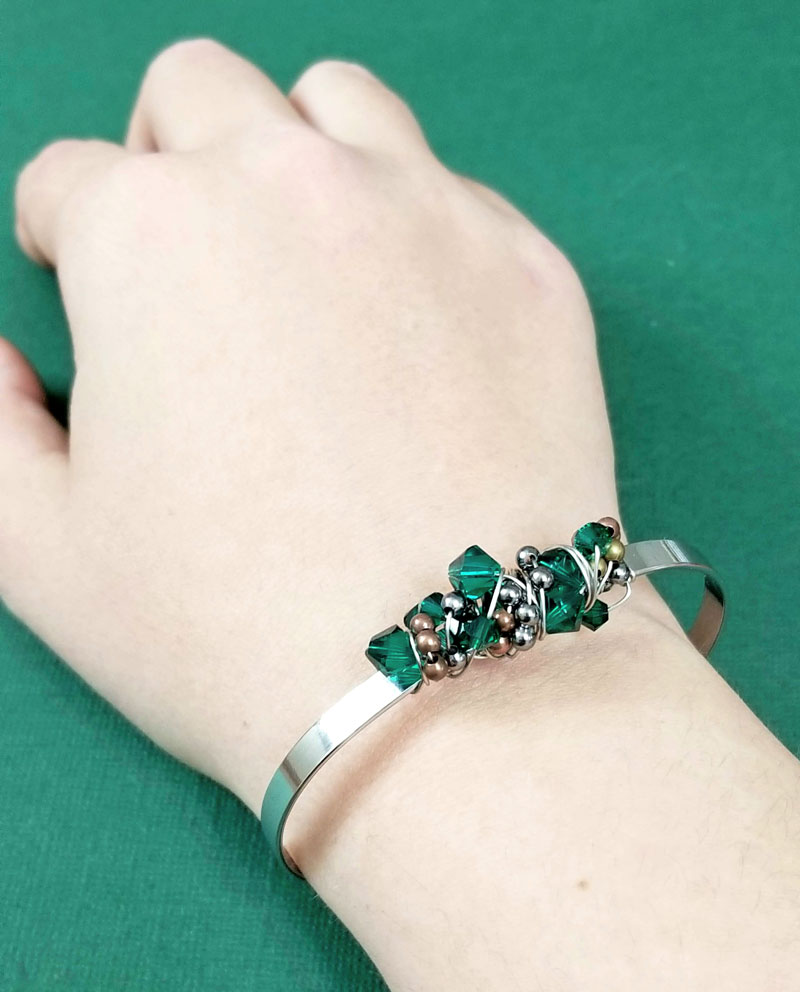
For the base, I recommend a bangle that opens, that’s flat, oval and not round, and small enough that it doesn’t flip around on your wrist. If you do it with a traditional circular bangle, the wrapped portion will just flop around.
With the style that I used, it pretty much stays put.
What you need to craft this wire wrapped bangle bracelet tutorial:
- An oval bangle with a clasp
- 22-24 gauge wire (thicker will be too hard to work with, might break the beads; thinner won’t hold well)
- Beads – I used 4mm Swarovski bicones in emerald, and 3mm mixed metal accent beads

Tools:
- Wire cutters
- Needle nose pliers – if you’re working with non-precious metals, I recommend a serrated jaw
Want to learn how to make jewelry out of anything? Get the book!
How to make a wire wrapped bangle:
Follow along with these wire wrapped bangle bracelet instructions and comment with any questions! A printable version of the instructions (without photos) is available at the end of this post.
Tip: The first few times you make this, you’ll want to use cheap wire, in case it takes a few times to get the hang of it, you can snip the whole shebang off and try again.
Wire Wrapped Bangle
Make a stunning, sloppy freeform wire wrapped bangle. This tutorial is great for beginners, but cool enough that even wire wrapping pros will want to give it a go!
Instructions
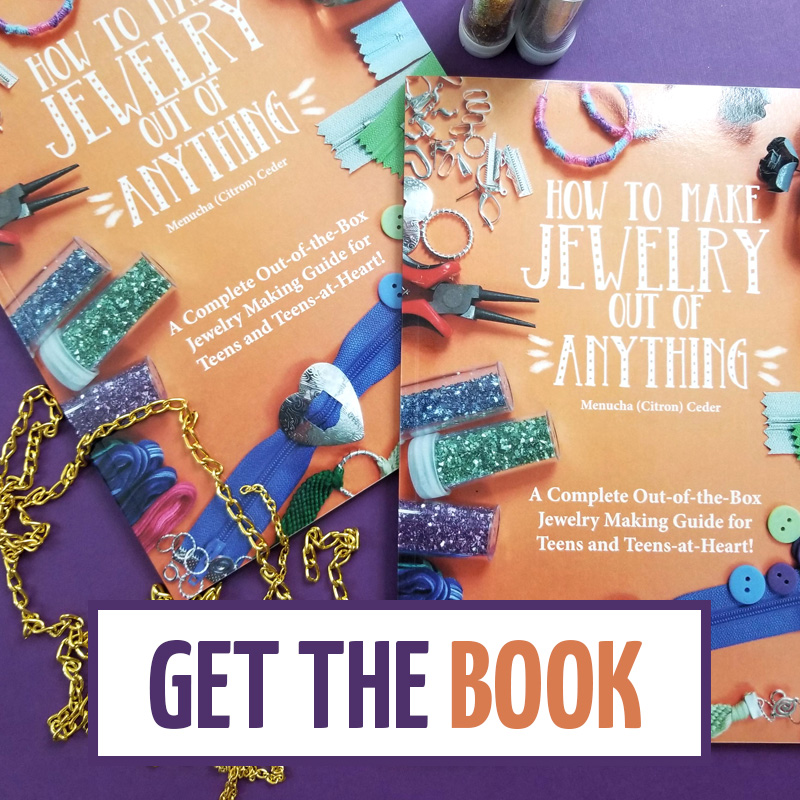
- Cut a generous length of wire but not too much that you can't work with it. Wrap the end around the part of your bangle where you want your wrap to start. Make sure any loose ends of wire sit on the outside of the bracelet and are wrapped over.
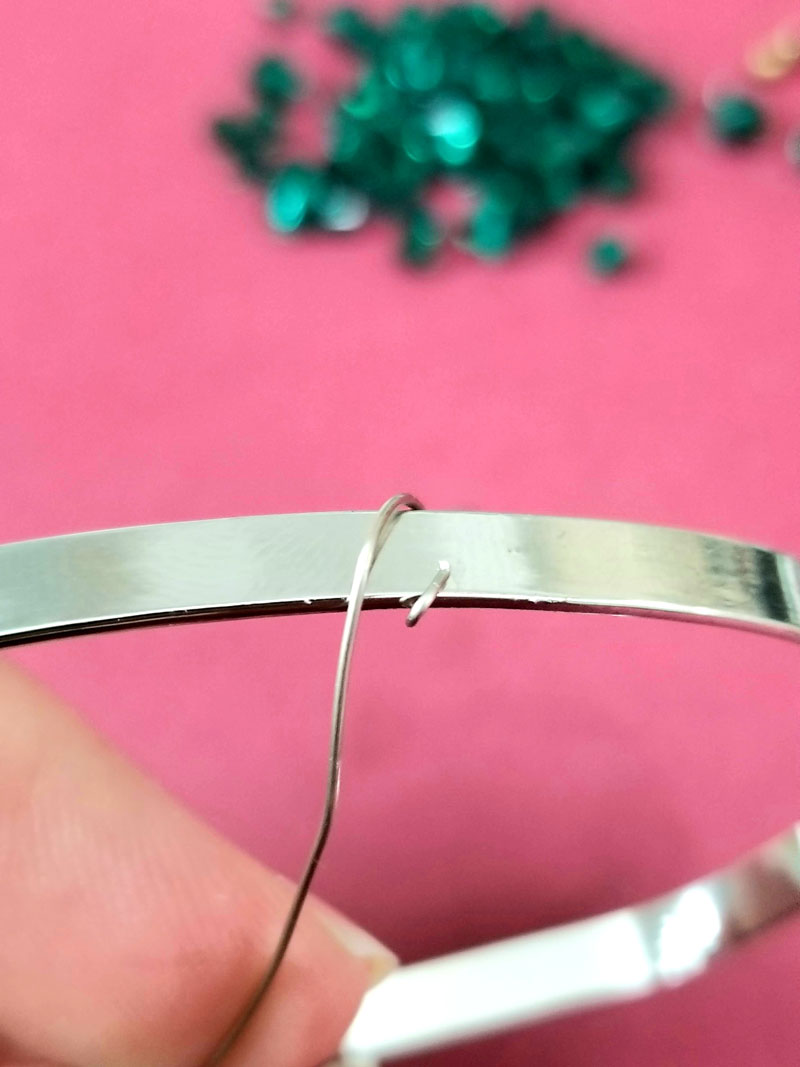
- Wrap around a few times. Add a bead or three. Wrap again. Add beads as you'd like, and wrap around in a messy but firm form. Make sure all beads sit on the outside.
- Keep on wrapping and adding beads until you're satisfied and your wrapped portion sits nicely in the center. I add some 3-groups of beads to solidify things. On the back, the wire should sit straight on the bangle (use your pliers to squash it as needed). If things feel messy (the ugly kind, no the pretty kind), add beads and wrap over.
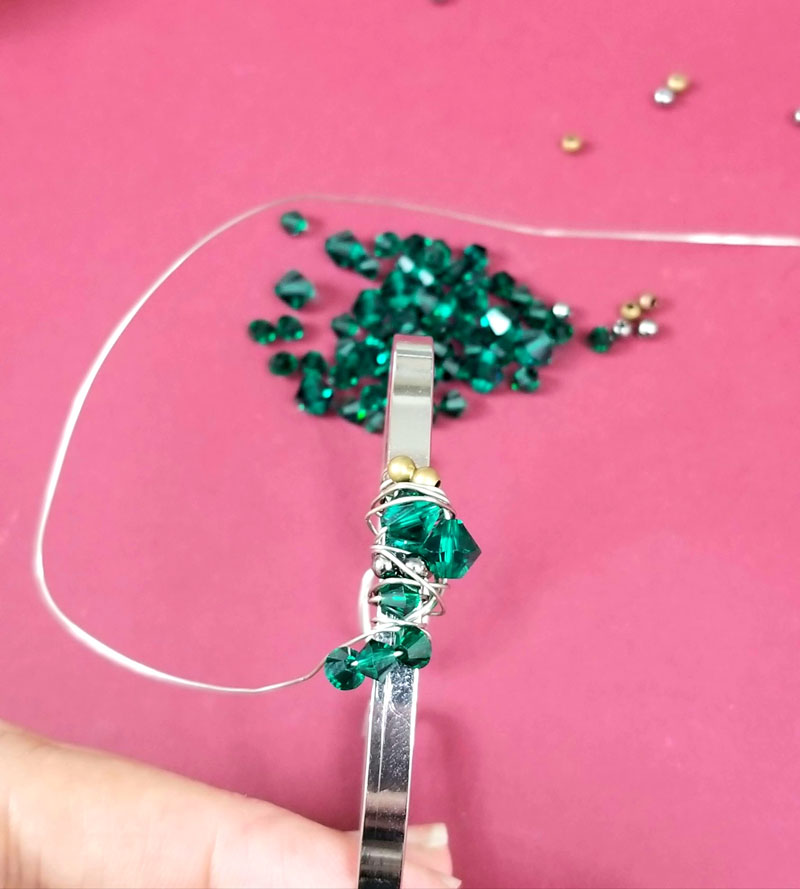
- Your beaded/wrapped portion should be firm enough that moving it would require some effort.
- When you're done, tuck the tail end deep into the wrapped mess. That's it! You can now wear it and love it and show it off A LOT.
Notes
The first few times you make this, you'll want to use cheap wire, in case it takes a few times to get the hang of it, you can snip the whole shebang off and try again.
Recommended Products
As an Amazon Associate and member of other affiliate programs, I earn from qualifying purchases.
-
 How to Make Jewelry Out of Anything: A Complete Out-of-the-Box Jewelry Making Guide for Teens and Teens-at-Heart!
 -
 Over 75 Printable Coloring Pages for adults - HUGE DISCOUNTED Coloring Bundle- PDF instant digital d
 -
 Sewing Shirt - Vintage Sewing Machine Sketch - Women's short sleeve t-shirt in red, green, blue,...
 -
 Unisex Fleece Hoodie for Crafters - I Make Stuff What's Your Superpower - Funny Humorous Gift for Cr
 -
 Learn With Play Kids Activities Ebook

Right off the bat, this tutorial has an immediate flaw. Where did you buy that underlying bangle? I have never seen anything like it and have no CLUE how to find one. You ought to have at least told us where you got all your materials and/or what that bangle of yours is CALLED so we know at least how to Google it! Until I have a prayer of finding a bangle like the one in this tutorial, I have no use for the tutorial.
Hi!
I apologize that you missed it. All materials are linked in the materials list, including the bangle. I purchased it from AliExpress, however I don’t like to call that out as I don’t want to necessarily promote purchasing from there (I no longer do) however I did still link to the one I used in the materials list so that you don’t need to hunt it down. As for what it’s called “Minimalist fashion personality contracted fine gold bracelet Women’s fashion beautiful bracelets free send a bracelet” wouldn’t really help anyone. I do want to be clear that you can do this with any bangle – preferably a wide, flat one- and I’d actually recommend prioritizing one you have at home.