
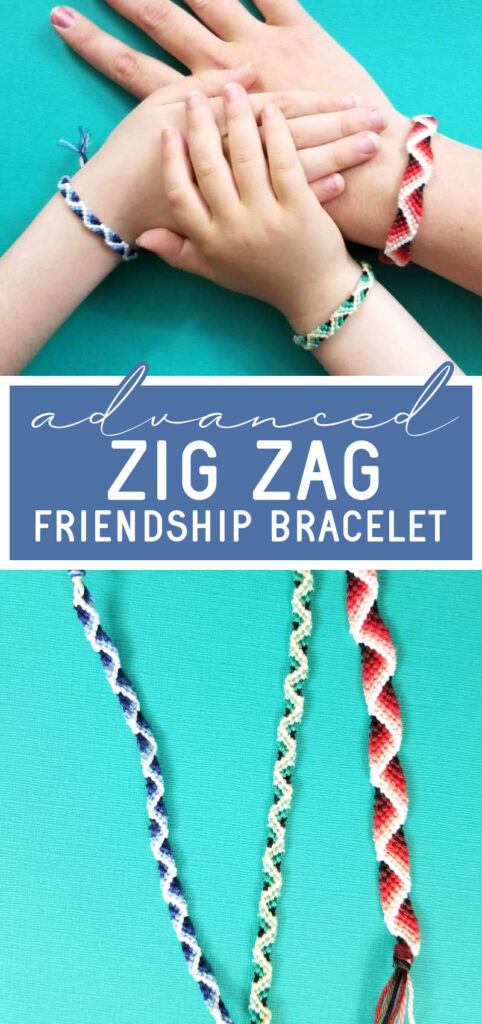
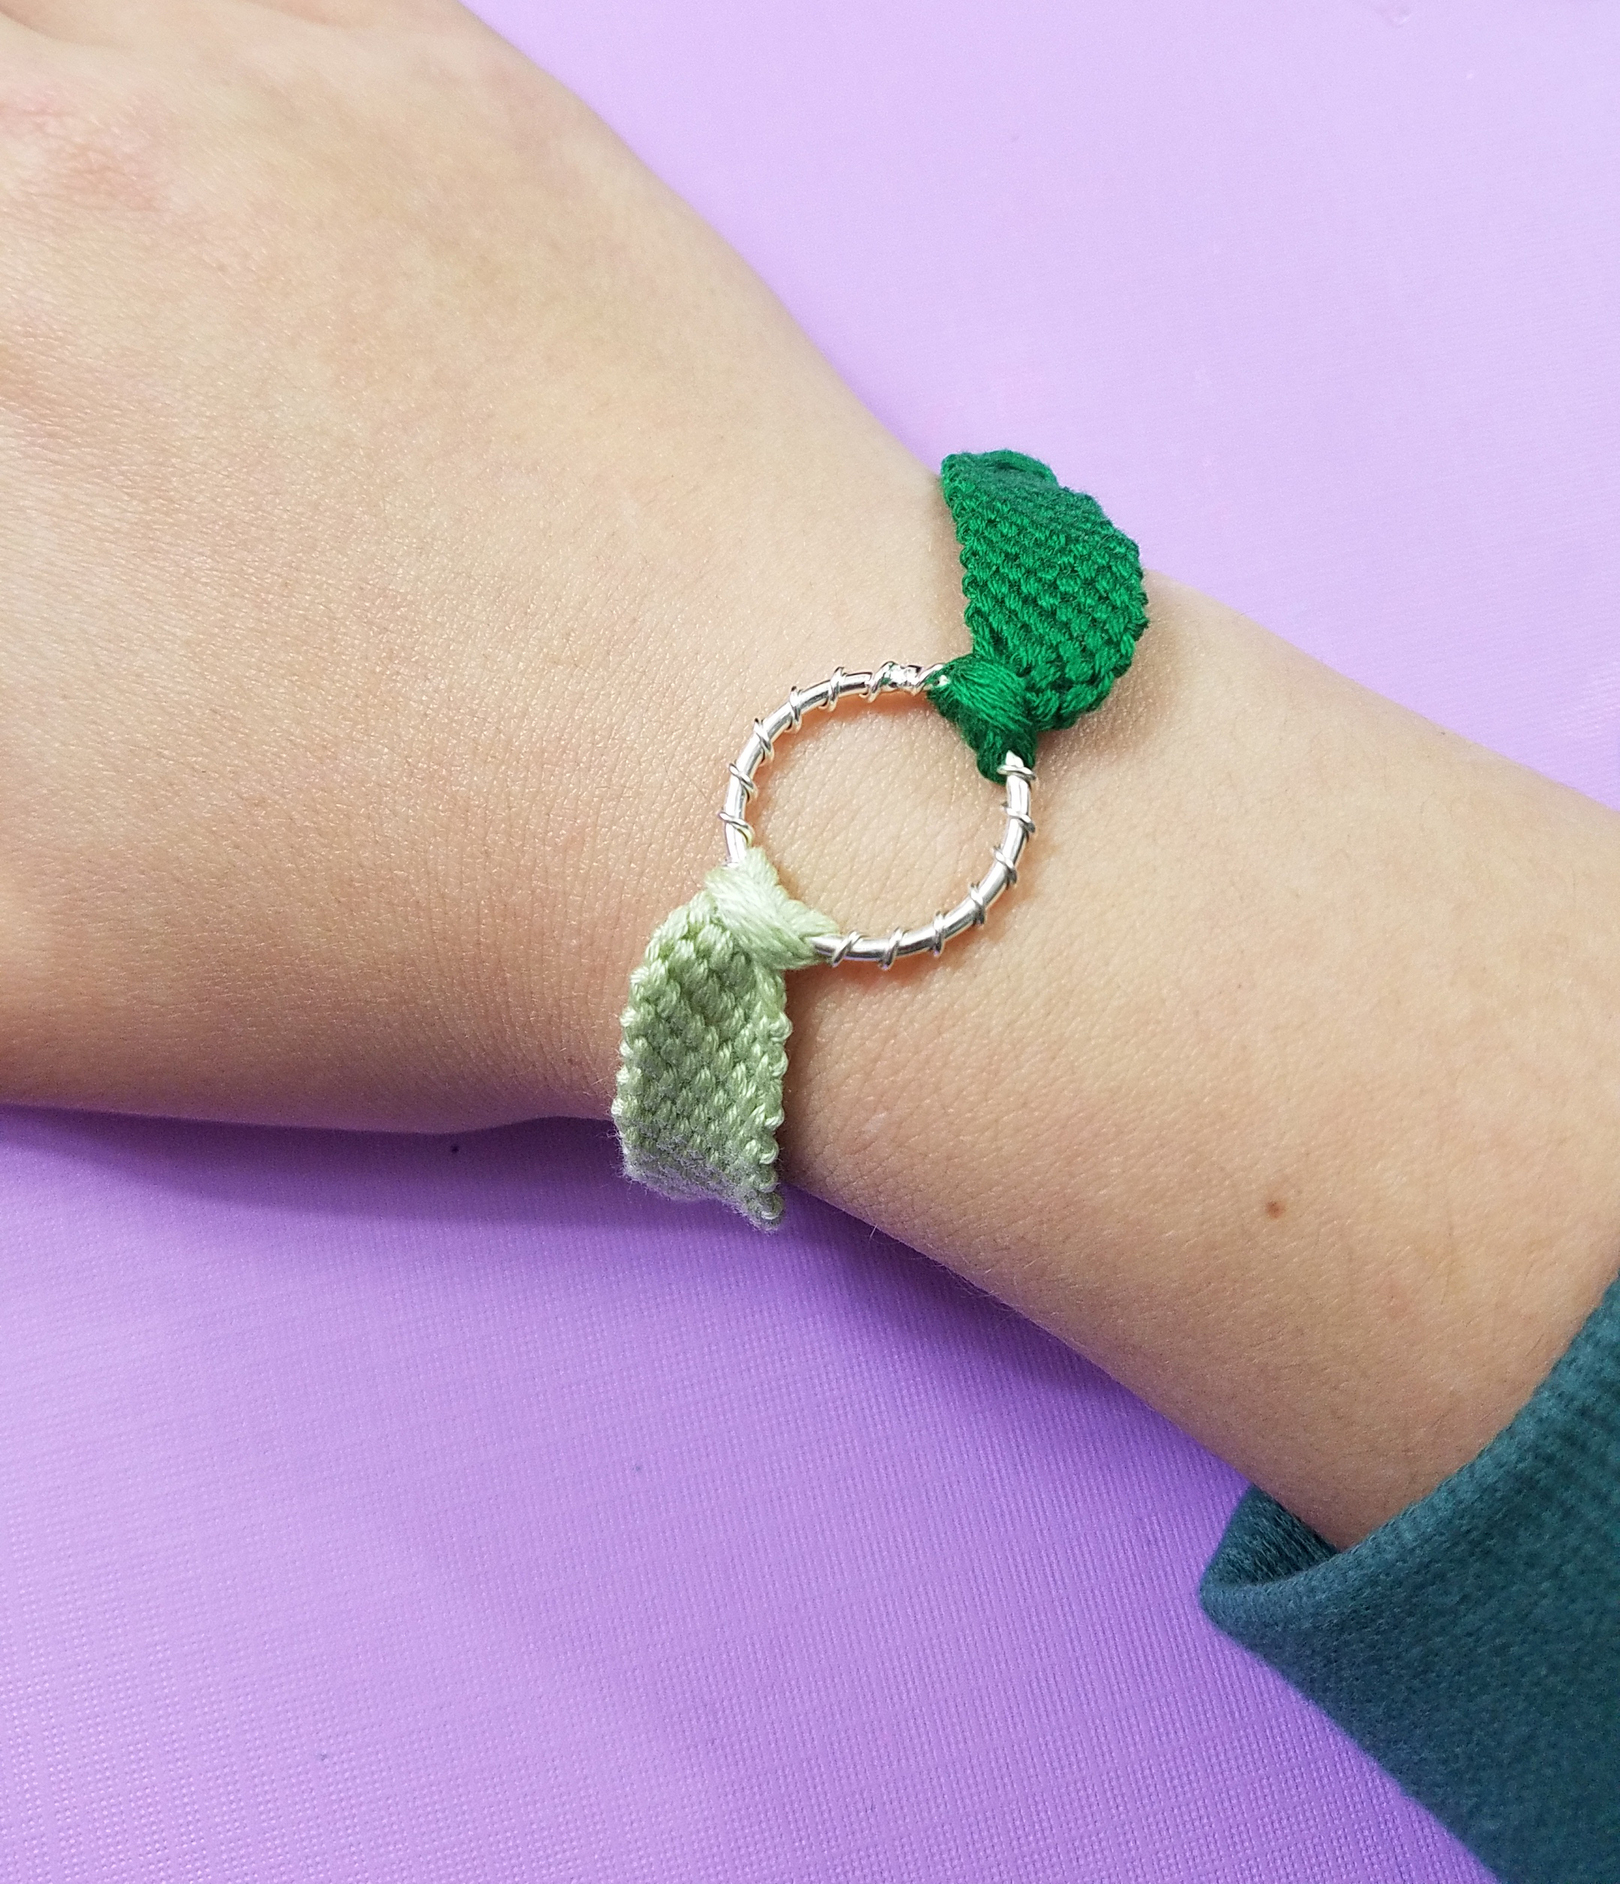
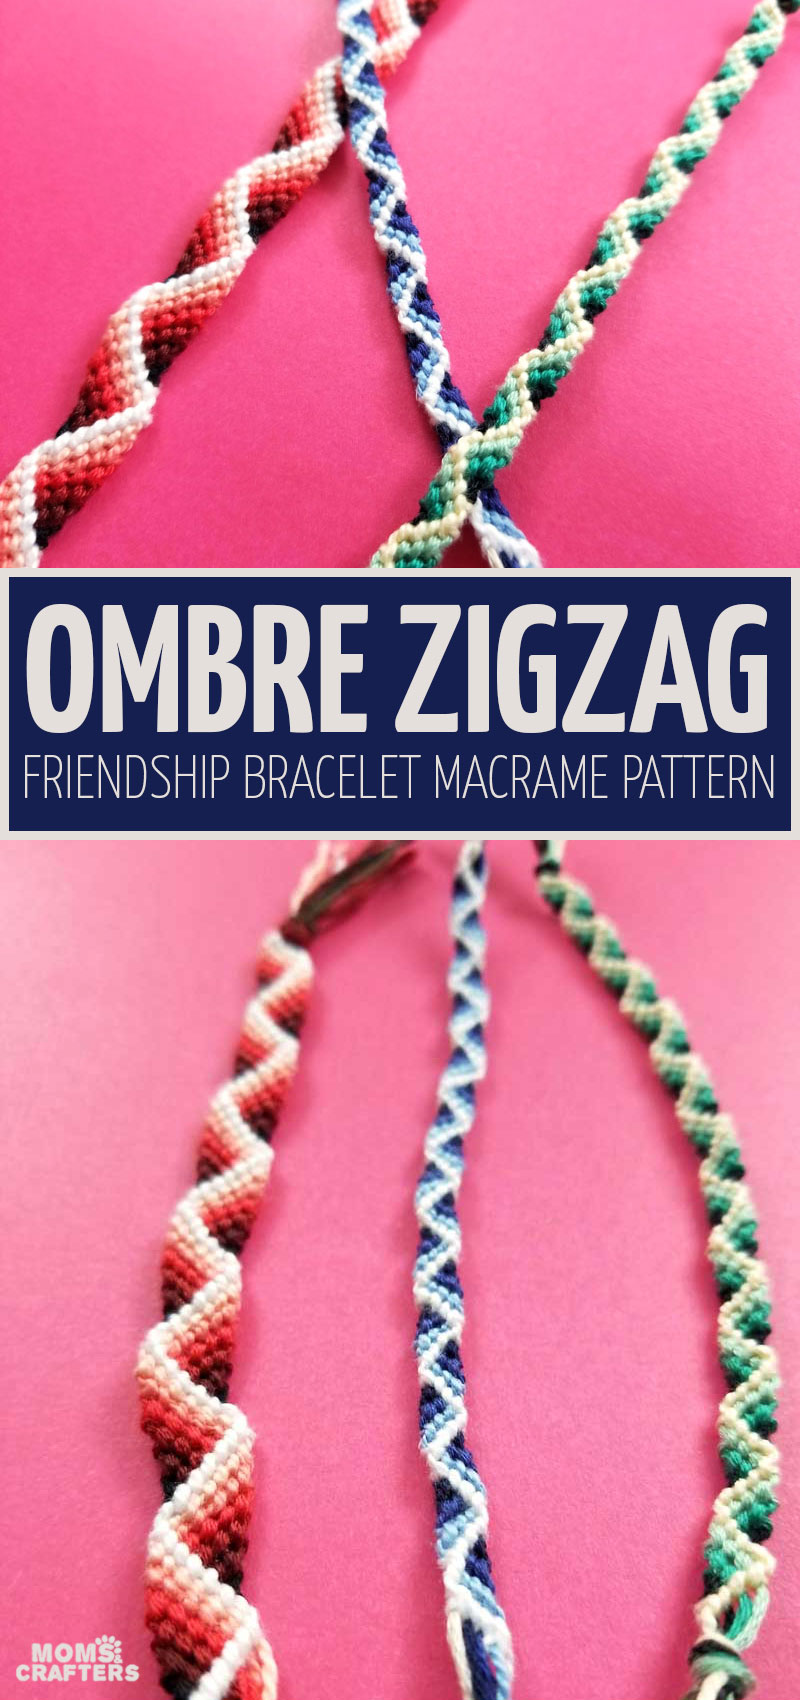
Zig Zag Friendship Bracelet Pattern with a 3D effect!
When I was a tween, I created this zig zag friendship bracelet pattern with a 3D effect and it’s time to share! If you want another cool 3D bracelet, check out the diamond friendship bracelet pattern. I used to make stacks of DIY friendship bracelets, eventually discovering how they created the patterns they did, and coming up with my own ideas. You can print the instructions at the bottom of the post. Disclosure: this post contains affiliate links. Post was originally published May 2019.

As a craft blogger, my job is to come up with ideas. And sometimes these ideas can lead to disappointment when we realize that we’re not the first ones who thought of it…
One of the first ideas I came up with was this zigzag friendship bracelet pattern. I created it as a young teen, when I wanted to make a 3D ribbon effect on a bracelet.
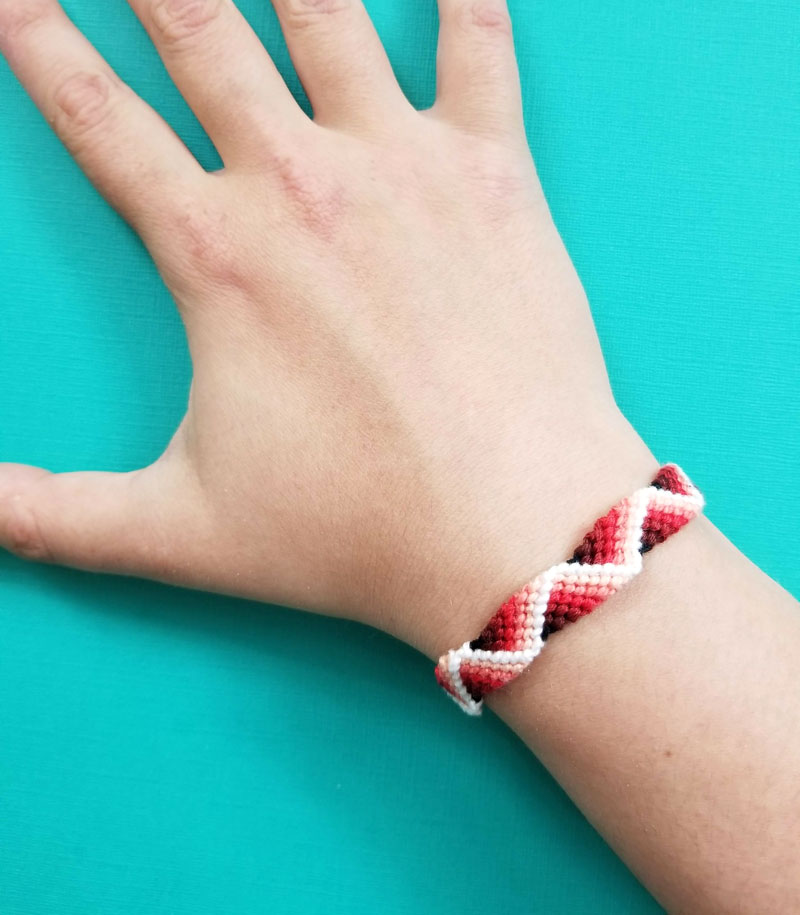
With summer 2019 upon us, I decided it’s about time I share one of my first crafts that I came up with myself – a friendship bracelet that has a zigzag pattern built into it. While the classic zig zag friendship bracelet is actually in the shape of a zigzag, this one offers a 3D zigzag effect instead.
While I was researching which keywords to use in this post, I discovered that the basic pattern of it has been out there already. Oh, well! It’s not that unique of an idea. But it can be hard to see that you’re not the first one sharing something that you know you came up with, in your own bedroom, over fifteen years ago…
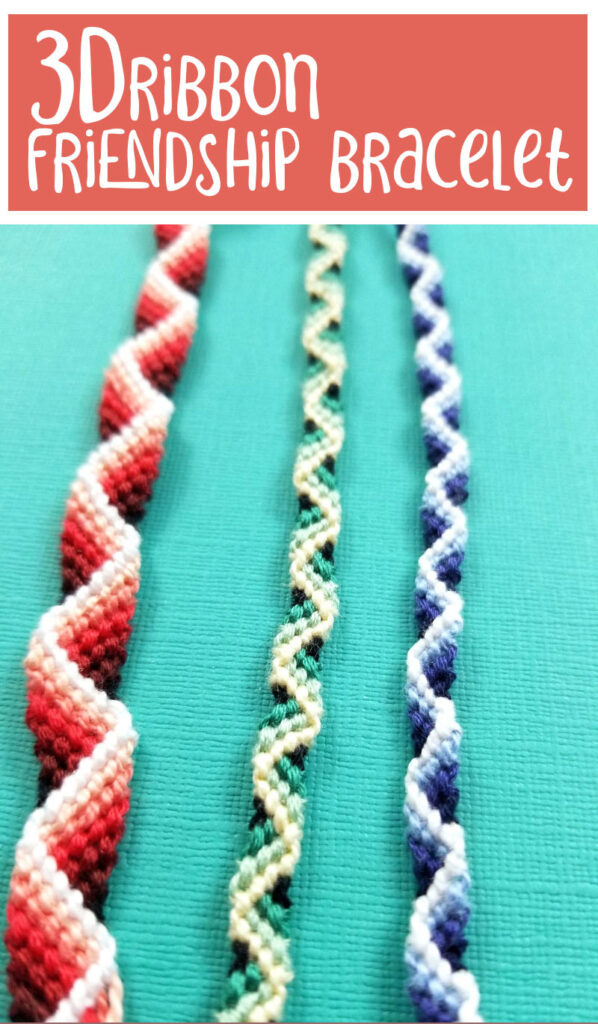
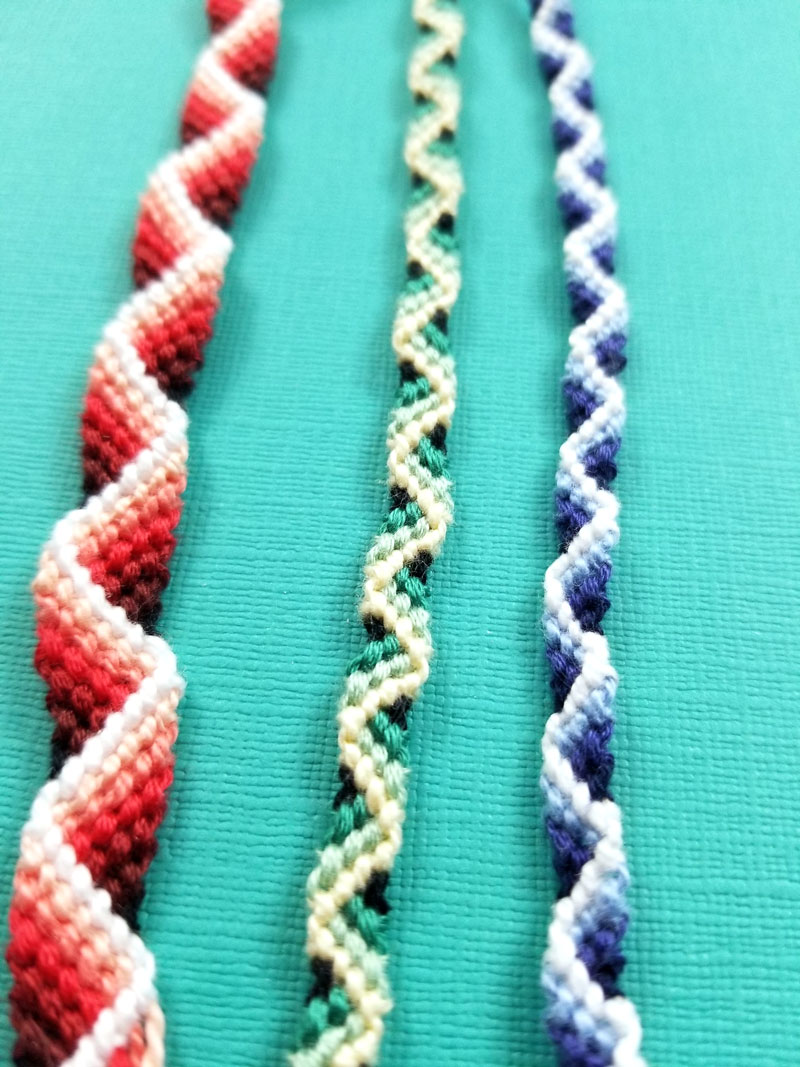
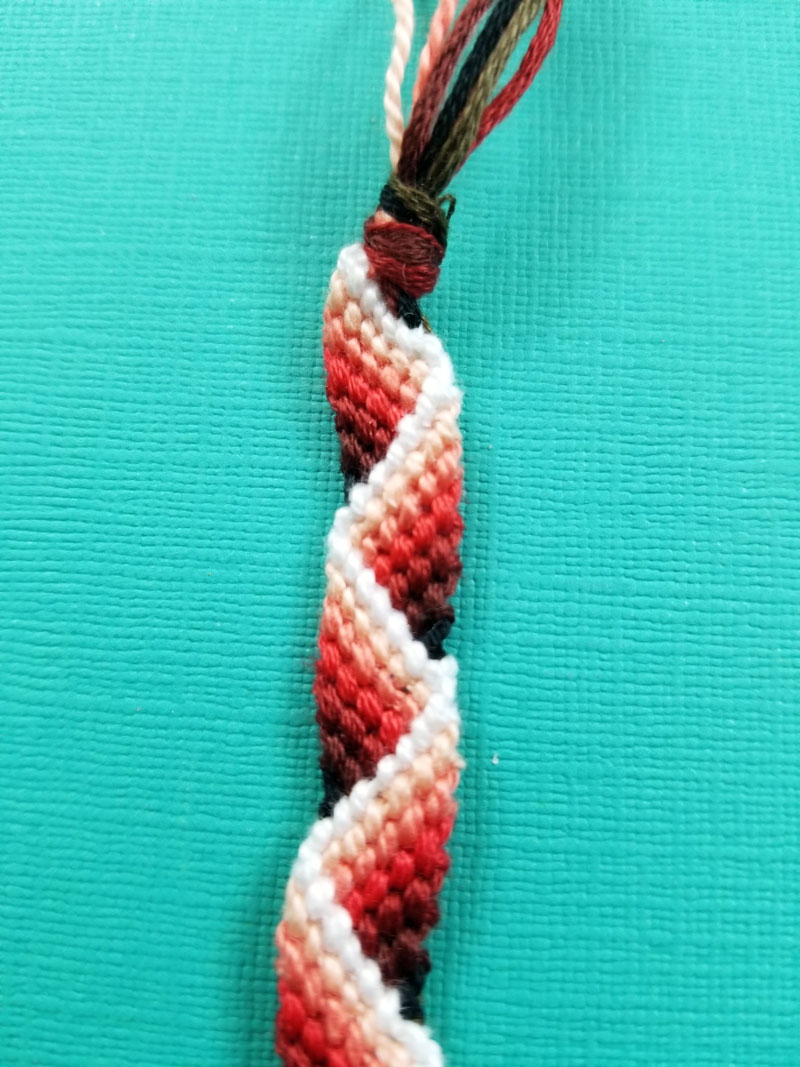
However, I’m happy to see that no one has yet shared it quite like I invented it. When I made this design, my goal was, from the start, to draw a 3D ribbon into the bracelet. To that end, I used graduating shades of the same color or analogous colors, with the lightest being the largest zigzag and the darkest sitting in the corner to create an illusion of a zigzag ribbon.
It was my early graphic designer mind thinking, and so I created this zig zag friendship bracelet pattern to accomplish that goal.
The basics of making zig zag friendship bracelets
There’s one string that I call the “joker” that doesn’t show – it’s only knotted around and it’s never actually knotted with. That one can technically be any color but since it might peek out at the beginning and end of your zig zag friendship bracelet, I’d recommend using something that’ll go with the flow (but won’t be confused with the others).
I also use the “joker” for a practical purpose. It’s always the last ribbon that you knot around in both directions. That shows that you’re done the row. You complete the round when everything’s back in the original order. But I’m getting ahead of myself…
You can make this zig zag friendship bracelet in any number of shades. The more shades you use, the more dramatic the 3D effect will be. However, it’s significantly harder to use more colors.
I tested this pattern with up to 8 strands (7 showing). It should work with more as well. I’d recommend starting with 5 strands/4 showing as featured in the step-by-step tutorial, however, I’ll share the rough formula for adding more.
From the start, I faced a huge challenge. Such a significantly larger amount of the light colors are used that it’s hard to gauge.
Back then, I just guesstimated what I needed and now and then I knotted more string to my original and hid it in the back.
Now, I finally sat down, tried a few things, and came up with a basic formula for the length of each string. It’s not totally mathematical but with a bit of trial and error I figured something out that’ll work for most bracelet widths.
A few tips for successfully making a zig zag friendship bracelet
- If the last string is too long for you to handle, fold it loosely and gather it, being careful not to pull on it so it knots.
- You can always add more string! Just tie another one to the end of the string that’s too short and pull tight, leaving a small tail. Make sure it lands in the back of your zig zag friendship bracelet when you get to it. When you’re done making your bracelet, glue the knot and trim it all the way.
- If you run out of thread and don’t want to add (or if you see you’ll run out) you can do a braided end, or finish it off in some other quicker way.
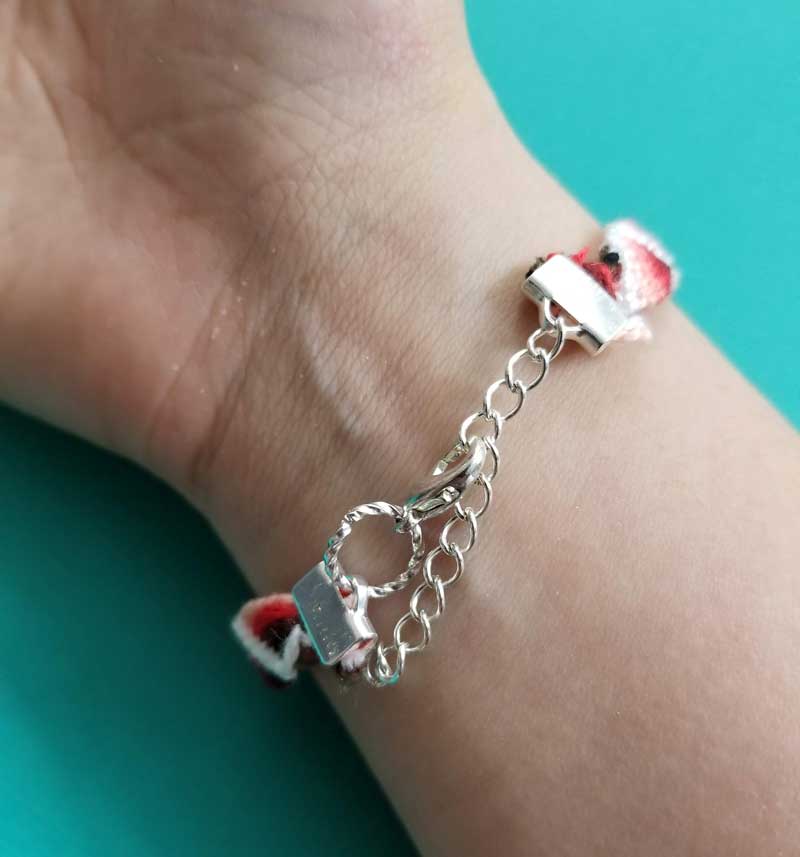
- And finally, if you’re just a little short on thread, you can do what I did on one bracelet: finish it off with ribbon crimps and an adjustable clasp.
Choosing colors for this 3D advanced friendship bracelet
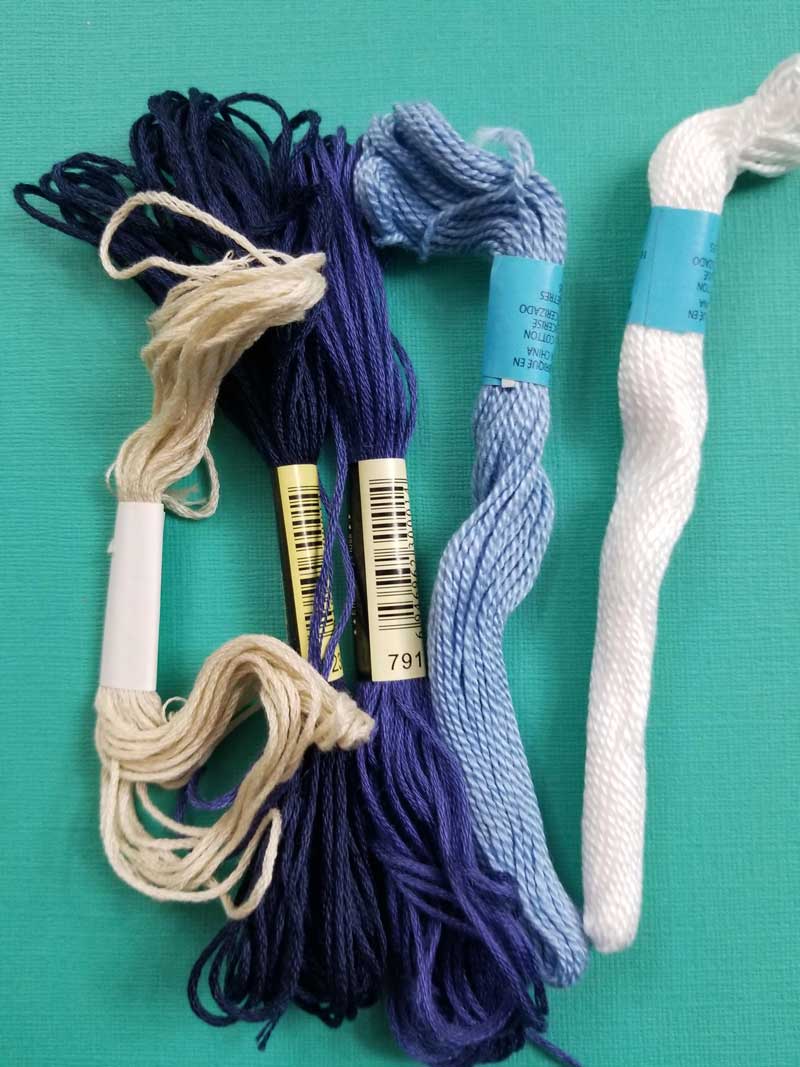
As mentioned above, you need to choose graduating shades of the same color OR analogous colors to get the 3D effect. Analogous colors are next to each other on the color wheel. If you take this approach, I’d recommend choosing a group where one is significantly lighter than the others – such as yellow, yellow orange, orange, red orange, red.
Whatever you do, you can also start with white and end with black.
I used to choose my color schemes by browsing the open-stock DMC threads in A.C. Moore. The quality of those threads were significantly better than the large packs I sometimes buy. Whether you want to spend for better quality or not is up to you, but there is a big difference.
I also loved that I was able to find this ombre effect in very unique shades, something that large packs don’t usually have. I wish I had photos of the zig zag friendship bracelets I made back then…
Regardless, you can definitely get big packs that have good colors for this pattern – they’ll more than do the job.
Want to learn how to make jewelry out of anything? Get the book! It’s got loads of fun, quirky, and colorful jewelry ideas for teens and teens-at-heart – PLUS more unique twists on friendship bracelets!
Supplies needed to complete this friendship bracelet pattern:
Optional finishing supplies for making a zig zag friendship bracelet:
- Ribbon crimps in the width of your bracelet
- Flat nose pliers
- Round nose pliers (or any second pair)
- Clasp
- Chain or a few jumprings to connect clasp to
- Jumprings for attaching ribbon crimp to clasp
Zig Zag friendship bracelet instructions :
1. Choose at least 4 colors to create an ombre/gradient plus your joker color (that won’t show)
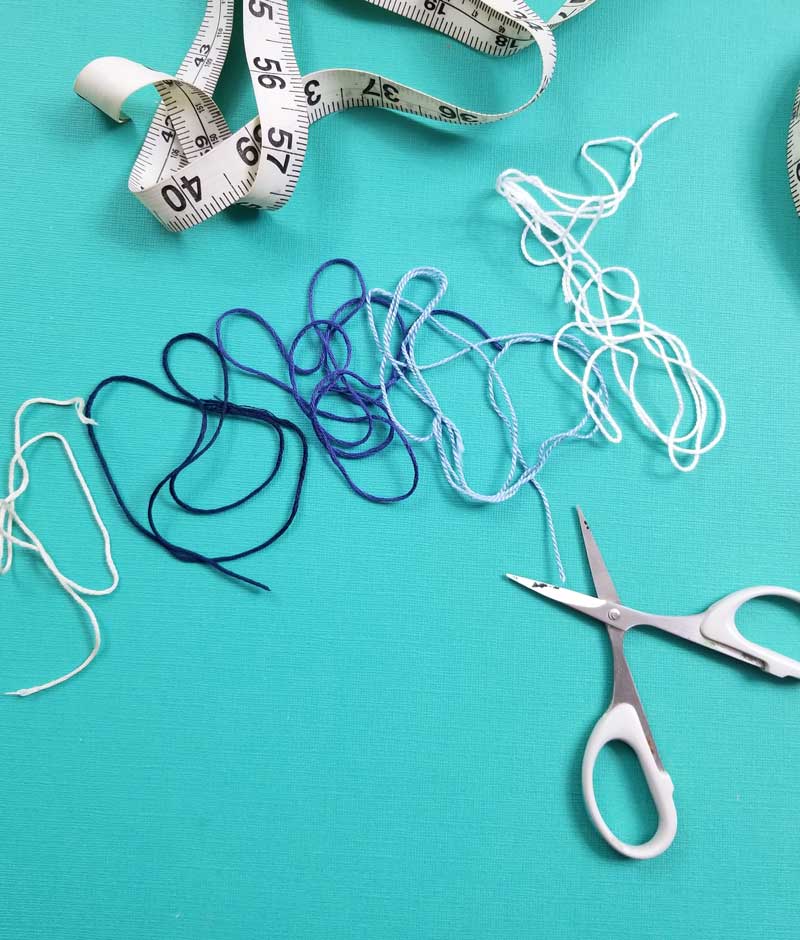
2. Cut them to size. The approximate measurements are as follows (toss in an extra inch or two if you know you’ll need every last bit of the full length).
For a 4-color gradient (joker, then darkest to lightest, in inches): 13, 18, 27, 36, 45
For a 7-color gradient: 16, 22, 33, 42, 51, 60, 69, 78.
If you’re really ambitious, you can probably do a few more shades, adding +9 inches for each one, and adding an extra 3-6 inches per color for the earlier shades.
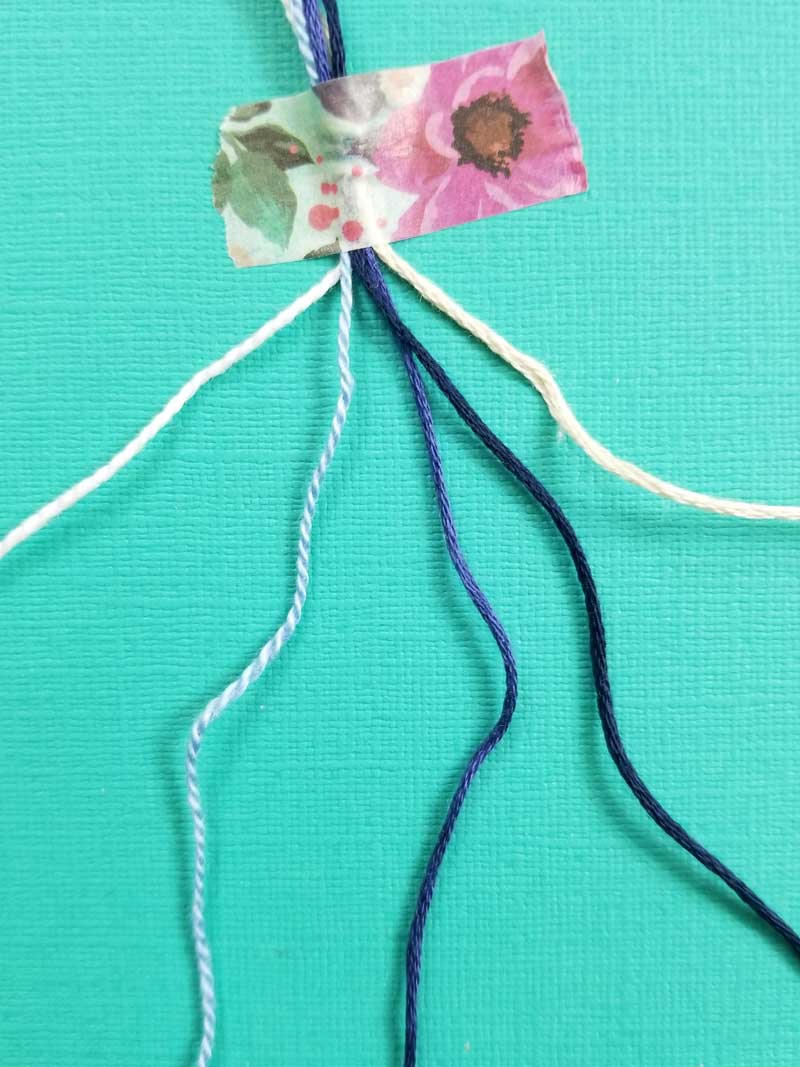
3. Place them in order from shortest to longest – first the joker, then the darkest, and each descending shade until you reach the white or almost white strand.

4. Knot your strands together about 1 inch from the end if you plan to add a clasp, 2 inches if you plan to tie it on your wrist.
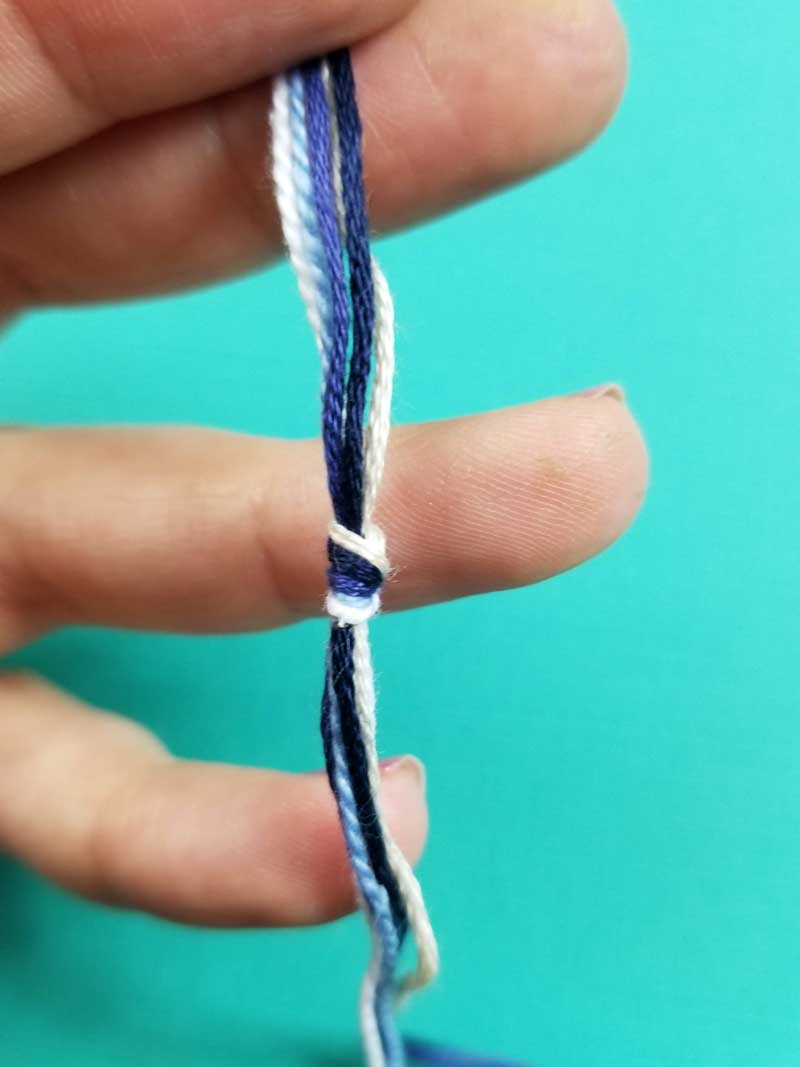
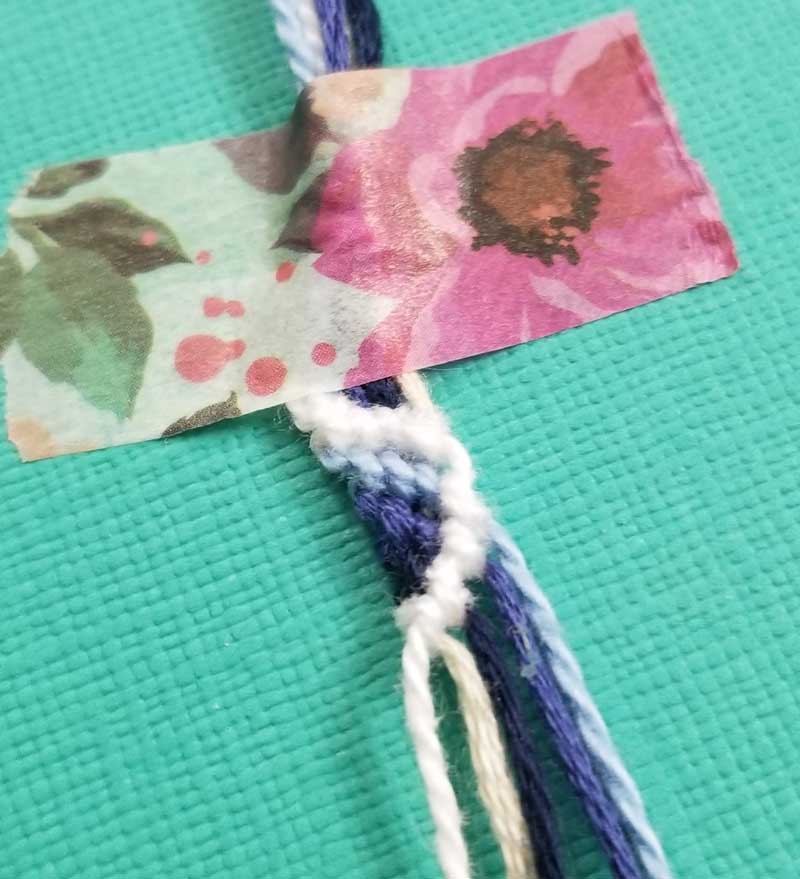
5. Optional: tape it down to your surface.
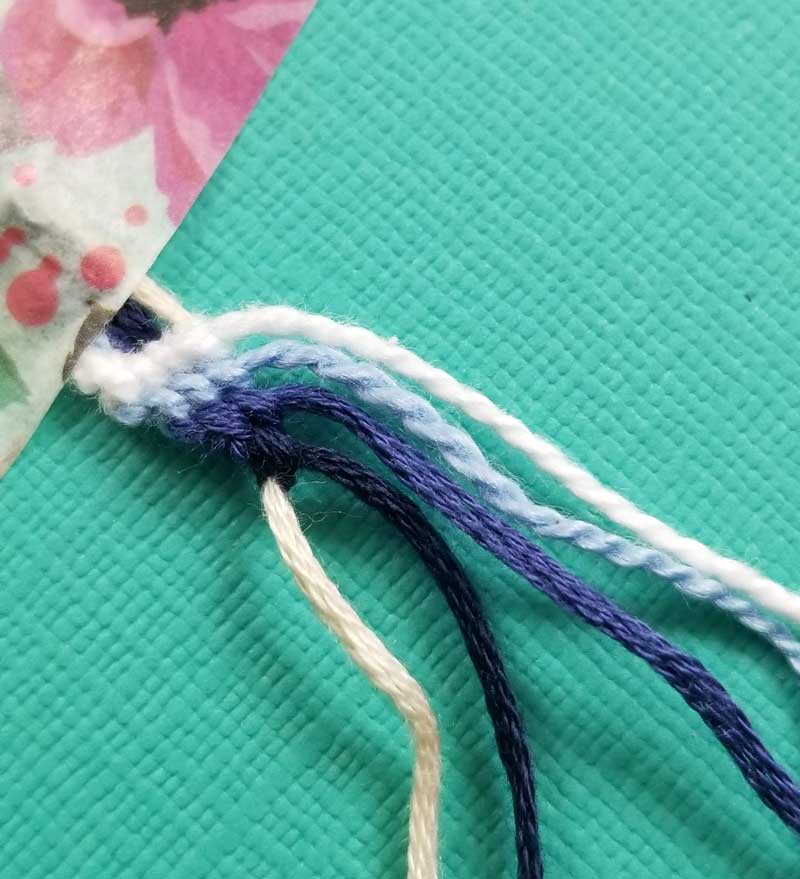
The order of your strands may have shifted slightly so make sure to separate them and place them in order before knotting your first row. By the way, the bracelet is flipped over – in step 3 I did it darkest to lightest, however when I taped it down, I flipped it over so that I worked lightest to darkest. Just an oversight… doesn’t really matter!
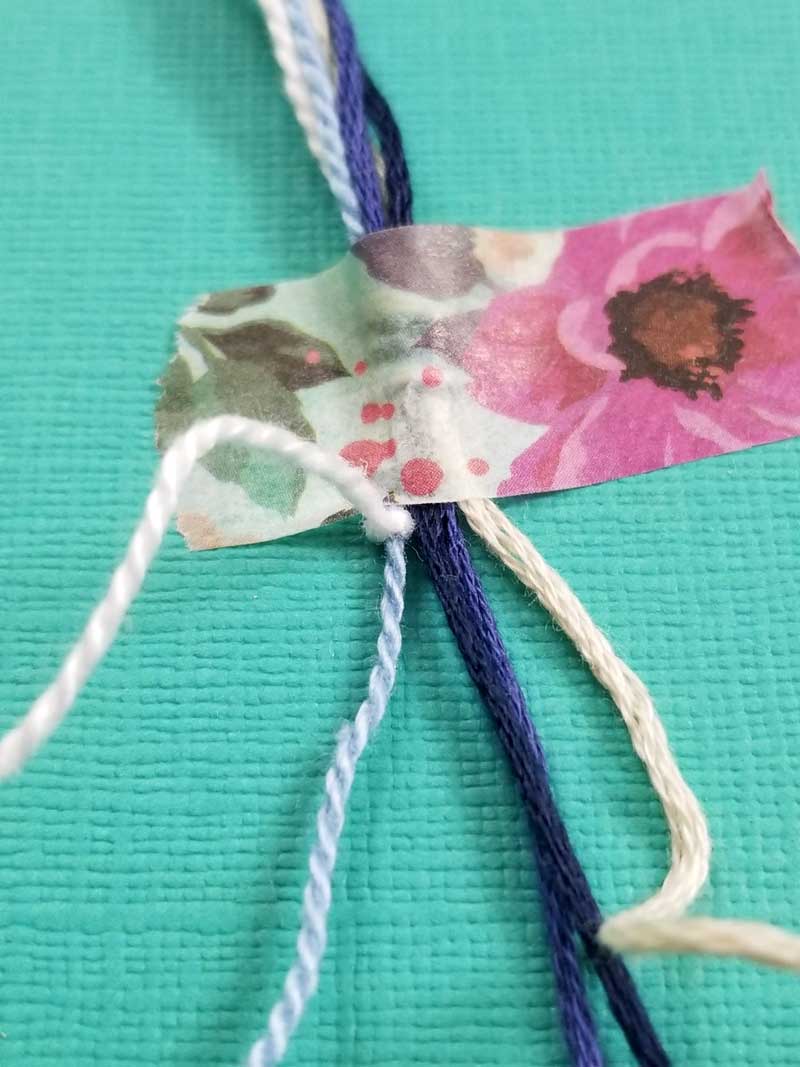
6. Start by knotting your lightest strand around the one to its right.
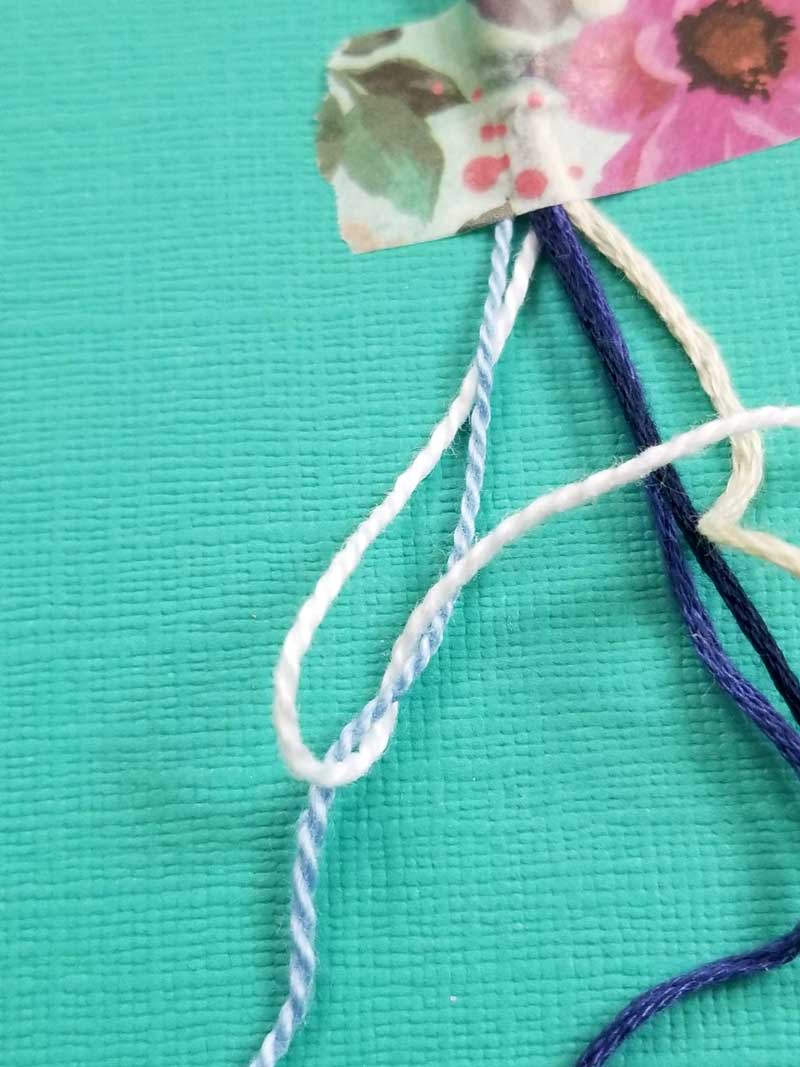
In case you’re not familiar with this kind of knot, here’s a photo:

Pull it up to the top of your bracelet.
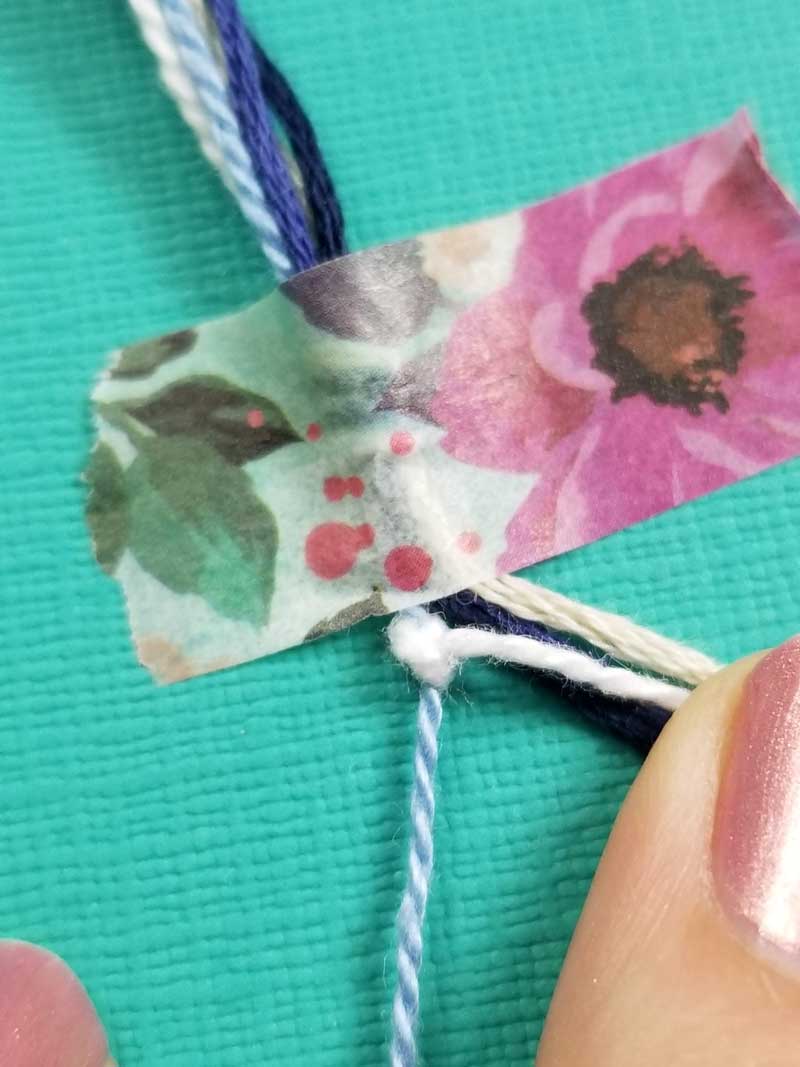
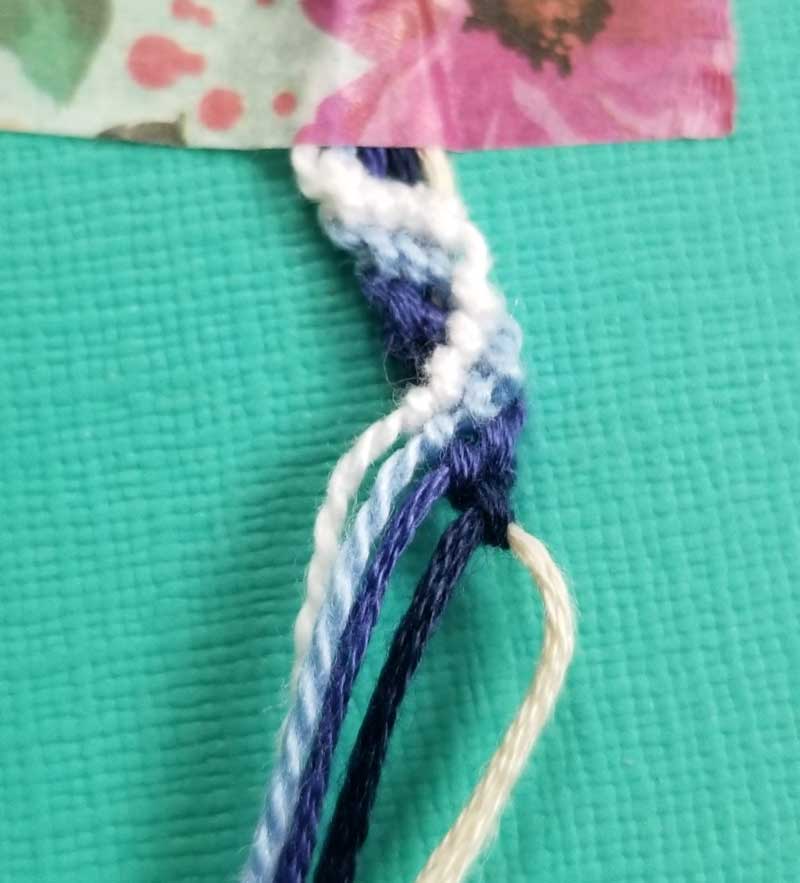
7. Knot again around the same thread. This double knot forms a “stitch” on the front of your zig zag friendship bracelet. The entire bracelet pattern is made of these stitches. This direction is called a “forward knot”.
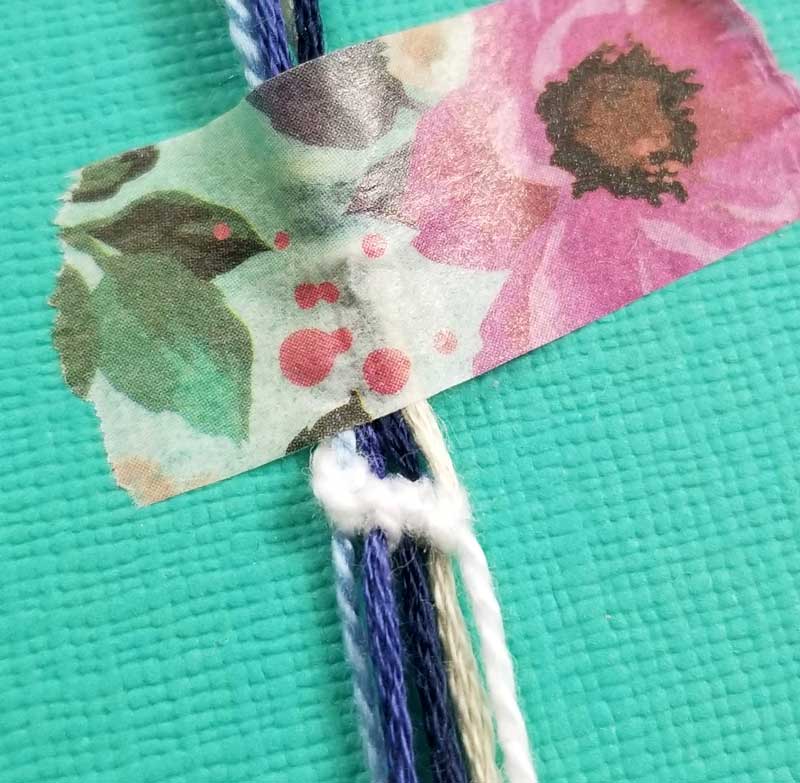
8. Continue with the forward knot using the white string around the other strings in the correct order, finishing with the joker.
9. Take your second lightest color, which should now be the leftmost strand. Forward knot it around the other strings – skipping the lightest color. Here’s a little trick to remember what to do: you never wrap a string around one that’s lighter than it in the ombre. You always finish your row with the joker.
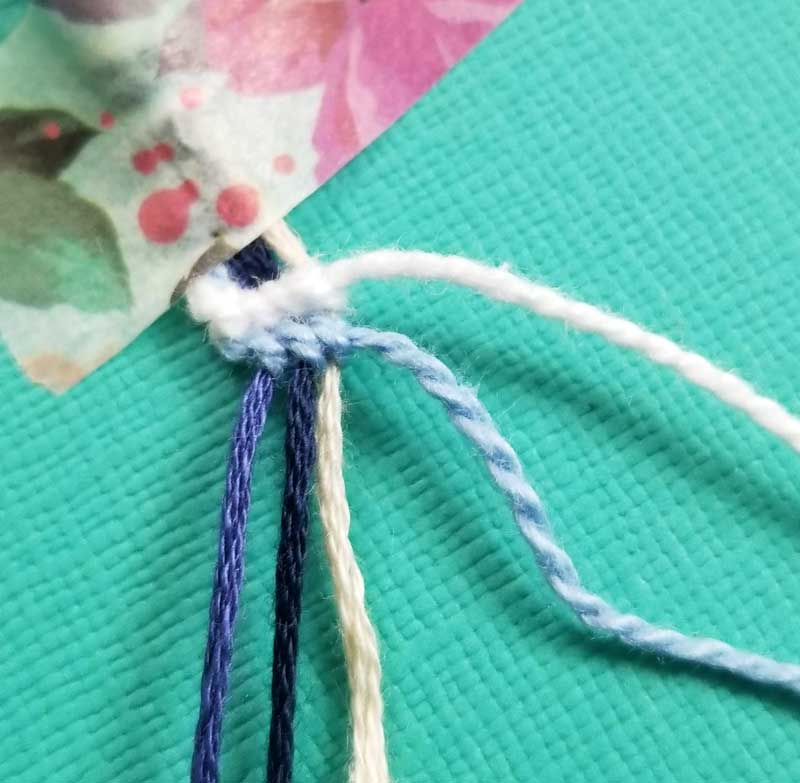
Continue with this process, with each row one shorter than the one above, until you’ve done every string besides the joker and your last row had one stitch (your darkest color).

10. You’ve completed half a round! Time to hit “rewind” (I’m really giving myself away as a 90’s girl here…)
Tie your rightmost string (the lightest) around the one to its left. Tie again to create a double knot/stitch. This is called a backward knot.

Continue double knotting your other strings, from right to left – like you did in step 8 but reversed.
11. Continue the process of step 9 in reverse, backward knotting all your strings around those darker than them, finishing with the “joker”. You’ve now completed a whole round!
12. Repeat steps 6-11, until you’re satisfied with the length of your zig zag friendship bracelet.
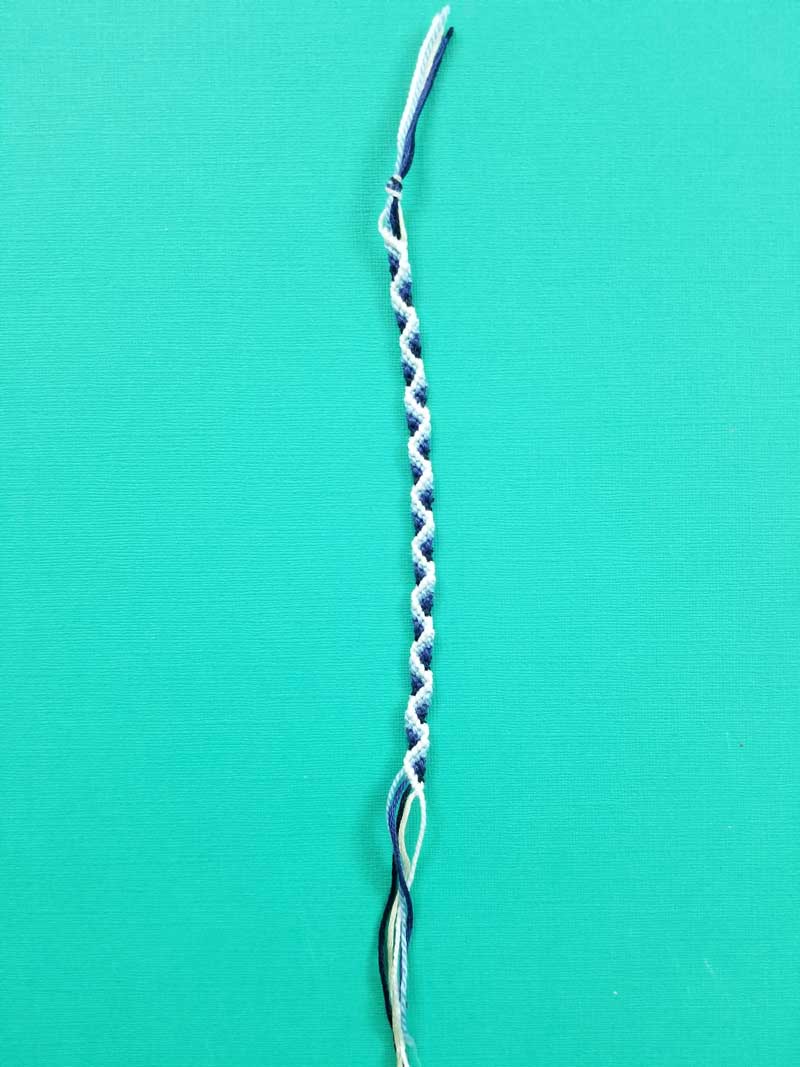
13. Knot the end and trim! You can tie it directly on to your wrist if you’d like.
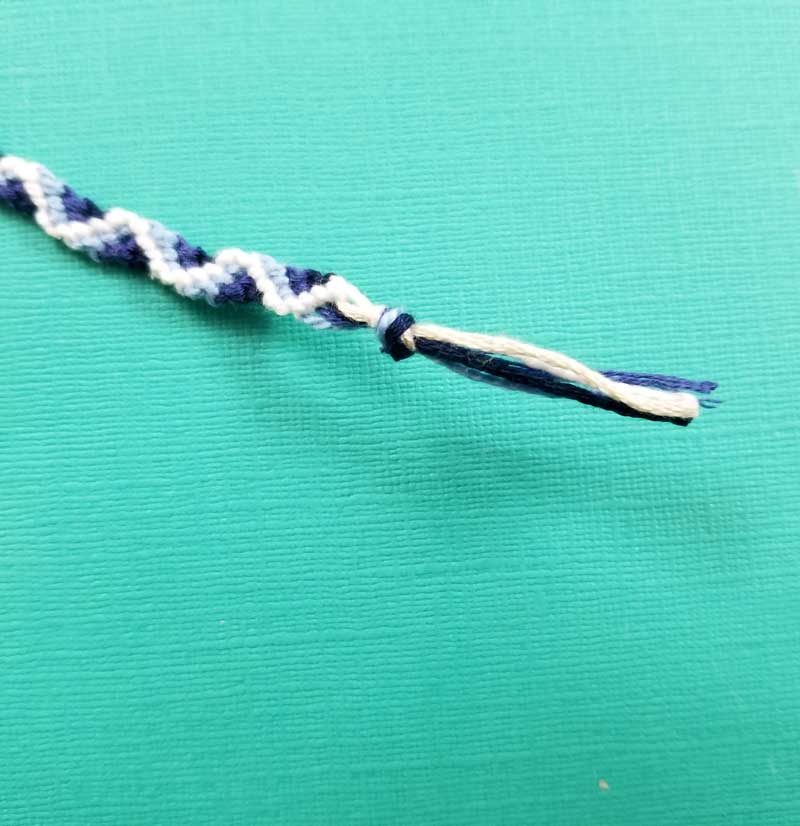
14. Or, add a clasp! To do this, bury your knots in ribbon crimps (you may need to widen the openings on the crimps first) and close them tightly. Trim any threads that are sticking out. Add a clasp and connector and wear with pride!
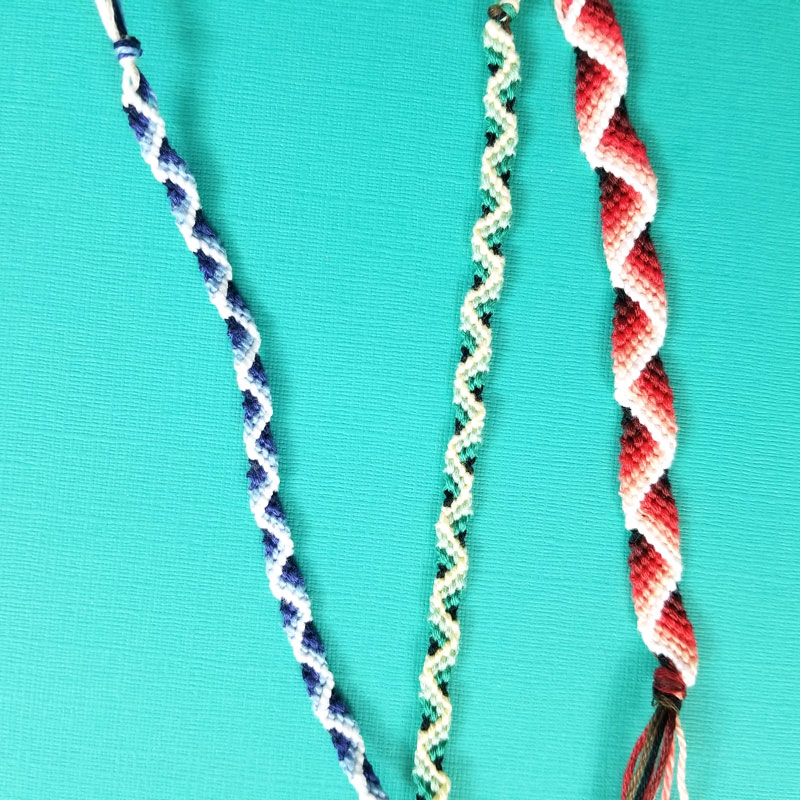
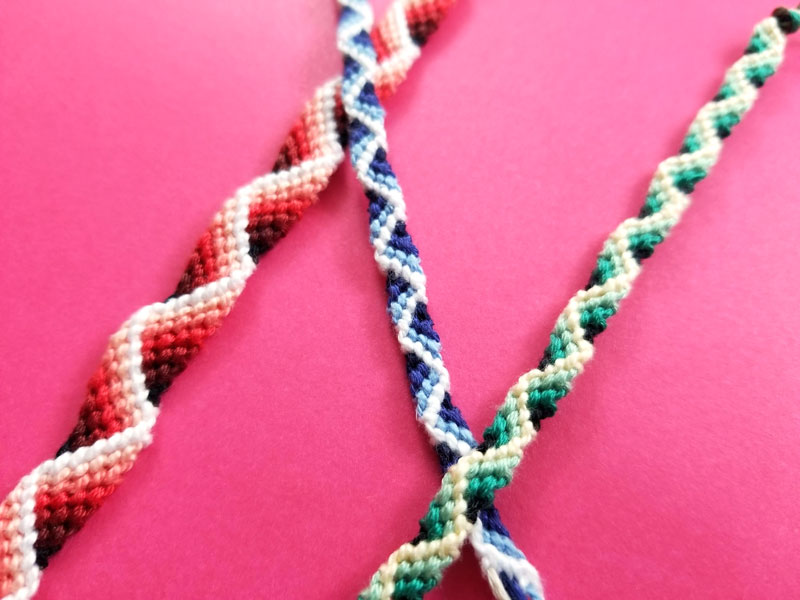
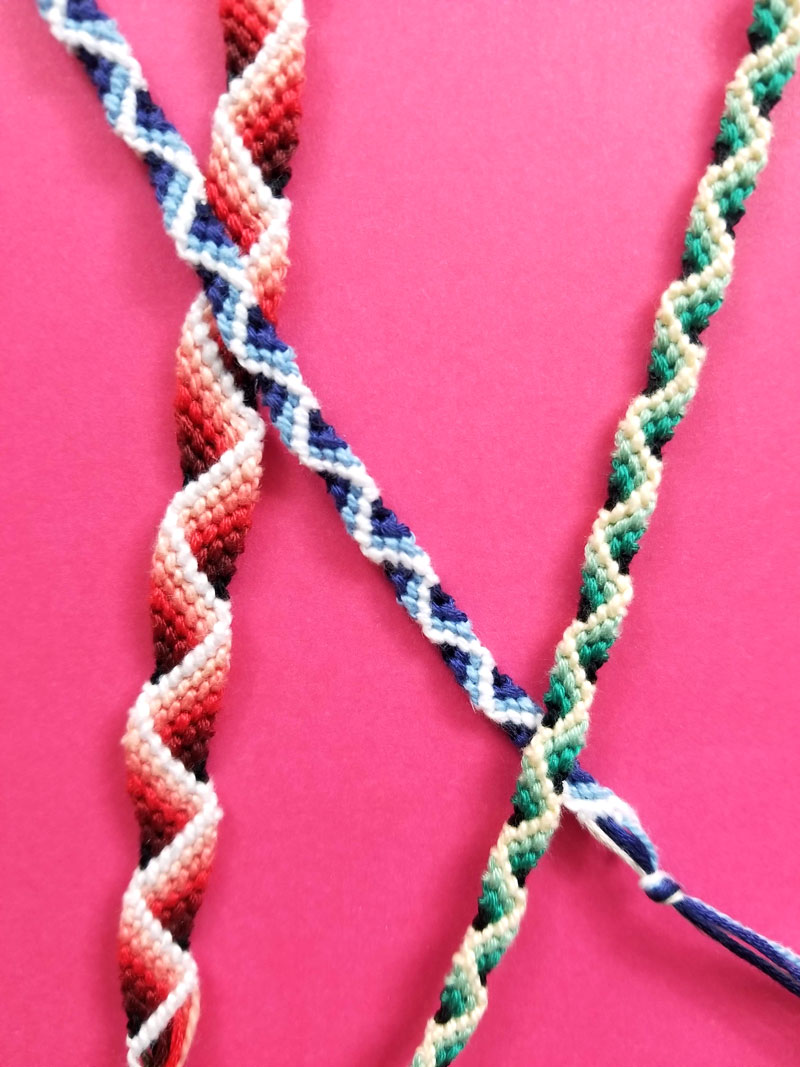
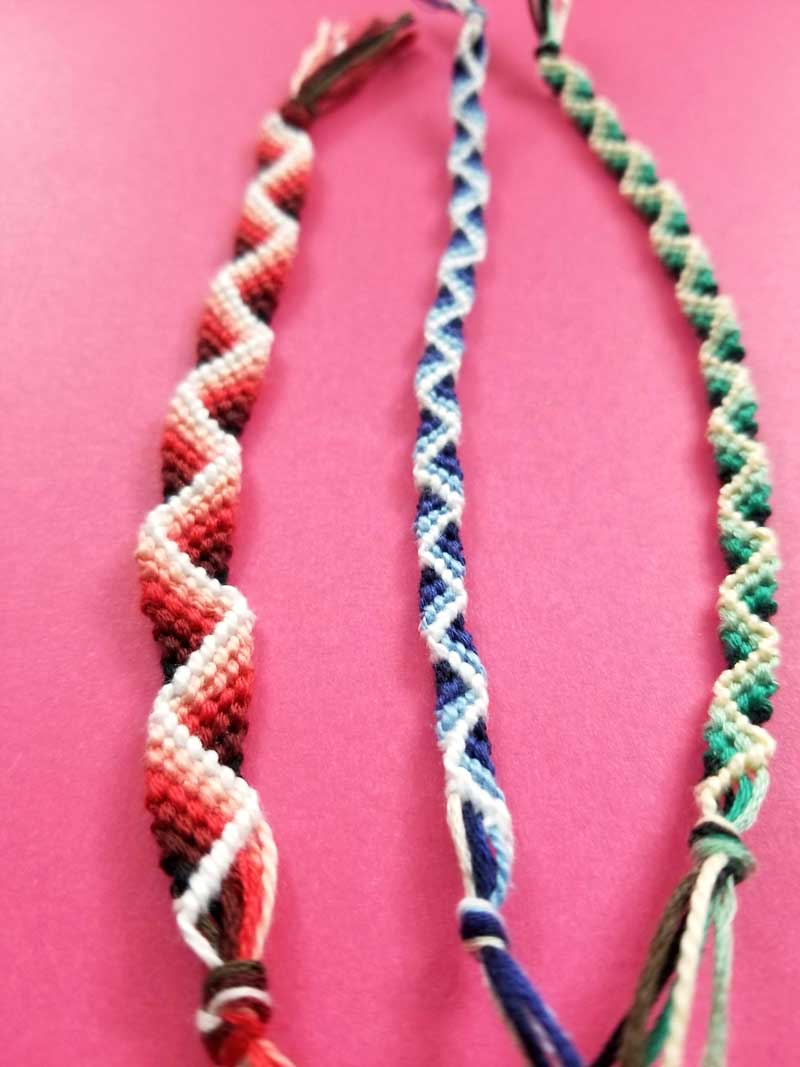
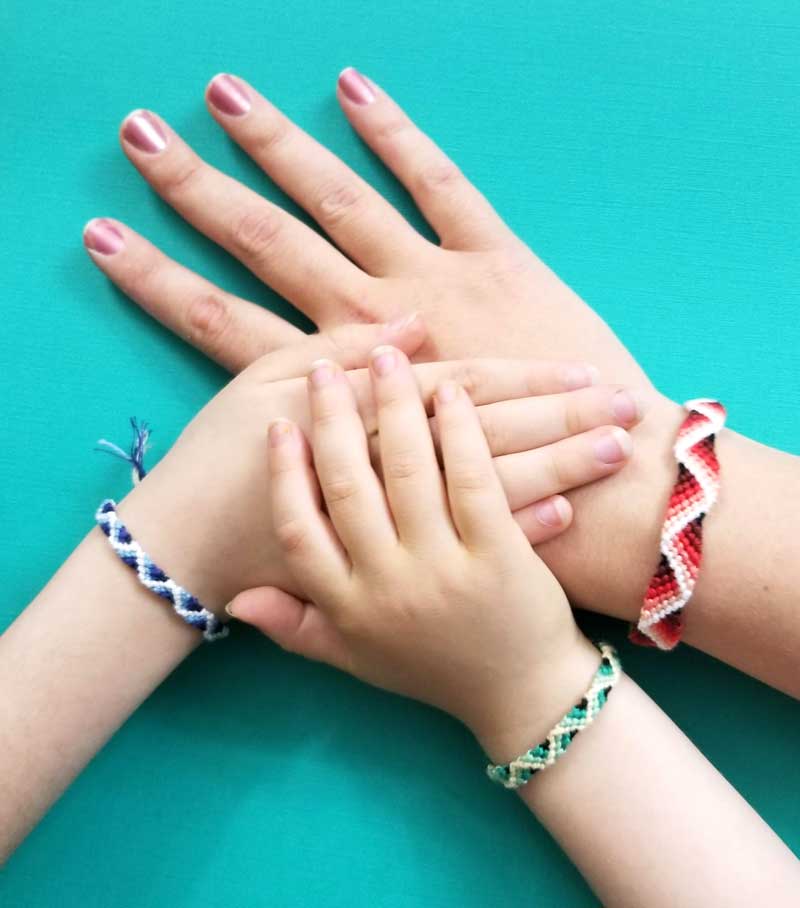
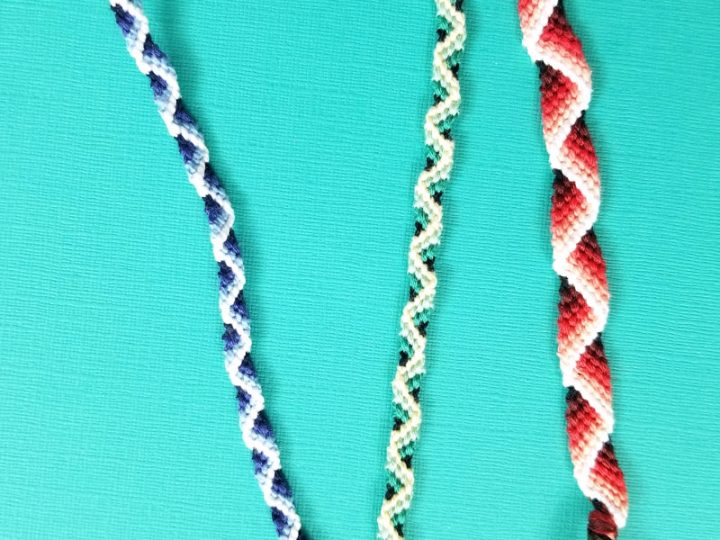
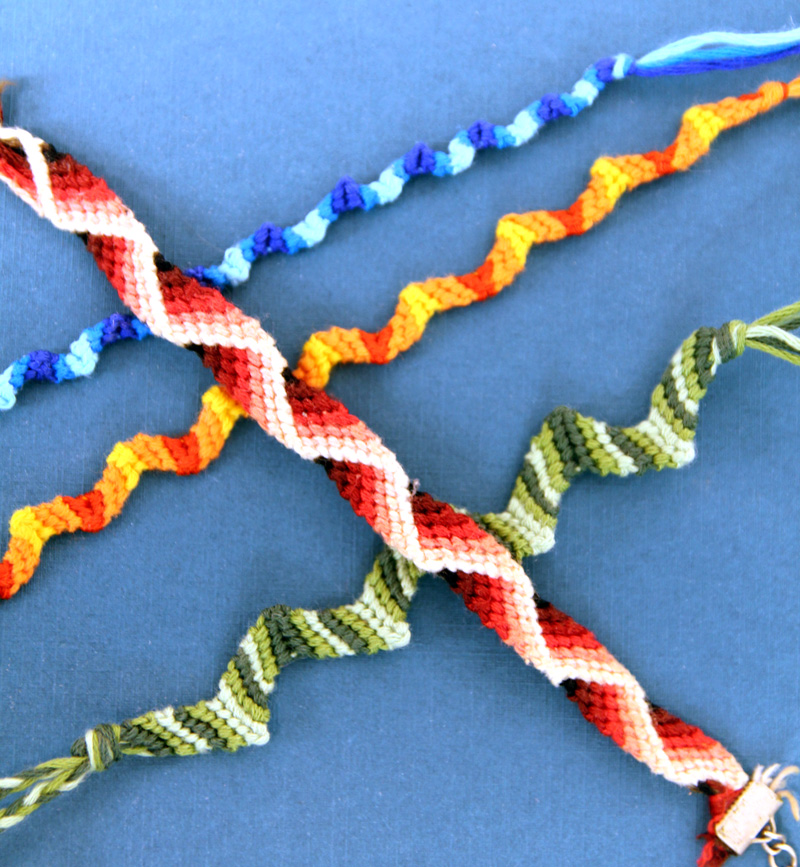
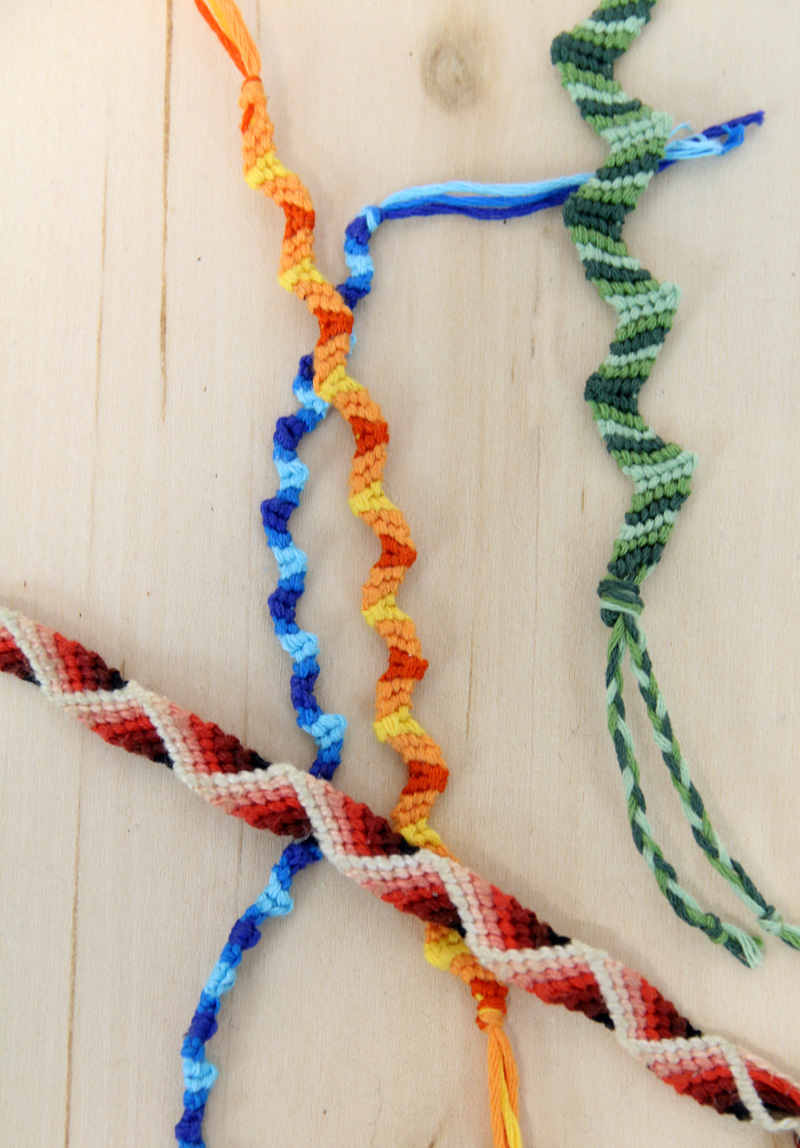
You can see the radical difference between a four-color gradient and a seven-color one!
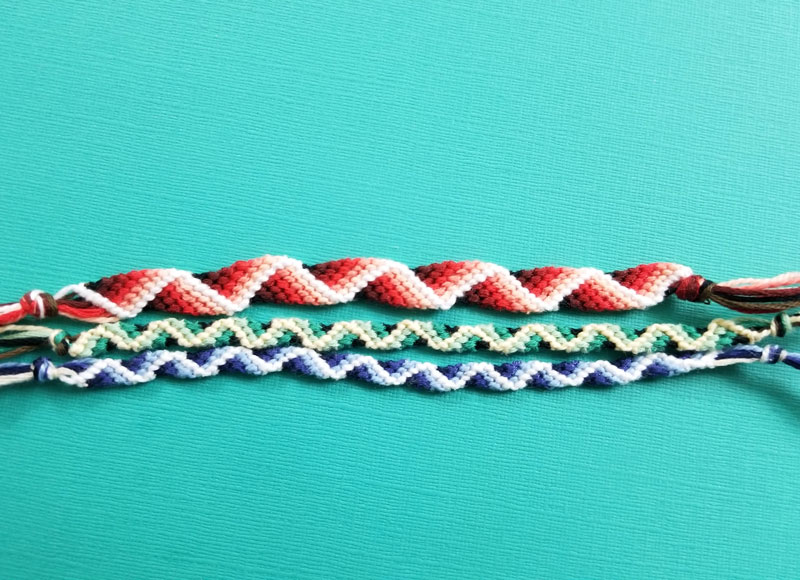
See if you can spot my “joker” color in the knot area of each bracelet.
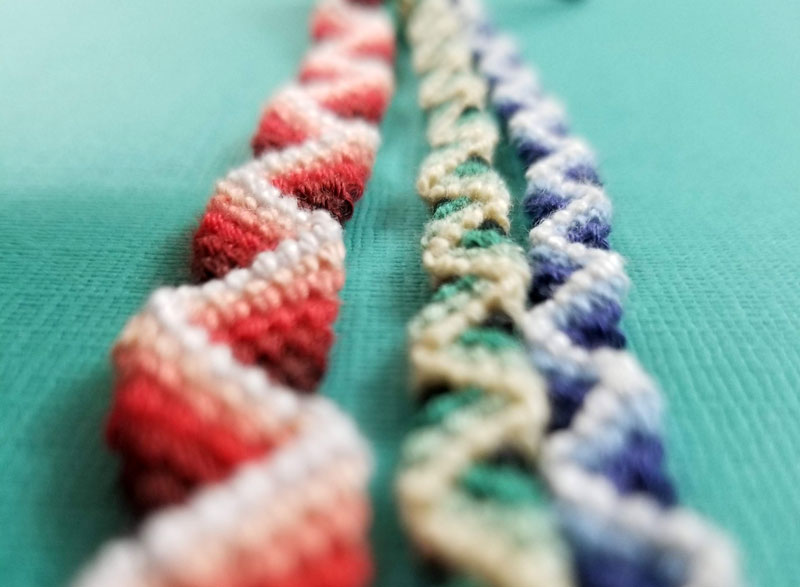
And check out how beautiful the texture that naturally forms on the bracelet is. The lightest color doesn’t just look a little raised – it IS raised.
This project is a lot like one in my book How to Make Jewelry Out of Anything and if you loved it you’ll love the book too!
You might also like my hair tie bracelet DIY or this list of cool ideas for how to make wire bracelets.
And finally, don’t forget to share these zig zag friendship bracelet patterns with your friends so that they can have fun with them too!
Who will you be making a zig zag friendship bracelet for? Print the tutorial right below and comment with your feedback!
3D Ribbon Friendship Bracelet
Materials
Bracelet:
Optional clasp closure:
- Ribbon crimps in the width of your bracelet
- Flat nose pliers
- Round nose pliers (or any second pair)
- Clasp
- Chain or a few jumprings to connect clasp to
- Jumprings for attaching ribbon crimp to clasp
Instructions
1. Choose at least 4 colors to create an ombre/gradient plus your joker color (that won't show).
2. Cut them to size. The approximate measurements are as follows (toss in an extra inch or two if you know you'll need every last bit of the full length).
For a 4-color gradient (joker, then darkest to lightest, in inches): 13, 18, 27, 36, 45
For a 7-color gradient: 16, 22, 33, 42, 51, 60, 69, 78.
If you're really ambitious, you can probably do a few more shades, adding +9 inches for each one, and adding an extra 3-6 inches per color for the earlier shades.
3. Place them in order from shortest to longest - first the joker, then the darkest, and each descending shade until you reach the white or almost white strand.
4. Knot your strands together about 1 inch from the end if you plan to add a clasp, 2 inches if you plan to tie it on your wrist.
5. Optional: tape it down to your surface.
The order of your strands may have shifted slightly so make sure to separate them and place them in order before knotting your first row. By the way, the bracelet is flipped over - in step 3 I did it darkest to lightest, however when I taped it down, I flipped it over so that I worked lightest to darkest. Just an oversight... doesn't really matter!
6. Start by knotting your lightest strand around the one to its right. Pull it up to the top of your bracelet.
7. Knot again around the same thread. This double knot forms a "stitch" on the front of your zig zag friendship bracelet. The entire bracelet pattern is made of these stitches.
8. Continue double knotting the white string around the other strings in the correct order, finishing with the joker.
9. Take your second lightest color, which should now be the leftmost strand. Knot it around the other strings - skipping the lightest color. Here's a little trick to remember what to do: you never wrap a string around one that's lighter than it in the ombre. You always finish your row with the joker.
Continue with this process, with each row one shorter than the one above, until you've done ever string besides the joker and your last row had one stitch (your darkest color).
10. You've completed half a round! Time to hit "rewind".
Tie your rightmost string (the lightest) around the one to its left. Tie again to create a double knot/stitch.
Continue double knotting your other strings, from right to left - like you did in step 8 but reversed.
11. Continue the process of step 9 in reverse, knotting all your strings around those darker than them, finishing with the "joker". You've now completed a whole round!
12. Repeat steps 6-11, until you're satisfied with the length of your zig zag friendship bracelet.
13. Knot the end and trim! You can tie it directly on to your wrist if you'd like.
14. Or, add a clasp! To do this, bury your knots in ribbon crimps (you may need to widen the openings on the crimps first) and close them tightly. Trim any threads that are sticking out. Add a clasp and connector and wear with pride!
Notes
- If the last string is too long for you to handle, fold it loosely and gather it, being careful not to pull on it so it knots.
- You can always add more string! Just tie another one to the end of the string that's too short and pull tight, leaving a small tail. Make sure it lands in the back of your zig zag friendship bracelet when you get to it. When you're done making your bracelet, glue the knot and trim it all the way.
- If you run out of thread and don't want to add (or if you see you'll run out) you can do a braided end, or finish it off in some other quicker way.
- And finally, if you're just a little short on thread, you can do what I did on one bracelet: finish it off with ribbon crimps and an adjustable clasp.
Recommended Products
As an Amazon Associate and member of other affiliate programs, I earn from qualifying purchases.
-
 Sewing Shirt - Vintage Sewing Machine Sketch - Women's short sleeve t-shirt in red, green, blue,...
 -
 Mug for Crafters - I Make Stuff - What's Your Superpower
 -
 Learn With Play Kids Activities Ebook
 -
 How to Make Jewelry Out of Anything: A Complete Out-of-the-Box Jewelry Making Guide for Teens and Teens-at-Heart!
 -
 Over 75 Printable Coloring Pages for adults - HUGE DISCOUNTED Coloring Bundle- PDF instant digital d
Looking for the “classic” zig zag freindship bracelet that’s a candy stripe adaptation? Check out this easy friendship bracelet too!
It’s amazing. Thank you so much
I’ve made a few mistakes and finally got it right! Made it for my diver boyfriend and he loves it!
So clever, did you do it in a sea color?
Hi. Why are the strands differ in length?
Hi Sonia, You are using different amounts of each color in the pattern, so you need longer strands for the ones you’re using more of.
Thank you, Menucha! It came out great!
So happy to hear, Sonia! Thanks for sharing!
Hi! I love this creative, cool pattern. would it be possible to make this pattern with 5 or 6 colors/strings (not including the joker)?
Thank you!
Hi! Yes, you can really scale it up with as many colors as you’d like, your long string just gets longer and longer the more colors you’re working with. for 5-6, choose lengths between my 4-color and 7-color lengths that I recommended. It’s not an exact science -you can just work with the 7-color measurements and have a little extra.
I m not sure mine turned out as expected. My edges are wavy but overall it is flat. Which I’m not mad about, just wondering how to get raised pattern and why mine didnt turn out as such.
Hi Jadine, if you want you can send me a photo at menucha@momsandcrafters.com – or join and post to the Facebook group:https://www.facebook.com/groups/458595427875660/ and I’ll see what you did, give feedback.
will it still look okay if it is not a gradient? like can i do multiple shades of two colors?
Hi Amalie, of course it will look okay – it will look beautiful! It just won’t have the same dramatic 3D effect. But it’ll still be nice. Other color schemes that would give a dramatic effect is if you slowly transition from one color to another for example, yellow to blue with shades of green in between)
Is there a video or a pattern picture?
Hi, no unfortunately I have not gotten to that yet.
I made this bracelet and it turned out super well! It was my first time making it and I am super proud of it. I did gradient blues and white for the edges of the zig-zag. Thank you for the pictures! They were extremely helpful!
Hi Natalie, I”m so happy to hear it came out nice!
Wait— so I start with the longest strand or the shortest? You lost me at the part about flipping things around and something about oversight I just untangled the mess of ridiculously long strings placed them in order, secured them, and now I have to flip them around?
Hi Bee, you start with the shortest. You do need to be able to work with long strands to make this bracelet.
@Menucha @ Moms & Crafters,
Menucha, but the shortest string is the darkest color string and the instructions say to never wrap a string around one that is lighter (i assume you mean a lighter shade) than it.
Something is not making sense to me either, Bee.
Hi DD, First of all, the joker is not included in this equation – as it doesn’t show but can be any color. I read over that step again and again and it does make sense. The darkest color only ever knots around the joker, therefore it’s the shortest. All the others are a lighter shade.
What end length results from the lengths of string listed in the instructions?
I don’t remember exactly but I usually make 7 inch bracelets for myself so I’m going to assume that’s what it is!
The 3D effect is absolutely stunning! I’m so impressed that you could figure out a pattern like that all on your own. 🙂 Thank you so much for sharing your creation and instructions!
You are very welcome and thank you, Claire!
Thank you for this. I made one yesterday and found your instructions very clear and precise.
I think mine turned out pretty good considering this is only my third (ever) knotted bracelet!! Thanks for the wonderful tutorial!!
Hi Evelyn, I’m happy to hear! Enjoy!
Thanks so much for creating this tutorial we needed to create a braid for a costume project and this ombre band worked perfectly !
I am confused (and new to bracelet making)–
From what I understand the longest length thread is the lightest color and the shortest length thread is the darkest color. Correct?
The directions say to place them in order of shortest to longest string which would be darkest to lightest color. Correct?
I assume we are knotting left to right. Correct?
If the above is correct, to start knotting, the darkest/shortest sting is leftmost and the lightest/longest string is rightmost. Yet the string that is most left and the shortest is the string that will be used the most.
To me, the picture in step 3 has the string placement backwards and also the directions to place the strings shortest to longest (left to right, I assume) are also backwards.
You did note that you had to flip the strings after taping them down, an oversight that did not really matter.
But the left to right placement of the strings does matter because of the varied lengths of the strings. Shouldn’t the longest string be most left (and lightest color) and the shortest most right (and darkest color) … especially if you never wrap a string around one that is lighter than it?
HI! You alternate stringing right to left and left to right. So yes, it is important to start with the lightest and progress to the darkest, never stringing around a lighter strand. However, I only flipped mine over at step 5. If you do have it darkest at left and lightest at right, you just need to start knotting backward knots from the rightmost.
I’m so glad I found this, the bracelet I made was so easy to make due to the amazing step by step explanation on how to complete it. If you are hesitant to try this, you need to try it, you will be shocked by how awesome it looks.
It was really fun and easy!
I’m so happy to hear that you enjoyed this!
hi there
im looking at your design and i wonder whether maybe you could help me with a colour design of it.
My partner and I are thinking of a handfasting ceremony and she has a thing for penguins as they mate for life. and we are each other’s penguins. so i have looked into this and found the colour scheme of the emperor penguin black, white with accents of yellow and orange.
Can you help a less creative individual come up with a colour scheme to use these colours where the white and black are dominant as with the penguins and use the yellow and orange as the accent colours.????
can you HELP!!!!!!!
Hi, I’m not really sure how you’d make it look 3D – I’d ditch that and go in order with black and white being your first two colors, then yellow and orange. You can also do black, white, yellow, black white, orange. Or something along those lines.
This bracelet design was really cool and fun! For the four+joker color lengths, those seemed to make closer to a 6 inch bracelet design, while the seven+joker was close to 7 inches. The 3D design can also come out very nicely with a color gradient, with an example of one I did being pink to purple. Though, the light to dark gives a better depth to the illusion.
once did this bracelet at my summer camp using 13 strands XD it took FOREVER
I’m a teenager and loved this! My grandma gave me a HUGE box filled with string, and when I saw this I knew what I was going to do with it all! It took me a long time, but I finally finished. I made a few mistakes along the way, but it was totally worth it!
Hi Rylee, I’m so happy you enjoyed!! It’s definitely not a quick one, but the more you try the fewer mistakes you make and the quicker it goes!