
Elegoo x Emoji 3D Printer Review + Tips for Kids & Beginners!
Read my review of the Elegoo x Emoji 3D printer – a special edition of the Centauri Carbon 2 Combo. In this review, you’ll specifically find the perspective of a mother buying it for an older kid, and loads of must-know tips for beginners! This post contains affiliate links and gifted product.

Elegoo Emoji 3D Printer Review for Teens
A 3D printer is a super cool gadget, and it is much more productive than just having another screen in the house. After running this beginner-friendly 3D printer nearly around the clock with my almost-13-year-old son for an Elegoo x Emoji 3D printer review, I found that it is an approachable, feature-rich choice for older kids who want to make, customize, and eventually design their own things. And I’m going to show you through it.
I AM an affiliate and yes, I earn a commission if you purchase through my link. If you find this review helpful and DO decide to purchase this, I ask that you please do so by clicking through my link – it’s how I am able to create honest reviews without requiring compensation from the brand and turning it into a straight up ad. Purchasing through affiliate links does not cost extra, and enables me to purchase test materials, disable in-post ads, and provide you with more information!
What is the Elegoo x Emoji 3D Printer?
This is a co-branded Emoji edition of the Elegoo Centauri Carbon 2 Combo. It is fun enough to excite a tween, yet it still looks like a sleek piece of tech that can sit in a family room, bedroom, or shared work area.

Watch the video
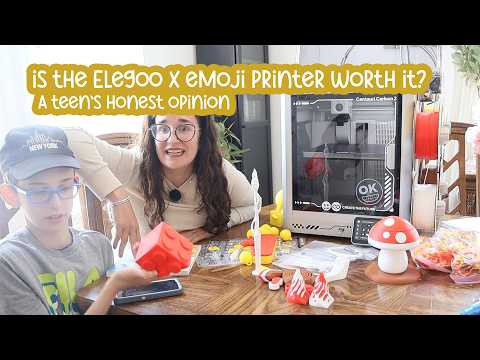
I did also do a video review for those of you who are more visual, and my almost-13-year-old joins me at the end to give his take. Otherwise, keep scrolling for my written review.
Summary of the Elegoo x Emoji 3D Printer Review
- Beginner-Friendly Performance: The Elegoo x Emoji 3D printer offers an approachable experience for teens, combining reliable hardware with an intuitive interface that makes learning 3D printing fun and manageable. And the emoji cobranding really helps!
- Four-Color Versatility: Equipped with the Canvas system, the printer allows for multi-color prints without manual intervention, though users should be aware that frequent color switching generates significant filament waste (as is normal for this type of printer).
- Safe and Modern Design: The fully enclosed chamber makes it a practical choice for a home or bedroom setting, while the subtle Emoji branding appeals to younger users without looking overly childish.
- Encourages Skill Development: Beyond just downloading files, the printer serves as a creative platform that encourages teens to learn CAD design, post-processing techniques, and problem-solving through hands-on projects.
Is the Elegoo Emoji 3D Printer a Good Pick for Teens?
My short answer is yes. The Elegoo x Emoji 3D printer has been a solid first FDM printer for my son, and it has held up well through a busy stretch of print testing. We printed practical household items, fidgets, Emoji accessories, loads of fidgets and toys, and a first custom design. It has not been glitchy, and the printer’s interface has been easy for him to understand.
The Emoji branding is part of what makes this machine so accessible to kids. That may sound like a small thing, but 3D printers can seem intimidating at first. The playful decals, themed designs, and textured print surface make it relatable to them. And there’s the “cool” factor of being able to print things with emoji texture on it, kind of like a signature.


At the same time, Elegoo kept the hardware itself fairly mature. The printer is not bright yellow and covered in cartoon faces. Instead, it has a clean, modern look with Emoji co-branding along the side. It comes with both black and white decal sheets, so kids can decorate it subtly and add more personality to it.


A 3D printer does come with a learning curve. For any 3D printing novice, the process involves a bit of trial and error. Right out of the box, you can get beautiful, useful prints using standard PLA filament. However, achieving perfect results takes time, testing, and some patience. Kids and parents should expect to learn about various materials, slicer settings, print orientation, bed adhesion, supports, post-processing, and design quality.
A functional first print is easy to achieve. Polished prints come after learning about settings, materials, and basic maintenance.
For a teen who likes building, problem-solving, art, STEM projects, inventions, fidgets, or customization, this printer gives them plenty to explore without requiring an entire workshop.

Learn more about the Elegoo x Emoji 3D Printer
Features we love
For a parent choosing a printer for a tween or teen, these are the features that were perfect for our use-case.
The printer holds four filament spools at once using its Canvas system, which is the four-color switching hardware. Four feeding tubes carry filament to the direct-drive hot end and high-temperature nozzle, allowing it to create vibrant, multi-colored prints without manually stopping the machine to swap filament at every color change. The generous build volume is also a major plus, providing enough space for most family-oriented projects – like toys and organizers – and creative desk accessories.


It is also a fully enclosed printer. This enclosed chamber was an important feature for me because the machine is located in a kid-accessible part of the house. The enclosure helps contain the working area and makes the unit much safer and more appropriate for a family setting than an open-frame printer.

The design has a two-sided magnetic build plate. One side is smoother, although it still has texture, and it can leave an Emoji-themed pattern on the bottom of a print. It is not a necessary feature, but it is a fun surprise on small projects, especially keychains, charms, and desk accessories.
The Emoji edition comes with a small sample amount of Rapid PLA Plus filament, but it is not enough for much printing. Plan to order extra filament at the same time as the machine (or one of their bundles with filament included). At the time of my content creation Elegoo offereds Emoji-branded yellow, red, brown, and white filament, with the others in pre-order, which is why our early Emoji prints used brown rather than black. Now the full color spectrum of Emoji cobranded filament seems to be available.

You are not limited to Elegoo filament. Most 3D printer filament is not proprietary, so you can use compatible filament from other brands. However, Elegoo’s official RFID filament allows the Canvas system to scan the material and load the correct printing settings automatically. Elegoo’s prices are competitive in filament too, much as they are for the printers, so I personally purchased more from them.
When loading filament, pay attention to the physical spool position, not just the number printed on the spool. We mixed up spool three and spool four at first, but the printer only needs to know which specific slot holds each color to function correctly.
One of our favorite features is the built-in camera. It records time lapse video (you can see some of that in our YouTube video) and allows for remotely viewing your print from their app! They’ve since updated the app to allow for printing directly from the app as well as exploring their models from the app. This is a game-changer!


The boring specs and details
Here’s a general list of the specs and features of the Elegoo x Emoji 3D printer for you to be able to review easily:
Print Technology
- Type: FDM (Fused Deposition Modeling)
- Motion System: CoreXY
- Fully enclosed printer for improved temperature control and safer printing
- Multicolor printing: Up to 4 colors/materials with the included CANVAS system (expandable in future updates)

Build Volume
- 256 × 256 × 256 mm
- Roughly 10 × 10 × 10 inches
- Large enough for:
- Helmets (in sections)
- Toys
- Household organizers
- Cosplay props
- Tool holders
- Functional parts
- Decorative items
Speed
- Maximum print speed: 500 mm/sec
- Recommended speed: 250 mm/sec
- Maximum acceleration: 20,000 mm/sec²
This places it among the faster consumer desktop printers available today.
Print Quality
- Print accuracy: ±0.1 mm
- Layer height:
- Minimum: 0.1 mm
- Maximum: 0.4 mm
- Recommended: 0.2 mm
Lower layer heights produce smoother prints, while higher layers print faster.
Hot End
- Maximum nozzle temperature: 350°C
- Standard nozzle: 0.4 mm
- All-metal hotend
- Designed for high-temperature engineering plastics.
Heated Bed
- Maximum temperature: 110°C
- Flexible spring steel build plate
- Dual-sided surface
- Removable magnetic plate for easier part removal.
Supported Filaments
- Standard materials
- PLA
- PETG
- TPU
- Engineering materials
- ABS
- ASA
- Nylon (PA)
- Polycarbonate (PC)
- Fiber-reinforced materials
- PLA-CF
- PETG-CF
- Carbon fiber composites
- Glass fiber composites
These are suitable for stronger, more heat-resistant parts.
Extruder
- Dual-gear direct-drive extruder
- Optimized for flexible materials like TPU
- Better control over extrusion than Bowden-style systems
Bed Leveling
- Fully automatic calibration
- Partial bed leveling
- Smart sensor system
- Automatic vibration compensation
- Pressure advance calibration
This minimizes manual setup and helps improve first-layer consistency.
Sensors & Automation
- Filament runout sensor
- Power-loss recovery
- Chamber camera
- Automatic calibration
- Automatic temperature management
- Smart monitoring sensors (19 total)
- RFID filament recognition for compatible reels.
Chamber Features
- Fully enclosed build chamber
- Intelligent airflow control
- Automatic vent shutters
- Stable internal temperatures for engineering plastics.
Camera
Built-in chamber camera allows:
- Remote monitoring
- Time-lapse recording
- Checking print progress without opening the enclosure.
Display
- 5-inch full-color capacitive touchscreen
- Supports 11 languages
- Modern interface.

Connectivity
- Wi-Fi USB drive
- Supports remote print management over a local network.
File Compatibility
- Input
- STL
- OBJ
- 3MF
- STEP (STP)
- Output: G-code
Slicing Software Compatibility
- ELEGOO Slicer
- OrcaSlicer
These prepare 3D models for printing.
Physical Dimensions
- Size 500 × 480 × 670 mm (around 19.7 x 18.9x 26.4 inches)
- Weight 19.35 kg (42.7 lb)
Power
- Input: 100–240V AC
- Rated power: 350W (110V) 1100W (220V)
Included Features
- CoreXY motion system
- Enclosed design
- Chamber camera
- Multicolor CANVAS system
- Automatic calibration
- Heated bed
- High-temperature hotend
- RFID filament detection
- Wi-Fi connectivity
- Flexible magnetic build plate
- Quiet operation
- Smartphone-style touchscreen
- Remote monitoring support

Setup Was Straightforward With a Teen Helping
The setup and assembly process was remarkably manageable, and my son was actually more proficient at some steps than I was. While there are several components to attach because Elegoo packs much of the hardware inside the frame for shipping, it wasn’t a big deal. It also features auto-leveling. This significantly simplifies the start process, ensuring the build plate is perfectly calibrated without the need for tedious manual adjustments.
Most of the equipment you need to begin comes in the box, along with a USB stick containing essential files and resources. You should plan to purchase additional filament right away, as the included sample is quite small and kids will inevitably want to print more than just a single test item.
The printer can run files directly from a USB stick, which is a great option for families aiming to reduce unnecessary screen time. You can prepare your models on a computer, transfer them to the drive, and run the print job locally. For the actual preparation, we used Elegoo Slicer, the proprietary slicer software designed for this machine. Slicing is the vital step that converts a 3D model into the instructions the printer reads to print, such as layer-by-layer movements, temperatures, and color changes.
One small software limitation surfaced during our testing. The printer can only link to one account at a time. Since I initially registered the device under my own account, my son must log in using my credentials to access it. Multi-account support would be a welcome update for a family printer shared by parents and kids.
Other than that hurdle, our experience was smooth. We encountered one or two instances where a print did not adhere properly to the build plate. We simply stopped the print early, cleaned the surface, and the subsequent attempt stuck perfectly. That’s another thing you learn as you start printing: each print needs something to stick to to run well, and your bed plate must always be clean.
The Exact Projects We Printed for our Elegoo x Emoji 3D Printer Revew and our feedback
We printed a wide mix of projects because I wanted to see how the printer handled small accessories, practical items, toys, multi-part pieces, and first-time design work. Most of the early files came from the included USB stick, the Nexprint platform, and other free 3D print file resources.
Poop Catcher
The first practical print was an Emoji-textured poop catcher. That name got a lot of laughs from my kids, but it has a real job. When a single-nozzle printer changes filament colors, it pushes out extra filament before printing with the next color. The poop catcher screws onto the back of the printer and holds those little strands and blobs.
Scraper tool
We also printed a handle and holder for the small scraper blade included with the printer. The scraper helps remove prints or leftover material from the build plate. It is a simple accessory, but it is useful to have a designated place for it.
Emoji themed prints
Several Emoji projects came next. Your printer will come with some emoji themed prints on the included flash drive, and you’ll find more on Nexprint.
We printed a detailed Emoji keychain, a heart Emoji pendant, and other themed pieces that can become earrings or accessories. The heart was a quick, easy print meant to be a necklace, although it could work as a keychain too. Using multicolor 3D printing on these small items really made the emoji designs pop, adding a professional finish that kids love.

I also printed the heart in white and gave it to my daughter to paint with regular washable kids’ paint. The paint held well because the print quality on this machine features tiny layer lines. People sometimes dislike those lines, but for painting, they give the surface a little grip. We loved seeing how 3D printing can be used to make paintable crafts!

Building Brick Pencil Cup
One of my kids’ favorite builds was a building-brick inspired pencil cup. The file was thick and solid, so it took a while to print, but it felt sturdy when finished. The design was not perfect, since one side was shallower than the other, which served as a great lesson for my son on checking for dimensional accuracy before running a long print.

Files on the internet are not always polished. A design may look fantastic in a photo but still have awkward proportions, weak connections, or assembly problems. That is part of learning to evaluate a model before committing several hours and a lot of filament to it. For personal use it didn’t make a difference.
Mushroom Spinning Stacker
We printed a stackable mushroom toy. This was a perfect lesson in the contrast between easy-to-assemble projects and those that need gluing.
The base came in two pieces, which screw together beautifully. The mushroom had white dots that need to be glued in. It was a fun project, although it also showed us that gluing and assembly can take practice. I am still learning the best adhesive method for 3D printed pieces, since my first attempts with super glue did not work as well as I hoped.


2-color Pencil Box
A two-color pencil box was one of our favorite practical projects. It showed us how to best do two-color prints. Printing by object instead of by layer on a craft like this one really eliminated a lot of waste. It’s a fun, practical school supply that really starts making me think that a 3D printer can save us money in the long run.
I also imagine a project like this with some cool personalization, such as a name embedded on the lid in another color.

Faucet Extension
My youngest is just potty trained, and so I knew I needed to do a print for myself – a faucet extension that helps the water reach him. It’s the type of thing we can buy for $8 on Amazon or print ourselves for an estimated 37 cents in filament.
It works beautifully and is even quicker than Amazon, and can be customized to our needs.


Fidgets, fidgets, and more fidgets
All my kids want to print all day is fidgets! We printed:
- A print-in-place ball fidget with connected round pieces.
- A print-in-place clicking fidget that needed a little sanding on the bottom.
- A two-part fidget with red and white sections that we glued together.
- Two flexible tornado-style fidgets that print ready to use.


These are fabulous prints that really make kids feel like they are creating for themselves. We traded one with Mrs. Bench and she was quite impressed. The kids do like to sell these to their friends, and I love that my incentive box is going to be indefinitely stocked.


More things we test printed
Other projects included:
- A classic multicolor Benchy boat, which is a popular first-print test in 3D printing.
- A plant support that turned out too small for the plant I had in mind.
- A custom keychain my son designed with his last name.
The custom keychain was small, but it was one of the most meaningful projects. It moved him beyond downloading files and into making something useful for himself. His next version could include his name, a phone number, and other information on the back. It’s a great backpack or luggage tag, and shows where you can go with customization.

Tips for Beginners, and must-know details before buying your first 3D printer
Multi-Color printing creates waste – but if you know how to avoid it, it creates much less
Why it creates such waste
The Canvas system makes multicolor 3D printing accessible, but it does create a notable amount of filament waste. Since this printer uses a single nozzle, it must eject leftover filament every time it switches colors. Since it prints by layer, it needs to do this for every layer with a color-change.
The printer does this automatically, and the little pieces of discarded material are commonly called printer poop. Managing this purge waste is a standard part of the process when using this type of machine.
This is a feature-level issue, not a brand-level issue. Any single nozzle multicolor printer you get will have this issue.

Minimizing waste strategy 1: Print more at once
A single detailed Emoji keychain produced a surprisingly large bag of waste. Because the design included several colors appearing throughout the layers, the printer had to switch back and forth repeatedly, which significantly increased the amount of purge waste.
By comparison, a plate of multiple earring pieces and other small designs produced much less waste than expected. The key was that the printer could complete more of one color before switching to the next, because we were filling more of the bed. Also note: the waste is very loosely packed – it’s really a fraction of the weight of the final projects, despite it being bulky and looking like more.

If you plan to make multiples, print several copies on the same plate after testing one first. A single test print lets you check the size, quality, and fit. Then, if the model works, printing a batch often uses filament and time more efficiently than running each one separately.
Minimizing waste strategy 2: print by object
Printing strategy matters a lot when you are getting started with multicolor 3D printing. If a design has tiny bits of one color scattered through dozens of layers, the printer will purge filament constantly. If you can organize your model so you print the red parts separately and then print the white parts separately, the machine will perform far fewer color changes.
The two-color pencil box showed this clearly. The printer made the yellow section and then changed colors to complete the red section. It only needed a few purges (that is maybe 4-5 “poop pieces – MUCH less) because the colors were separated by sections rather than mixed throughout every layer. If it had printed by layer, it would have had to switch between red and yellow for each layer.

This method does have some serious size and height limitations, so it’ll be an incredible save – but only in some circumstances. The nozzle needs to move freely around existing prints, which means they need more berth.
Can you use the printer purge?
For now, this leftover material is typically discarded unless you find a way to repurpose it. Some makers use it as filler for maracas, noise makers, beanbag-style projects, or other crafts. Machines exist that grind and reform filament, but they are quite pricey and do not make sense for most hobbyists.
Beginner Tips That Will Save Frustration
Start with pre-made files. Kids do not need to learn 3D modeling before they print their first project. The included designs and free files from 3D print libraries help them understand how files work, how long prints take, and how different settings affect the result. Start with affordable PLA and move on from there.
Pay attention to licenses before sharing or selling anything. Emoji-themed files are intended for personal use, and trademarked designs should not become products for sale. Many free files also have personal-use-only licenses, even when they are not connected to a big brand.
Choose simple models at first. A pencil caddy, keychain, faucet extender, or single-color fidget will teach more than a complicated toy with tricky supports, tiny moving parts, and multiple gluing steps. It is also easier to identify what went wrong when the design is simple, as you learn and improve your understanding of 3D printing.
Give prints time. A small item may take an hour, but larger or solid models can take many hours. While the print speed of the Elegoo x Emoji 3D printer is impressive, larger or more detailed objects still require time to complete. The Emoji keychain took about eight hours, while a full plate of the emoji themed items took a little over nine hours. Long print times are normal because the printer builds every object in thin layers, and color switches take time. But printing more of an item on a plate does get much more efficient.
Print-in-place designs are a beginner-friendly win. These models come off the printer with their moving sections already connected. They do not need hardware, screws, or assembly. Our flexible fidgets, made using standard PLA filament, were especially satisfying because they were ready to play with once removed from the plate.

Help Kids Move From Downloading Files to Designing
The fun factor and the educational factor really starts to expand when kids begin making their own models. For me that is an essential second step that was one of the first questions I asked as I was getting my almost-teen into 3D printing. Downloaded files are a helpful starting point, but designing teaches them how to turn an idea, frustration, or need into a physical object. It’s where STEM comes in, where kids really start learning from 3D printing.
Tinkercad is a great entry point for children and first-time designers. It is free, widely recommended, and focuses on simple shapes. A child can start by combining a box, cylinder, hole, and text instead of trying to master complicated professional design software.
My son began with a basic backpack-style keychain. It is not complicated, but it works. He can change its size, add a name, put contact information on the back, or make versions for luggage, school bags, camp gear, and sports equipment.
The book 3D Printing and Maker Lab for Kids has also been useful for getting started. Some software details may change as Tinkercad updates, but the basic lessons have still been functional. Tinkercad’s videos and YouTube tutorials offer plenty of extra help when a child gets stuck.
Personalization is what most excites my son. They can put their name on a pencil caddy, customize party favors, make a useful organizer that fits a specific shelf, or create a themed fidget for a friend’s birthday. By moving into original CAD design, teens learn how to influence the print quality and structural integrity of their work, ensuring their custom creations are both durable and aesthetically pleasing. They can actually engineer and invent.
Kids (or anyone) who want to sell prints should eventually focus on original designs. Selling even purchased and properly licensed prints is a race to the bottom, and originality is key to success. A child can take inspiration from existing fidgets or organizers, but original ideas give them more room to build a recognizable product and avoid competing only on price.
What You’ll Need Along With the Printer
The printer includes enough to get started, but a few supplies will make the first week much more enjoyable. The Elegoo x Emoji printer is much more fun when there is enough filament on hand to test, make mistakes, and print more than one project.
- Buy several full 1-kilogram spools of PLA filament. Sales sometimes advertise very low prices, but the listing may be for a 250-gram quarter spool. Check the weight before ordering to ensure you have enough material for your projects. You can eventually move on to different materials, such as sturdier PETG, but I recommend learning on PLA.
- Add a deburring tool for removing the burrs and overhangs after printing. Having the right post-processing tools like this makes the overall setup and assembly process much easier, especially for keychains, fidgets, and practical household pieces.
- Keep a small selection of glue for multi-part prints. Super glue is commonly used, but test it on scrap pieces first because adhesion can vary based on filament and surface prep.
- An adult can keep a small torch for careful post-processing of light filament fuzz. This is an adult-only tool and should stay out of children’s reach.
- Pick up a few basic sanding supplies. We even used the sidewalk to sand the bottom of one fidget when we wanted a quick fix, though proper sandpaper is much cleaner.
- Consider choosing white filament for projects kids want to paint. The printed layer lines give washable paint a little texture to hold onto. We used up white first, so you might want to start with two spools of white.
- Some projects use specific hardware like keyboard switches, ball bearings, keychains… These are more specific to projects, but we did stock up on a few we knew we wanted to make right off the bat so we have them handy.
Pros and Cons of the Elegoo x Emoji Printer
This printer gave us a lot to like, especially for its price point. Similar enclosed, four-color printers from other brands can cost several hundred dollars more, and I always evaluate and review based on existing features for the price point.
Some of these cons are “absent features” – meaning, it’s not things that didn’t work well. It’s things that don’t exist on a machine of this caliber, and it’s important for you to know what this is and what it isn’t. If you need those added features, you will be paying more for them.
What We Liked
- The printer features an enclosed chamber, which made it a more comfortable choice for a shared, kid-accessible space.
- It holds four filament spools at once, so kids do not need to constantly reload colors for every project.
- The Emoji co-branding, decals, themed designs, and textured surface finish quality make the printer feel exciting without making the machine look childish.

- It has printed reliably for us through frequent use, including long overnight prints.
- The interface is easy enough for a teen to learn, and files can be run through USB rather than requiring constant computer use.
- It has enough capability for a beginner, while still leaving room for more advanced projects, design skills, and small-batch printing later.
What Could Be Better
- The single-nozzle system creates a lot of purge waste during multi-color prints with frequent color changes.
- One printer can only connect to one account at a time within the proprietary slicer software. That is inconvenient when parents and children share the machine.
- Prints take time. That is normal for 3D printing, but a child used to instant results may need help planning around longer jobs.
Summary of our Elegoo x Emoji 3D Printer Review
As part of our review, we like to pinpoint who it’s ideal for, why we think it might be good for certain scenarios, and sometimes who we think might want to avoid this one.

Why This Printer is Such a Cool Big Gift
A 3D printer falls into a similar gift category as a gaming device in terms of cost, but it provides a child with a much more engaging, hands-on activity. Instead of just consuming digital content, they can make fidgets, toys, accessories, school supplies, party favors, organizers, labels, gifts, and inventions that solve everyday problems.
The Elegoo x Emoji 3D printer is a fantastic choice for a teen birthday, holiday gift, or a standout bar mitzvah wish list item because it serves as an incredibly beginner-friendly 3D printer that is ready to grow with the child. In fact, if my child wouldn’t have gotten this as a summer incentive already, it would have been at the top of his Bar Mitzvah wishlist.
While users might start by printing funny Emoji accessories and simple fidgets, the Centauri Carbon 2 Combo offers the advanced capabilities needed to learn complex modeling, try personalization, and create original, useful products over time. It’s not just a kids’ toy, it’s a real serious piece of craft tech.
For our family, the printer quickly became something everyone wanted a turn using. My son was ready for me to finish the review so he could fully claim his new machine, while my other kids were already busy choosing projects and colors. It is the kind of gift that transforms from a fun toy into a genuine creative tool as the teen develops their skills.
Who the Elegoo x emoji 3D Printer is best for
Because of the multi-color printing, with a single nozzle, this can really be both an affordable hobby machine – very competitive with other brands that have similar specs – and a small business machine.

This is a great choice for a serious hobby printer, not just baseline but with improved features. While the emoji cobranding is a nice perk, and functionally you’ll get the same results from the unbranded Centauri Carbon 2 Combo, the emoji branding really makes it more fun.
Is the cobranding worth the few extra dollars? That is up to you. My understanding is that there are a few small improvements on this over the basic one – such as a clear top with a lower profile, with the canvas mounted to the side instead of over the machine. If you’re looking to save those few bucks, this general review will apply to the original Centauri Carbon 2 Combo.
This machine is also a great option to add to print farms as it’s a solid, reliable machine that performs very well for its price point. If it’s your solo machine and your business model is mass-produced multi color prints, then it might not be the best option for you. Otherwise, it really does do itself justice.
Final Thoughts on the Elegoo Emoji 3D Printer
This Elegoo x Emoji 3D printer review comes down to one clear point: it is a strong first printer for a tween or teen who wants to make more than they consume. It has four-color capability, an enclosed design, a user-friendly interface, and plenty of room for kids to learn through real projects.
While the color-switching waste is a real drawback, there are ways around some of it with know-how, and the Canvas system makes multicolor 3D printing much more accessible for beginners who are just getting started. Shared family account access still needs some improvement, but overall, the machine has been reliable, easy for my son to operate, and full of creative possibilities. The best projects will come when kids move beyond basic prints and start designing solutions that are their own. When you look at the big picture of this Elegoo Emoji 3D printer review, it remains a fantastic entry point for any young maker looking to explore the world of additive manufacturing.
Frequently Asked Questions
Is this printer appropriate for a complete beginner?
Yes, it is designed for ease of use with features like auto-leveling that simplify the calibration process. While there is a learning curve regarding software and materials, the included documentation and accessible interface make it a great starting point for teens.
Can I use filament brands other than Elegoo?
Yes, you are not restricted to proprietary filament. While Elegoo’s RFID-enabled filament automatically loads settings for convenience, the printer is compatible with most standard third-party PLA filament brands.
How much space does the printer require?
Because it is a fully enclosed unit, it has a larger footprint than some open-frame printers. It is best to place it on a sturdy, level surface in a well-ventilated area, keeping in mind that it needs enough room to access the filament spools and the build chamber.
Are there any recurring costs I should expect?
Beyond the initial printer purchase, your primary recurring cost will be filament. You should plan to keep extra spools on hand, especially since multi-color prints involve a ‘purging’ process that consumes more material than single-color printing.


